Paradise Ridge Winery Sunset

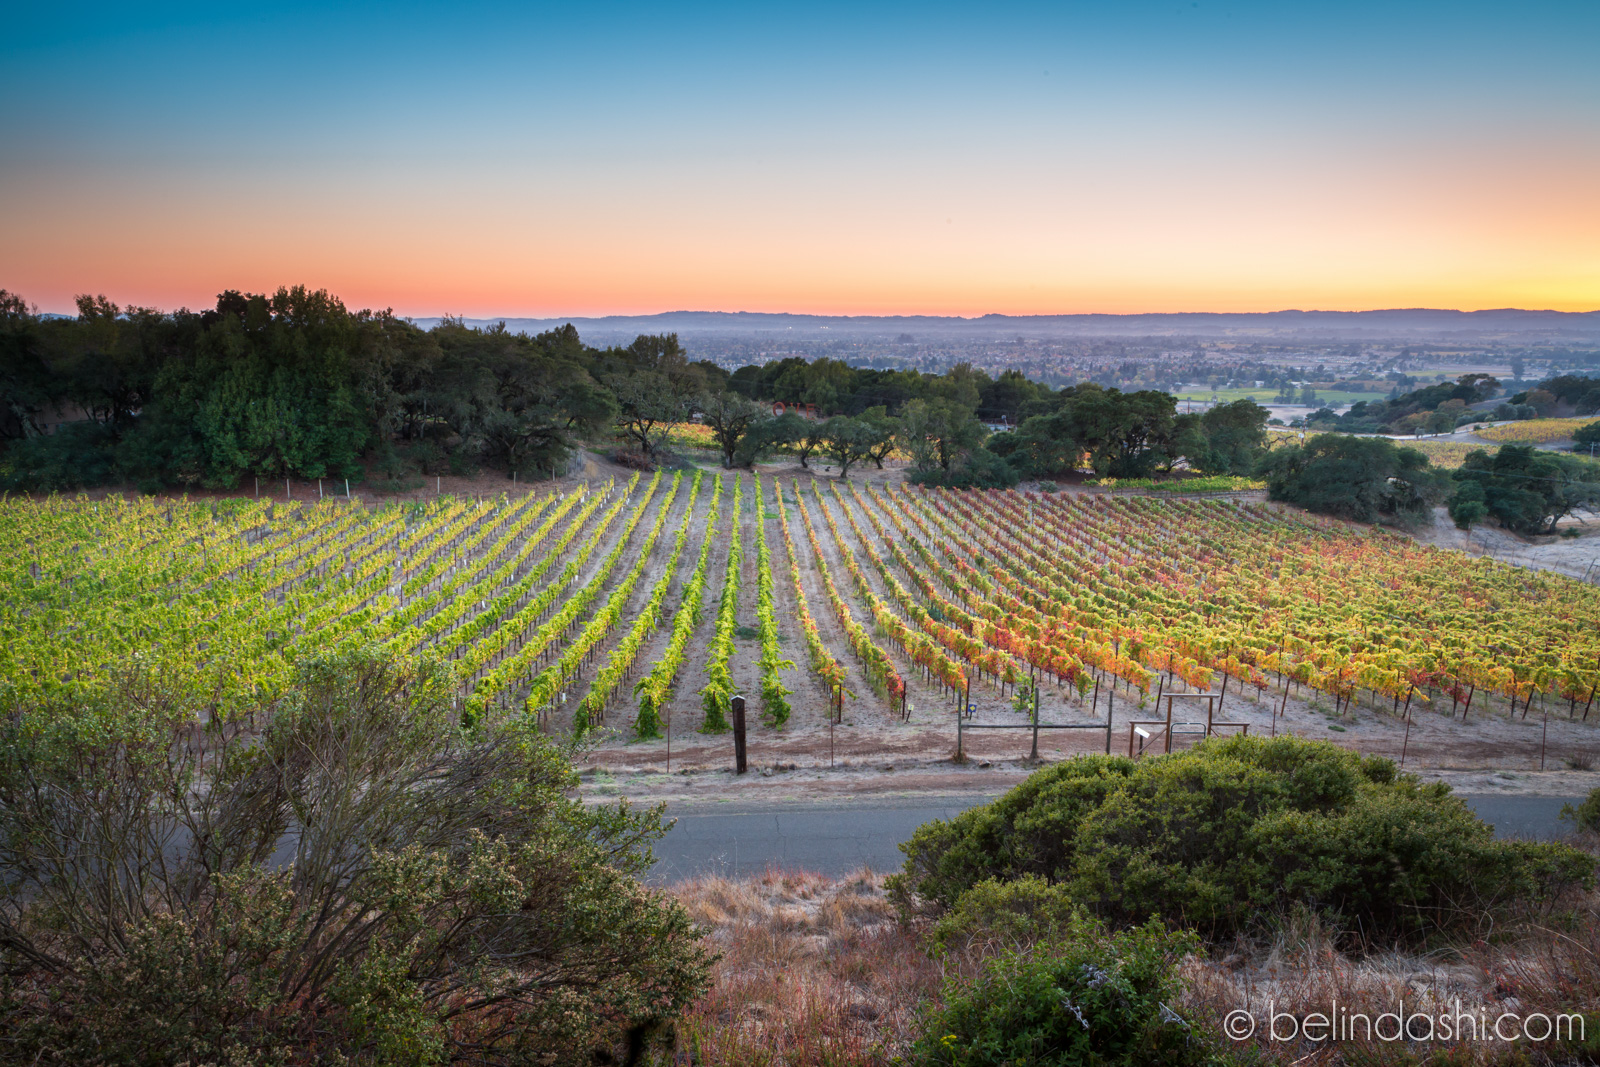
Paradise Ridge Winery sunset 2015-06-25-003
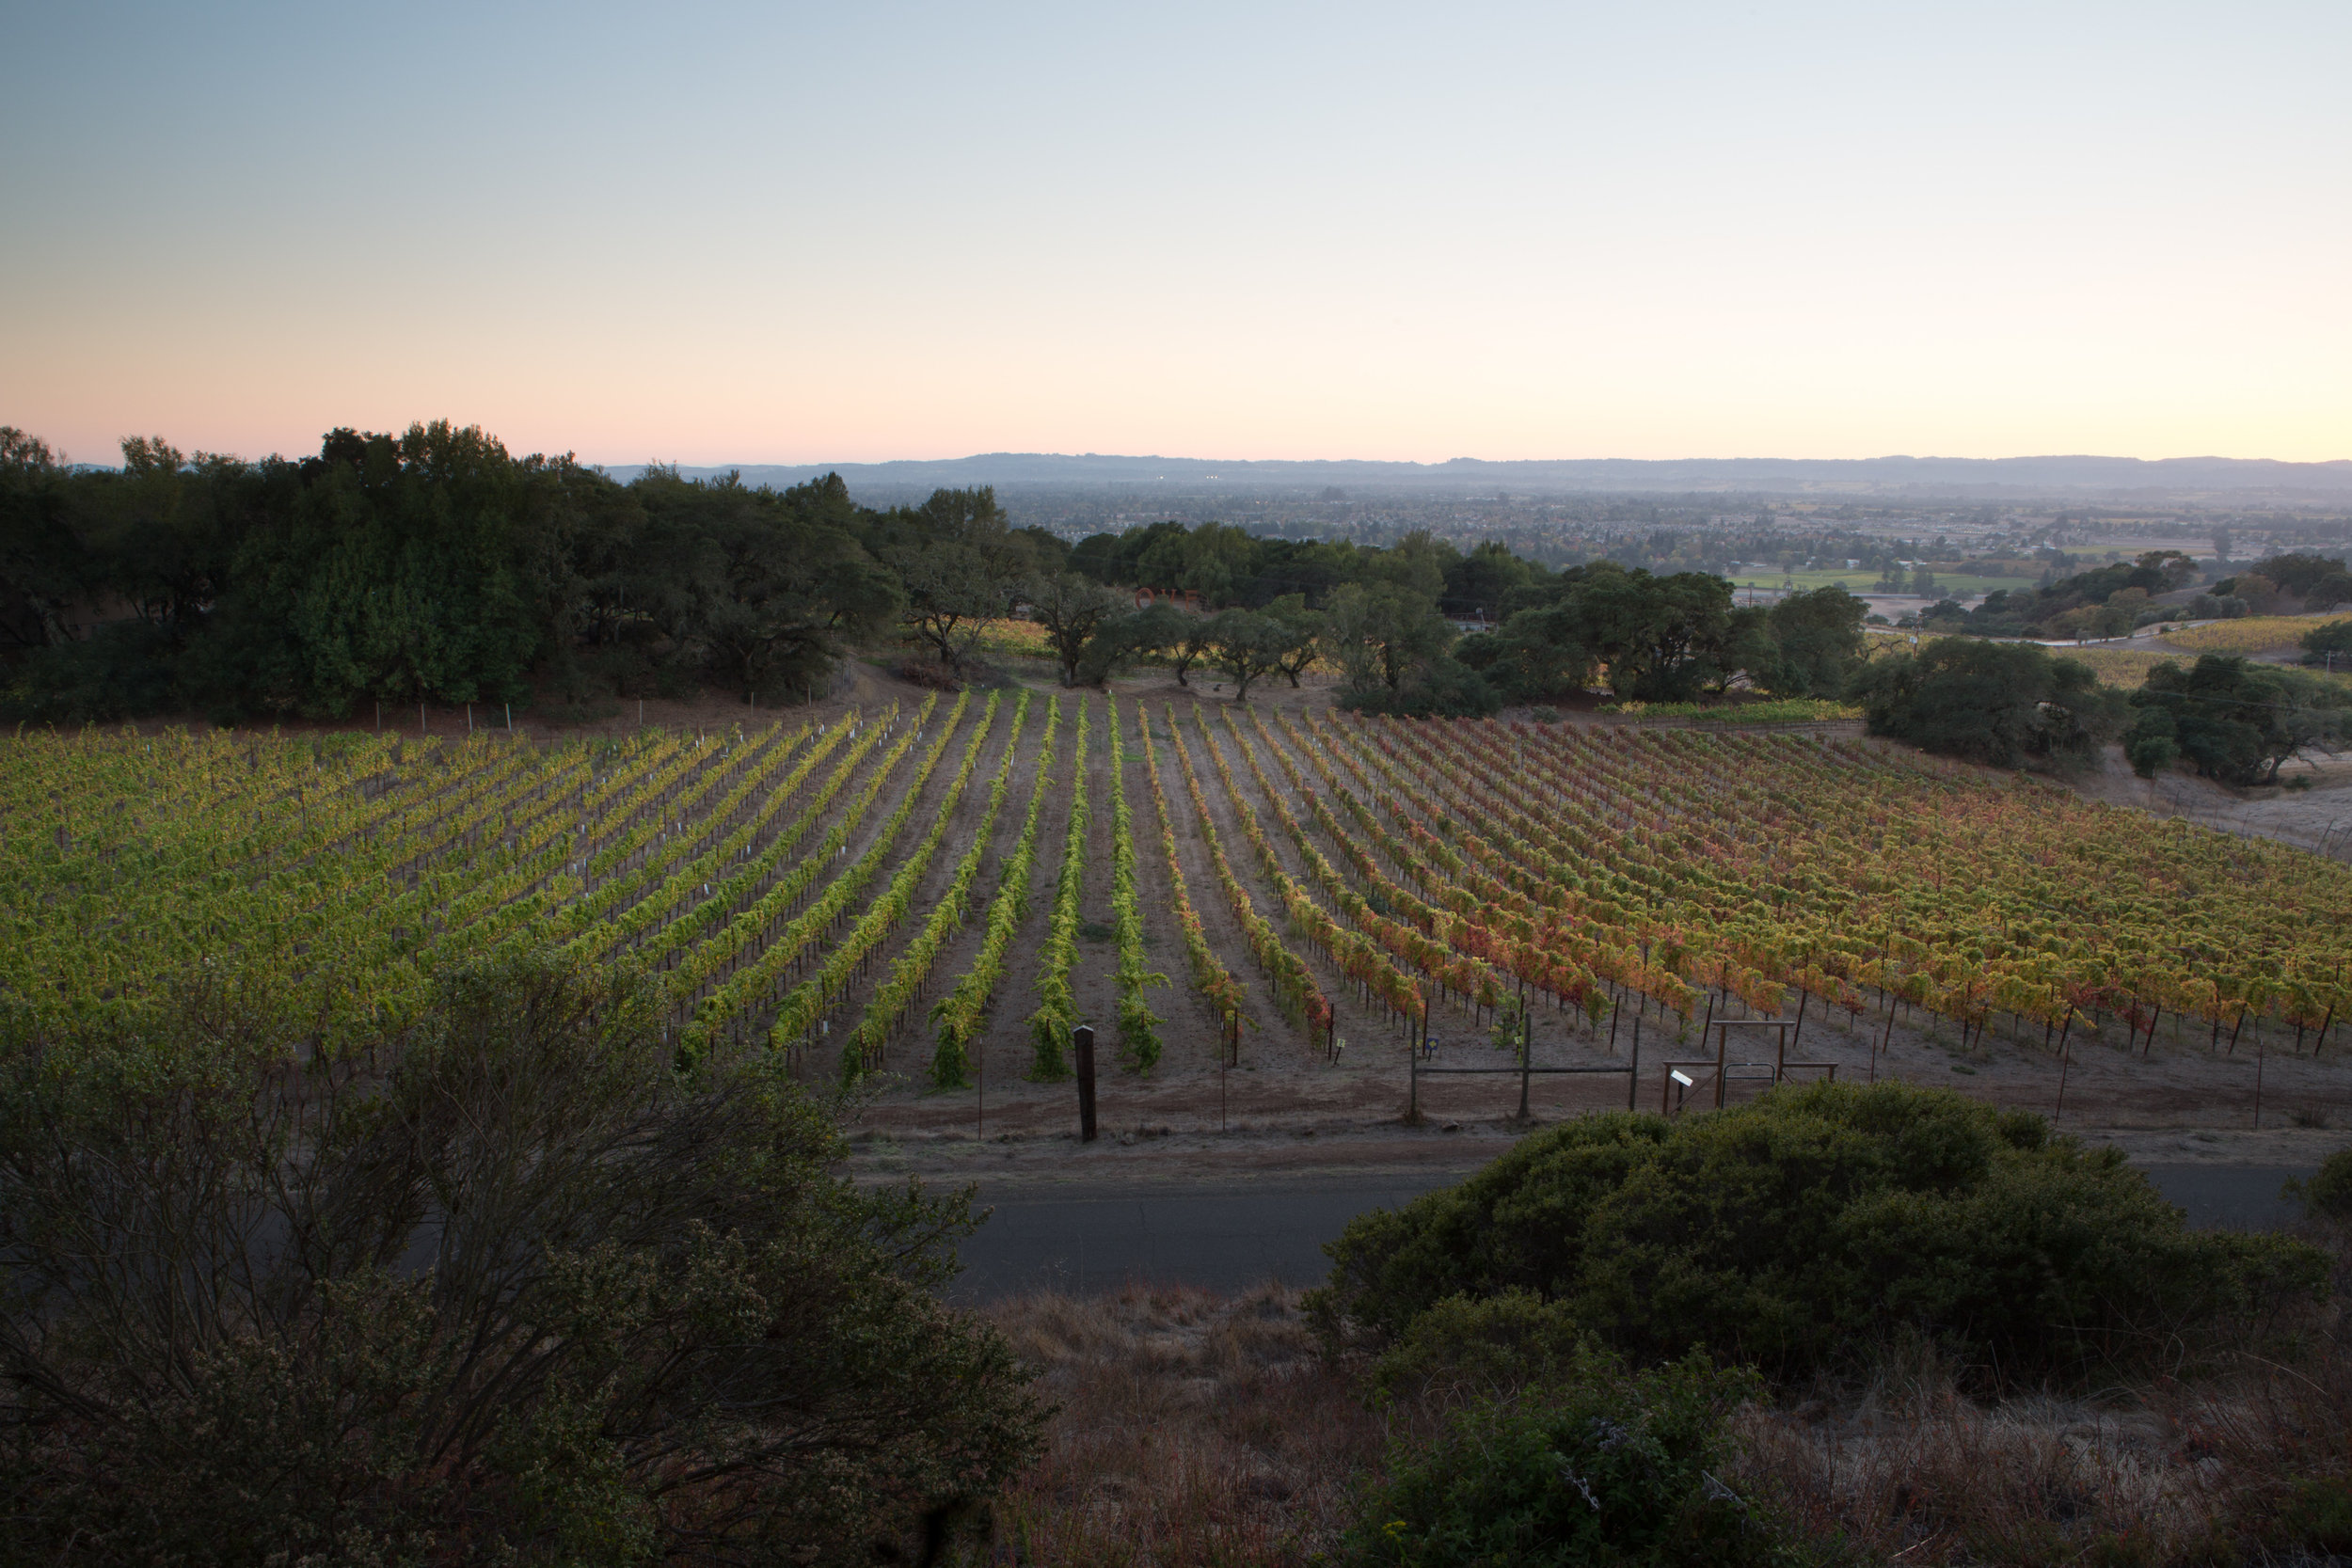
Taken 8 minutes before sunset, June 25, 2015.
ISO100, 24mm, f/18, 4 seconds, two Lee neutral density filters (2 stop and 3 stop) stacked together to cover the sky.
Photographing sunset at wineries could be an enjoyable experience, particularly if you enjoy wine. However, in order to do this, you will need to not only select a winery with great view, but also access to it after normal business hours in a good season. For example, sunset two days ago was 8:37pm, but Paradise Ridge Winery closed at 5pm.
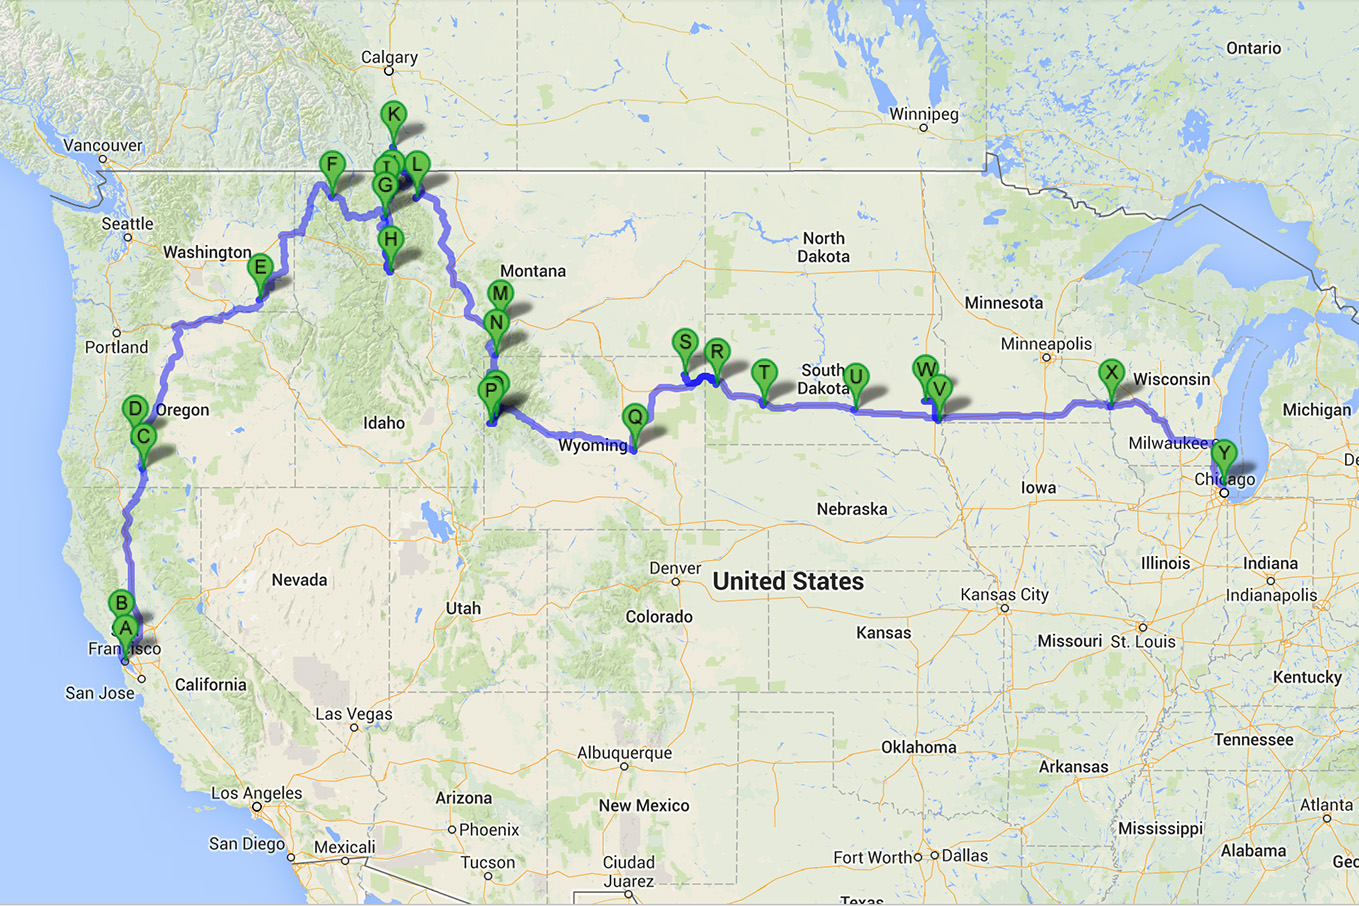
Fortunately, I was invited to a non-profit fundraiser as their media sponsor. They used the following photo I took at the same spot two years ago for their marketing brochures. Click on the links to see the map of my 72-day national park road trip. So I decided to take the same photo again, with exactly the same setting.
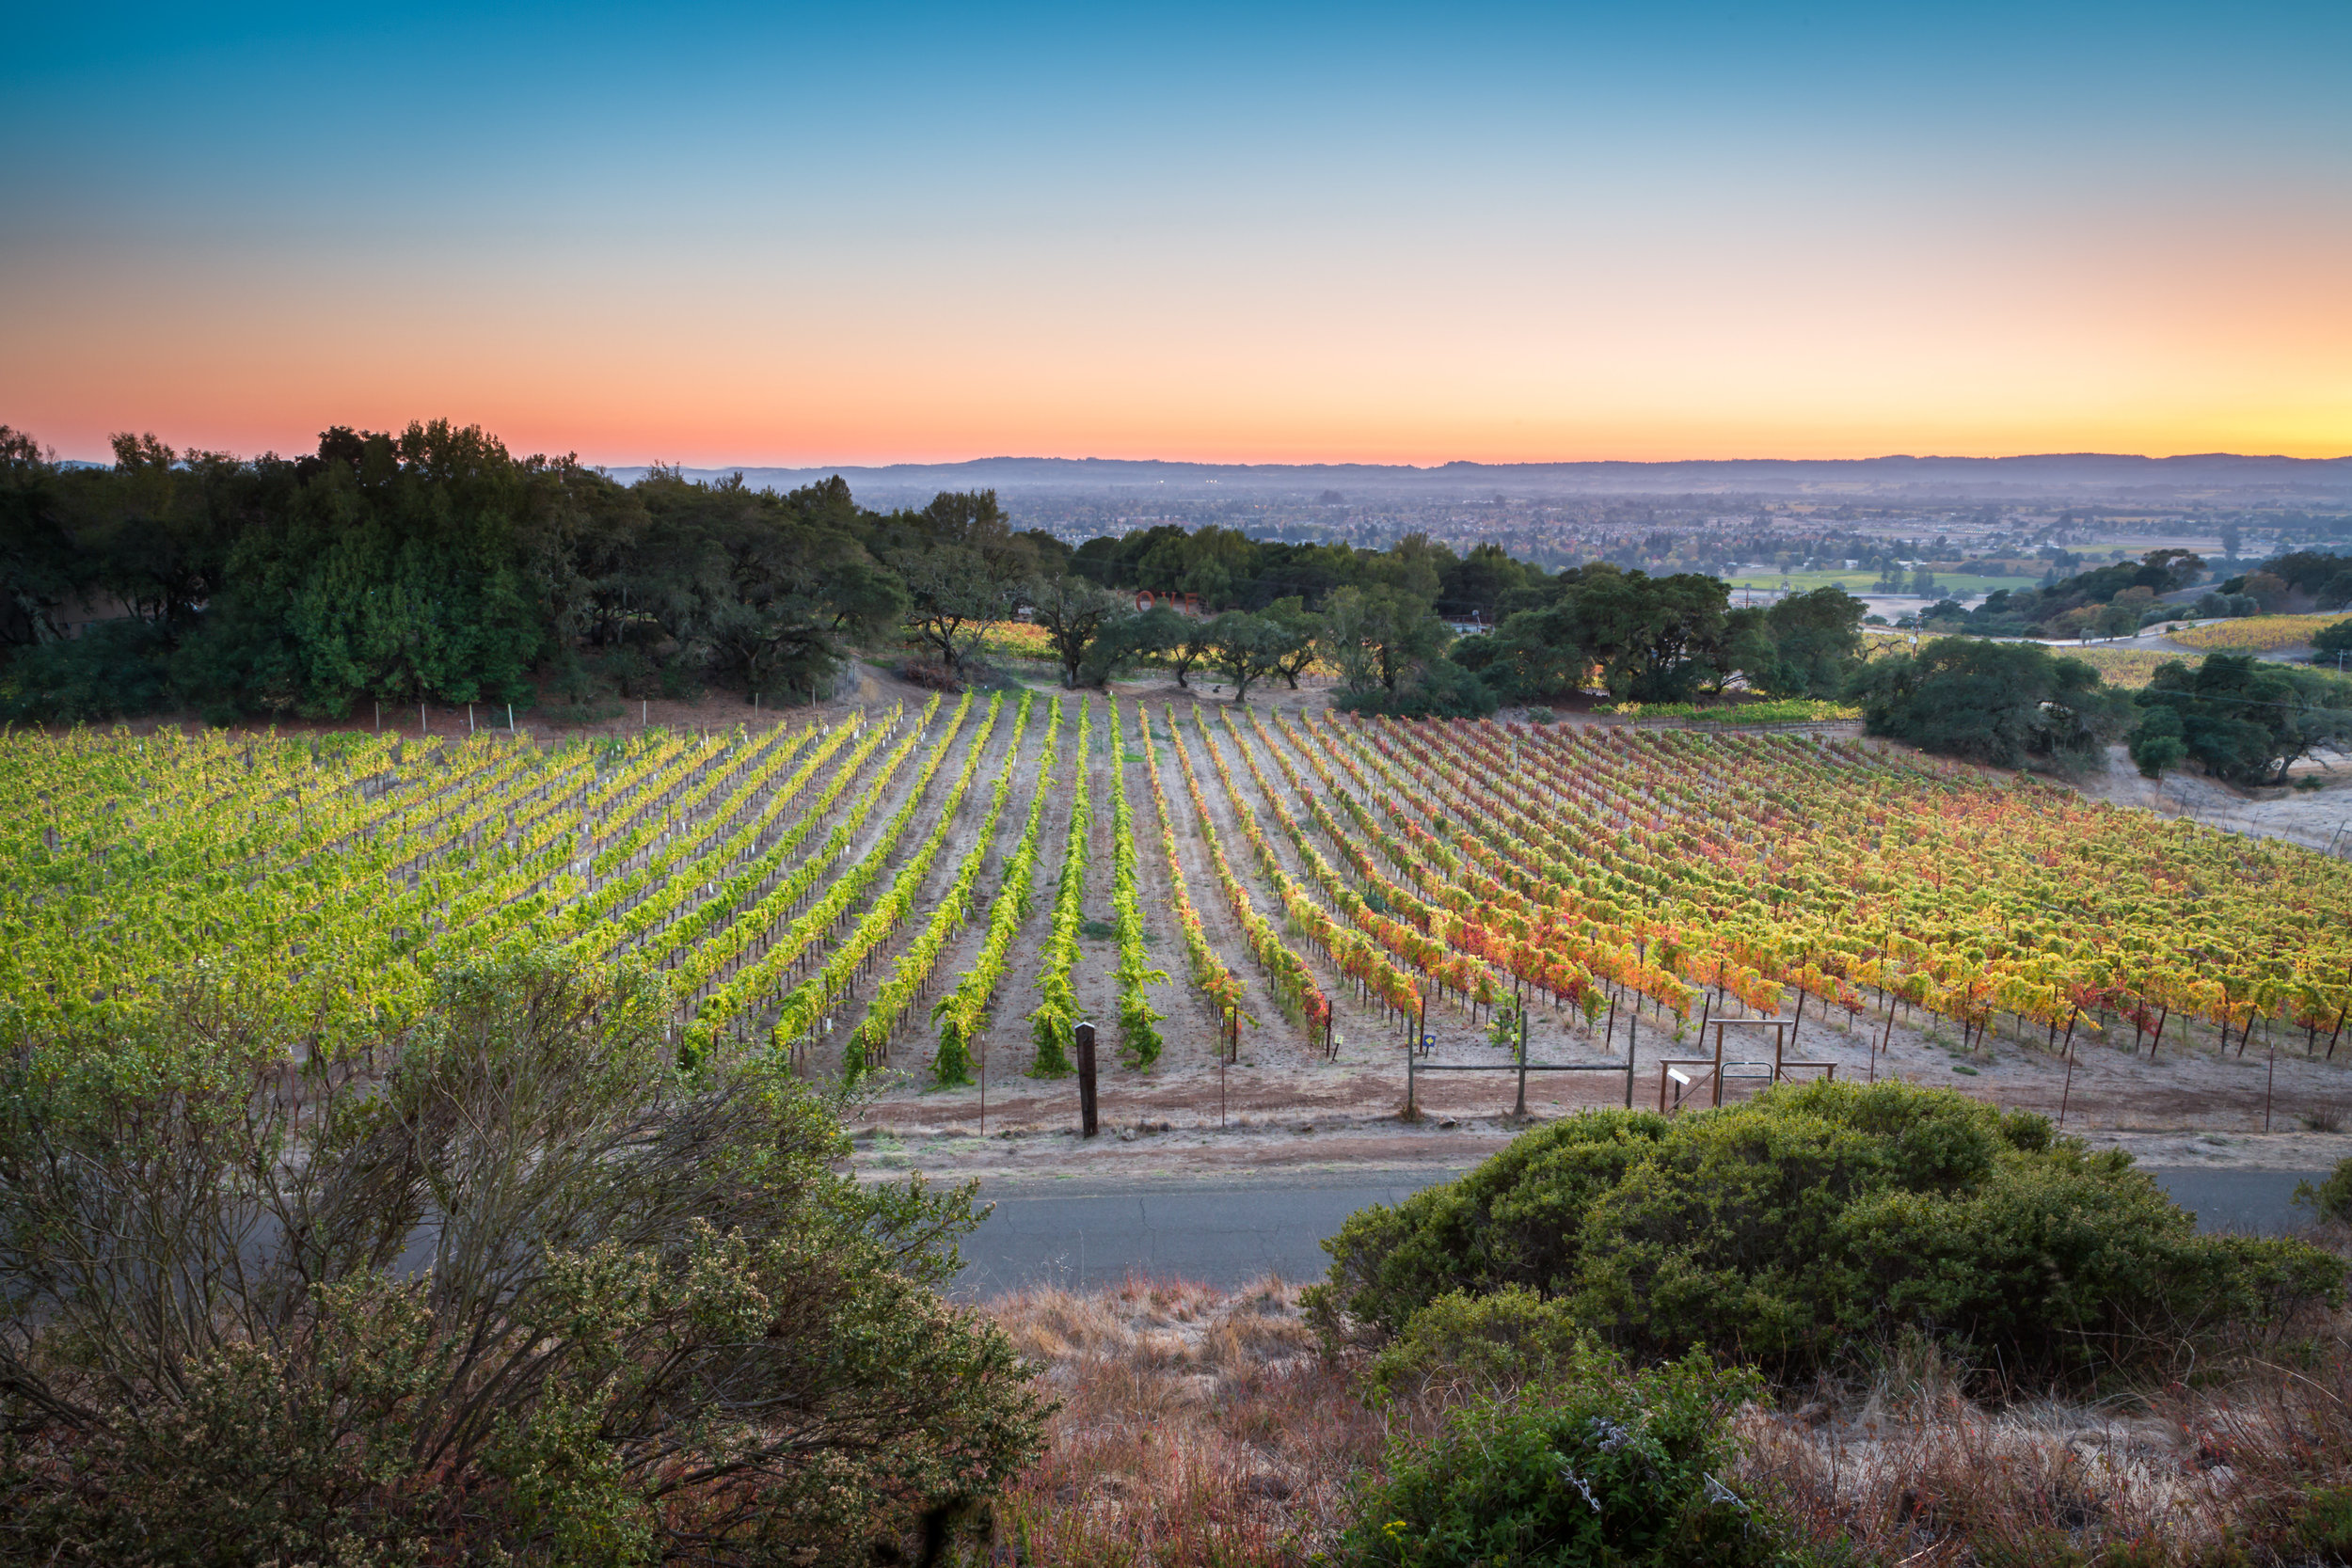
Day 71 - Sunset at Paradise Ridge Winery Sonoma CA
Taken 3 minutes after sunset, Oct. 17, 2013. ISO100, 24mm, f/18, 4 sec
I used two filters (as shown in the following photo taken at the day) but didn't remember the stops of the filters I used.
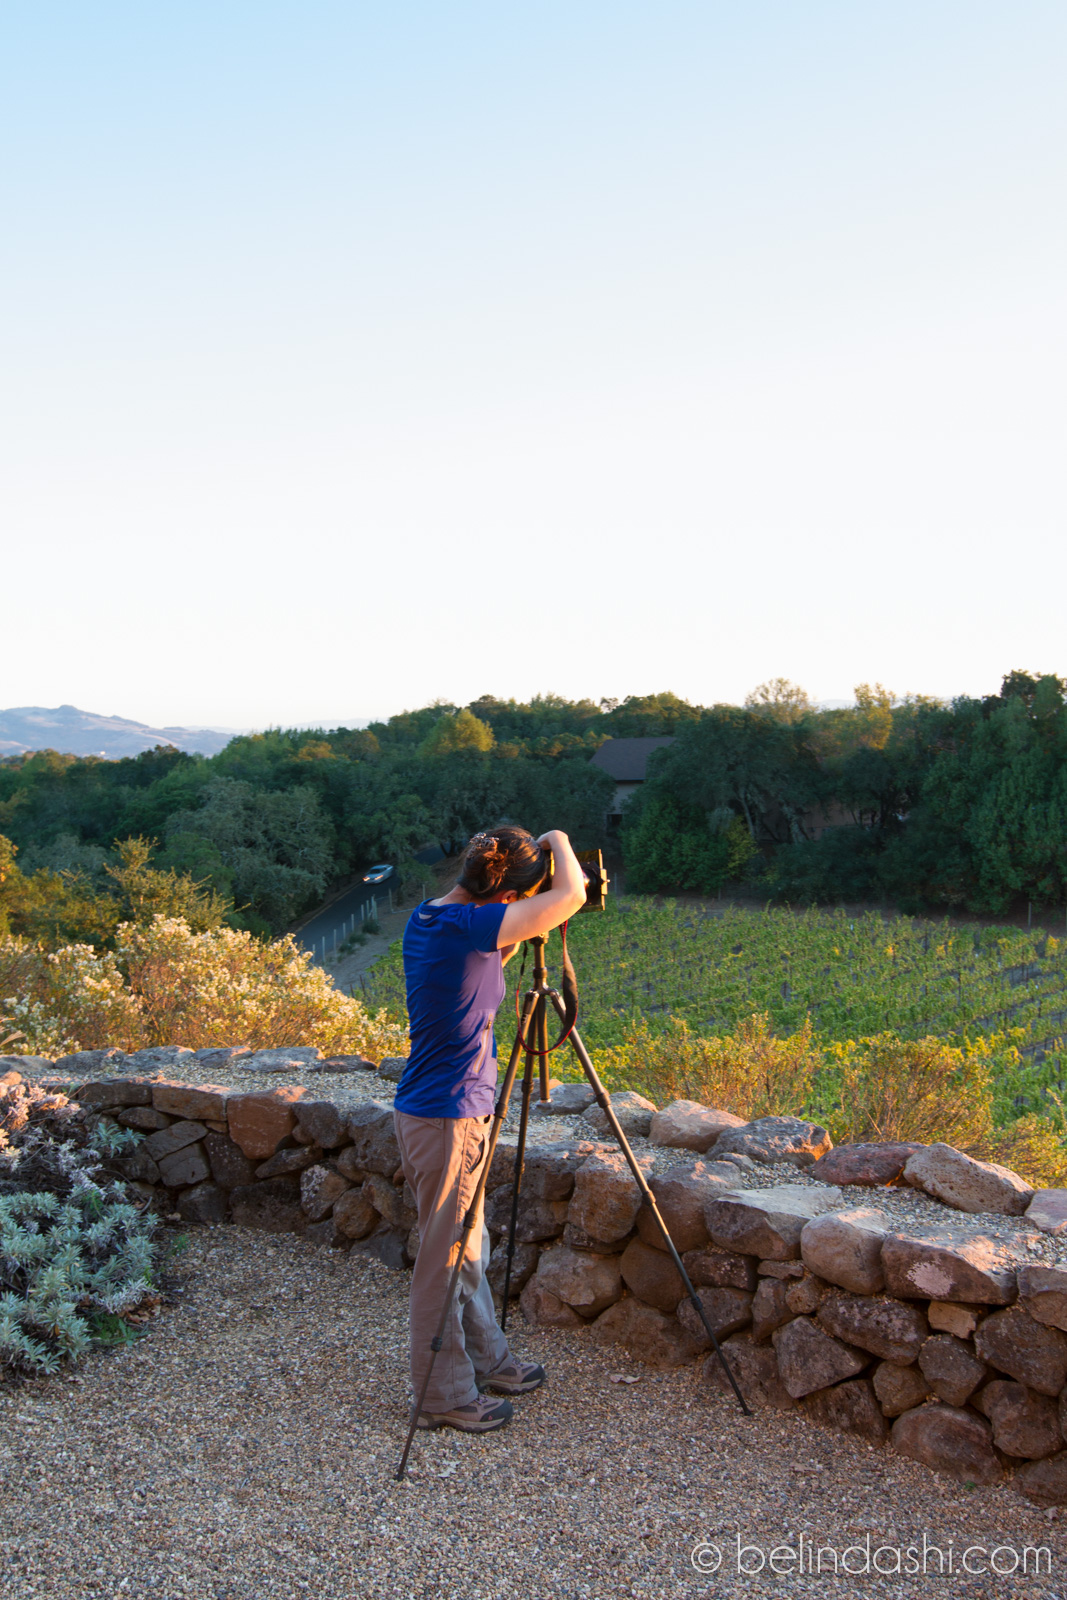
Belinda at Paradise Ridge Winery
Photo Tips for photographing wineries
I can summarize the workflow of any landscape photoshoot in my long advocated 3P photo creation process. Photographing winery is no different.
1st P of Photo Creation process
1.1 Choose a good season
The best season to photograph wineries, in my opinion, is the fall harvest season. The leaves in the vineyard will show a combination of green, golden, red colors (as shown in my October photo above), whereas summer seasons only show green color. Apparently, you don't want to go in the winter when you will probably see bare branches.
1.2 Choose a day with great weather
With clouds or no clouds are both good. I personally enjoy light clouds, in beautiful patterns. Clouds can complement your foreground landscape, especially if the landscape subjects you choose to photograph are simple. Heavy clouds during sunrise or sunset can block the sun and thus limit the colors you can capture.Unless you are someone who enjoy taking chances, or have no time to prepare, you can check the weather beforehand. This is why I always emphasize the 1st P of the 3P photo creation process as an important step for serious amateur or professional landscape photographers. Here are more tips on how to photograph clouds.
1.3 Master the best timing
The best time to photograph landscape, if you like colors, is mostly during sunrise and sunset. Unless you have many hours to kill and don't mind waiting around for sunrise/sunset, you can do a simple homework before heading out. The simplest way these days, if you have an iPhone, is to check the weather app, which tells the exact sunset time for each day of your location, as well as the weather.As for how many minutes before or after sunrise/sunset is best, here are more tips on the best timing to photograph landscape and how to master it.
2nd P of Photo Creation process
2.1 Select the right gear
As an amateur photographer, you might not have lots of equipment, which is good. My advice is to familiarize yourself with your existing equipment, and capture the best photos you can from it. A good photo can come from any camera from a skilled photographer. A sophisticated camera and a set of complicated equipment, on the other hand, does not guarantee a great photo.
If you are new to landscape photography and do not know what equipment you need, you can start with just a camera and a lens. See my explanation below and you'll soon find out, other than a tripod, most others are optional.
Must-have: a DSLR camera and a lens. I personally prefer a wide angle lens to photograph a winery, particularly if I can stand high and see a wide angle view. In landscape photography, you are not required to invest in the much more expensive fast lens as you would normally do for portrait and sports photography, because you typically do not need fast shutter speed. Quite on the opposite, you often need slower shutter speed during sunrise/sunset for a beautiful photo.
Must-have: a tripod (see my suggestion). As mentioned above, slower shutter speed is often used in landscape photography. You need something to keep your camera still. Wait! Is a tripod really necessary? I've set my camera on many stones, or solid benches to take landscape photos many years ago. It limits your composition obviously, as you can't find stone or bench support everywhere. Therefore, if you are serious into taking gorgeous landscape photos, invest in a good tripod!
Optional: a shutter release (whether it's wireless or wired is optional). This is only useful when your shutter speed is longer than 30 seconds. Apparently for the above winery photos, you do not need one. I always install the wireless shutter release at the beginning of my landscape photoshoot. I enjoy having the flexibility to do longer than 30 seconds exposure in dim light situation, eg. before sunrise, after sunset, or with dark filters. Also, it gives me the flexibility to walk around and explore alternative vantage point while taking the photo remotely. Shutter release is typically inexpensive. Watch my gear section to see my top recommendations.
Optional: filters. They are great to even out the exposure between the bright sky and darker ground, when you use the filters to cover the sky. There are many filters in the market. If you'd like to save money, instead of buying filters, you may want to apply filters in post-processing. Play around the graduated filters in Adobe Lightroom (see examples in my video tutorials here), which works like charm. Or you can learn my tips on when and how to use filters.
Lastly, if you are interested in seeing what I normally carry to a photo shoot, check out what is in my camera bag. You can also download my free eBook on the recommended gear for landscape photography.
2.2 Master the photo-taking workflow
If you think taking a good photo involves only one click, and wonder why your photos are blurry, not focused on the right subject, look too bright or too dark, and conclude it's your camera that caused the trouble, you have some homework to do.
Here's my suggested 10-step workflow for landscape photography. It might sound daunting and complicated, but once you have mastered the equipment setup and basic camera settings, all you need to work on is your composition. Composition is THE most important factor that differentiates you from other photographers, and is something you want to work on.
Here is my video tutorial on 4 easy steps to improve composition and my personal favorite "Less is More" composition philosophy. No matter what approach or style you adopt, all you need to do is practice, practice and practice!
3rd P of Photo Creation process
Here's the last P of the photo creation process. I have included the before/after images of the above two photos.
My post processing is fairly simple. All I did was a few clicks using my Magic Light landscape workflow lightroom presets and it cost me typically about 5 seconds on each photo. Watch the video tutorial and learn how I did it. You can improve your photos with these tools too.
More Travel Stories…