Less Is More - 7 Approaches To Create Simple Yet Strong Composition
I'm a big advocate for simplicity. A simple photo can easily draw the viewers' attention, and can deliver a powerful message more easily than a crowded busy photo. A common mistake many photographers (particularly beginners) make is to include too many things - subjects, colors, lines - in one photo. And when they become more serious about photography, they put too much energy into improving gear and software instead of improving themselves.
Good news is that now you know a great photograph typically is something utterly simple, no matter how complicated the technique used to create it.
Below are 7 approaches I use to create simple photos. I call these LESS IS MORE approaches.
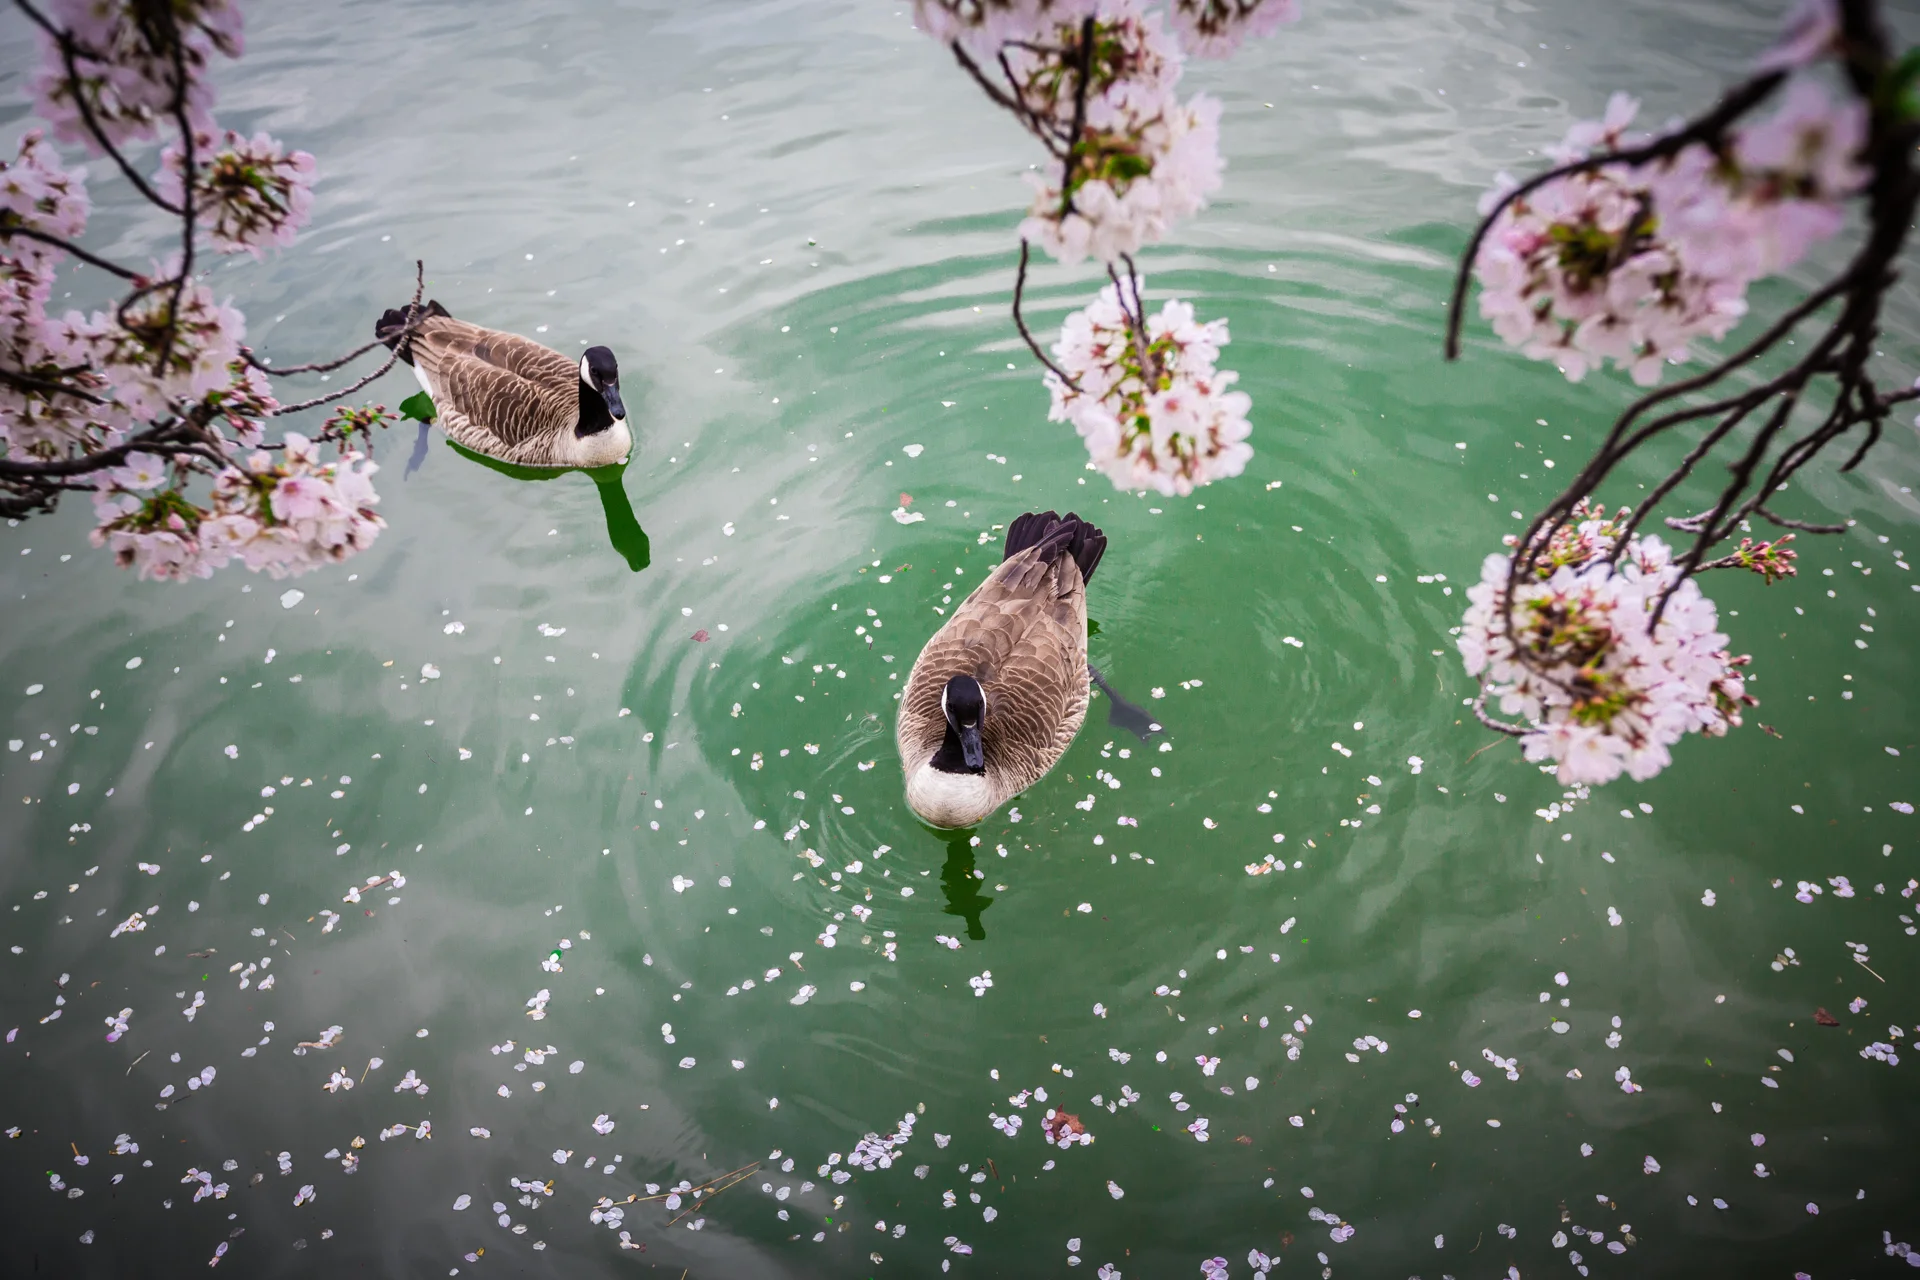
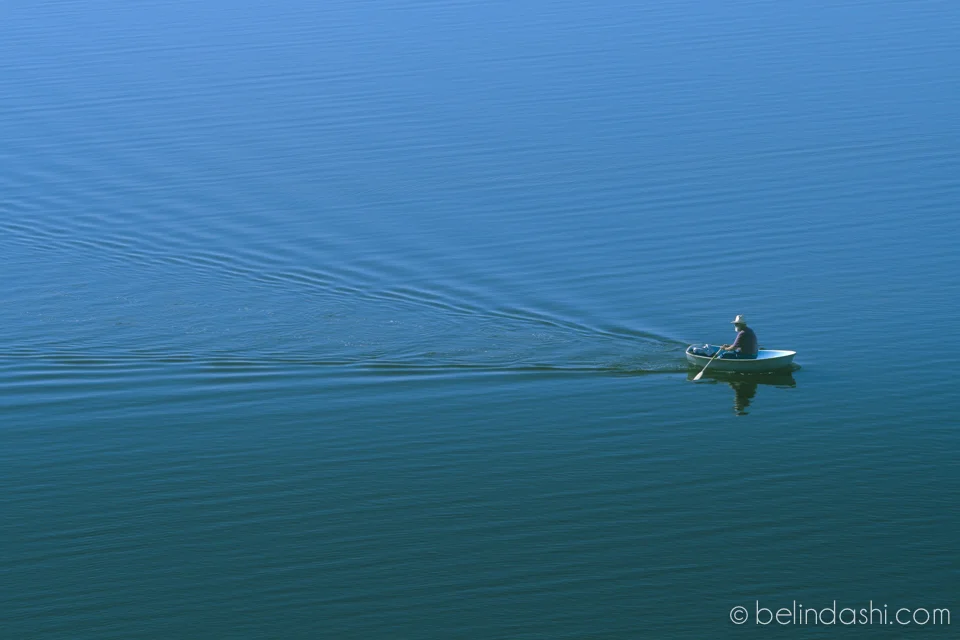
1. Photograph one subject at a time - only one subject, no more.

Statue of Liberty in New York

7 Peace and wisdom in simplicity - old man · boat
2. Find wide open field as simple backdrop
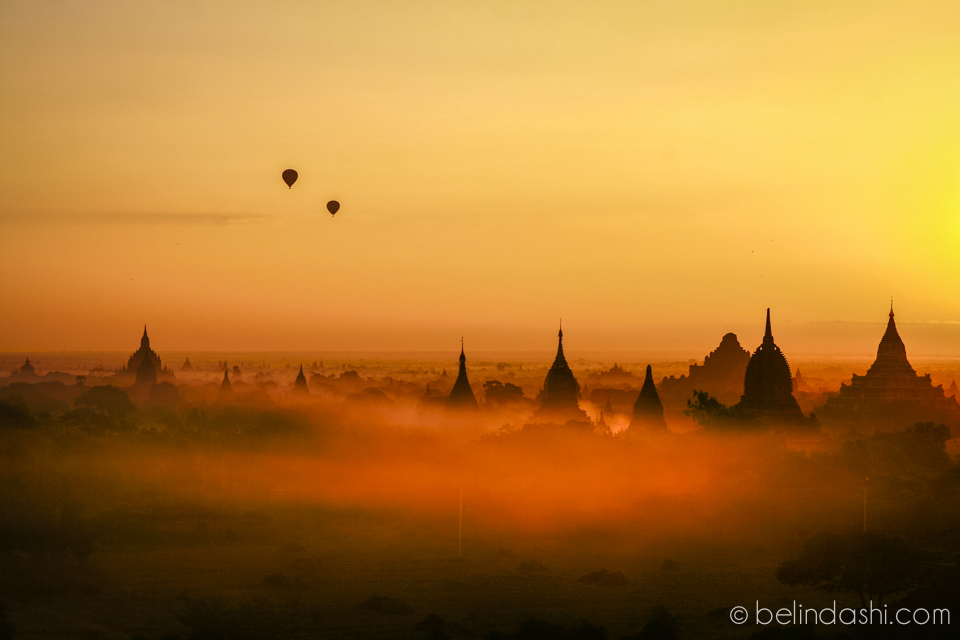
Bagan temple in the dawn mist, Myanmar

Palm trees in sunset at secluded Ngwe Saung beach, Myanmar

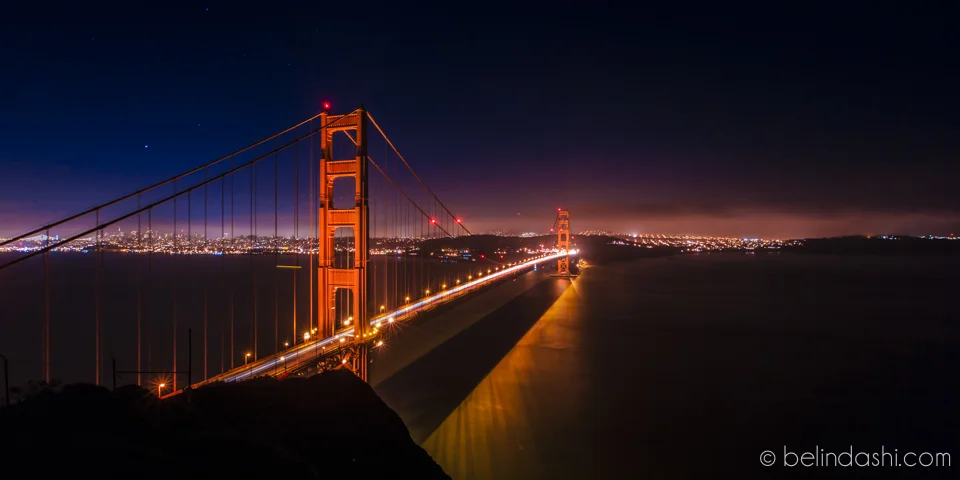
Alcatraz in sunset, San Francisco
3. Frame simple repeat patterns

Day 51 - Hay Butte Overlook, Badlands National Park, South Dakota
Spetses, Greece

Temple pattern in Myanmar
4. Create symmetry

Palace of Fine Art, San Francisco

Old Door in Shanghai, China
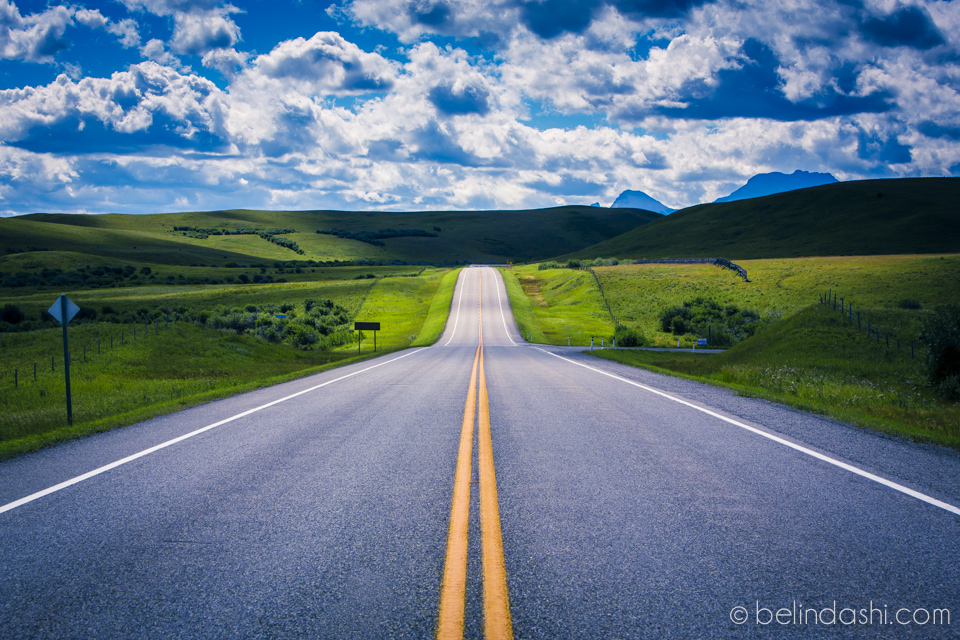
Day 23 - Pincher Creek - drive to Waterton Lake Park, Alberta, Canada
5. Use few color tones, such as black and white

Balinese temple · Moment of peace, Indonesia

Opus One Napa Valley, CA
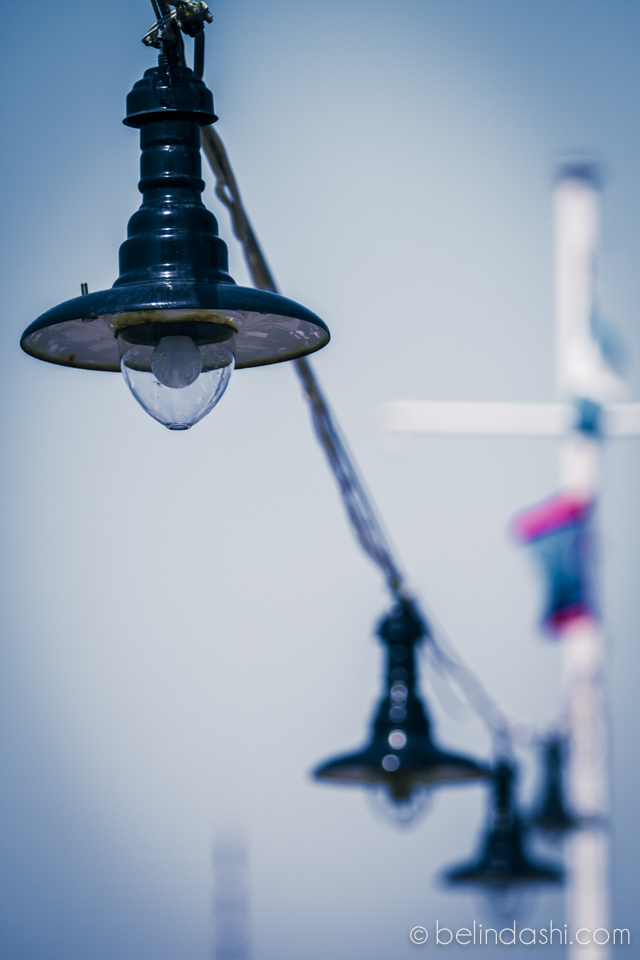
6. Do close up and use shallow depth of field to blur the background

Napa grapes, Napa Valley, CA

Tucan with rainbow beak, Brazil

Point Reyes Beach, CA
7. Use long exposure to create calm or dreamy feel

Day 69 - Lake Tahoe in sunset, CA

Baker Beach, San Francisco
As we go through the list, you'll find out that the first four approaches do not require any gear or software upgrade. The only thing to change is you! Where you stand, how you frame the image. I have included more tips in this video
The latter three approaches do require certain equipment and technique, but none of them are expensive or complicated.
For Approach 5 - there are many softwares you can use to convert an image into black and white, many might be free. You can even create BW directly from the camera. Depending on if you aim to create professional artistic BW or a simple amateur BW, the difference rests mainly in time. My best recommendation is to get Adobe Lightroom. It's the best investment you can make in streamlining your workflow and retouching. (Check out my 6-Step Adobe Lightroom Workflow)
For Approach 6 - without any investment, you can create close-ups simply by holding your camera REALLY close to your subject. For example, you can use an inexpensive kit lens (eg. Canon EF 18-55mm), dial to the smallest f-stop number, photograph your coffee mug at a distance of 0.82 ft (or 0.25m), which is the minimum distance requirement. Photograph a second picture by doubling your distance from the mug. And compare the background clarity of two images. However if you have the budget, invest in fast lenses by all means. Here's an article that includes some basic info about lenses
For Approach 7 - the best investment for this approach is a tripod, and a shutter release. If you are a beginner and don't have a tripod or shutter release, you can explore long exposure by setting a camera on a solid place (e.g, a rock, bench etc.) and use self timer mode to avoid camera shake when pressing the shutter. I have tried this many times before when I didn't have a tripod or wanted to minimize my weight in a hike. Of course you eventually have to use a tripod if you want to mount filters and adopt more advanced technique.
Now here are your 5 simple steps of homework to improve composition:
Find 5 pictures you shot recently that you are most proud of. No matter if it's a flower, a baby, a mountain or an animal, see if you can "trim" the composition by cropping the photo, e.g. trim an extra/unnecessary subject on the edge or in the background. If it's a person/pet, crop it into a close-up only showing the face, or even the eyes.
If the subject is easily accessible, photograph it this time with your new cropped composition. See what effort you need to make - walk up closer, or zoom in etc.
Pick another LESS IS MORE approach above and reduce the "clutter" even further, for example, if you photographed a coffee mug last time with a computer in the background, remove the computer and keep a clean background. See what effort you need to make this time - e.g. change an angle
Pick one more LESS IS MORE approach above by only photographing one subject or simple patterns. See what effort you need to make this time? Does a different camera help or not?
Repeat the above again and again in your practice, until you can absolutely reduce no further.
You may also love…