
3P Creation Process For Golden Gate Bridge In Sunset

I have lived in San Francisco for quite a few years, but have never been to Marshall Beach before. What a shame :-) Yesterday I decided to explore the beach like a tourist, and of course I brought my full set of equipment for the sunset shoot.
To get to Marshall Beach, we need to map our destination to Baker Beach, and drive along Lincoln Blvd, park the car on Pershing Dr. or take one of the few spots on Lincoln Blvd right next to the Baker Beach hiking trail. There are two hiking trail entrances, one down to Baker Beach, the other down to Marshall Beach (a bit north to the Baker Beach trail).
After another 10-15 easy hike down to the sandy beach, the Golden Gate Bridge would appear nicely in the background. There was a few minutes rock climbing (pretty easy) until I moved close enough to the bridge and got rid of the large rocks blocking my view. I tried to include as many waves as possible into my frame and decided to set my tripod in the water. It was not the first time I did this but this time I made a big mistake - the waves were much stronger and the sand was soft. The tripod sank deeper into the sand every time a big wave rolled in and sucked the sand into the ocean.
Since I was doing long exposure, my photo composition changed slightly every time the tripod (and the camera) sank. I didn't realize this until I uploaded my pictures to my computer. Therefore I spent a bit more time in my retouching process this time. See following my complete 3P Creation Process (or click on this link to learn more)
1. Planning
Hike to Marshall Beach before sunset time (4:52pm yesterday). This photo was taken at 4:27pm. I typically take landscape pictures within 10-20 minutes before or after sunset time depending on how far into the horizon I can see and my position relative to the sun and the subject. Due to the fog (which is common in San Francisco and particularly at Golden Gate Bridge) and the ships/boats passing by, I had to grasp a moment when the bridge was not completely covered by fog, and there was no large ship crossing the bridge to add "noise" to my composition. I also wanted to capture the golden sunlight cast on the bridge, therefore I started shooting a bit earlier than usual this time. Click here for my video explaining the Importance of Planning in natural light photography (no matter for landscape or portrait works)
2. Photo Creation
Equipment
Canon 5D MarkIII
Canon 24-70mm f2.8L lens
Gitzo Traveler carbon fibre tripod
Really Right Stuff BH-40 ballhead with lever release
Really Right Stuff Camera L-plate for Canon 5D Mark III
BW 10 stop filter (Mounted the filter to execute a long enough exposure to smooth out the ocean wave)
Satechi wireless timer remote control
Pre-shoot camera setting/adjustment
Change default photo format to RAW, instead of Jpeg
White balance: Auto. I seldom adjust this in the camera for landscape photos because 1) it is not a guarantee any of the camera white adjustment gives you accurate white balance 2) in the retouching process if you modify colors/white balance, adjusting white balance on the camera is simply a waste of time.
Spot metering (I always use this no matter for portrait or landscape photos. This comes with many years of practice and intuitive judgment)
Color space: Adobe RGB (this is the first thing I change after getting a new camera and never change later. Adobe RGB color space is larger than SRGB)
[You can skip this step unless you have to shoot Jpeg] Picture style: Landscape style with modification in my camera. 6 for sharpness and 2 for contrast, 0 for saturation and color tone (Nikon camera might have different name but basically I increase sharpness and contrast for my landscape style). In fact I only shoot RAW, however my Canon 5D Mark III has a HDR function that automatically stack three images together into a Jpeg. I adjusted my picture style purely for my HDR Jpeg result. If you don't use this camera, you should completely skip this step.
Camera setting
ISO100, 42mm, f/20, 166 second, Bulb mode
Workflow
Level your camera: Set up tripod in the ideal vantage point. Level the tripod. Mount the camera. Lots of cameras these days will show a horizon bar in your LCD screen. From both of my Canon cameras, I half push my shutter button, then press info twice to get into the level indicator. Alternatively, I could turn on the live view, and press info a number of times to see both my composition and the level bar
Frame your composition: Turn on live view, make sure the camera is leveled and adjust the composition as needed by adjusting your camera on the tripod. For at least 95% occasions, I don't crop my images. I'd like to get the composition right directly from the camera instead of relying on post processing. This requires leveling the horizon at this step in addition to get the right composition.
Focus: Most of the time I compose an image and change the focus point in the camera, instead of focus first and re-compose the image. (The former method is much more precise than the latter particularly if you shoot in shallow depth of field or your f stop is smaller). I typically focus 1/3 of the way between the closest subject I want to be in focus and infinity
Take test shot with basic settings. Use Aperture Priority, ISO100, set aperture at least at f/8 or smaller (I typically set between f/11-20), 2 sec delayed shutter (to avoid camera shake caused by pressing the shutter button).
Check histogram: After first test shot, I always check on camera histogram to see whether the photo is exposed correctly. For example, if most of the curve chart is located on the left side of histogram, I double or sometimes triple the exposure time. If most of the curve chart is located on the right side of histogram, I reduce the shutter speed accordingly. Adjust exposure compensation to increase/decrease exposure. Take the 2nd or 3rd test shot and check on histogram, until the image is exposed correctly. There are a number of different ways to adjust exposure but this is the quickest when using a tripod
Refine shutter speed: Depending on what I photograph and the shutter speed required, for example seascape or waterfalls require a bit slower shutter than a mountain shot, I'll adjust the aperture and / or ISO to achieve the ideal shutter speed
Use additional equipment and/or apps to further improve exposure: Make sure to choose the right equipment. For example:
Before sunset (and sometimes also right after sunset), the sky typically is too bright, I would install a graduated ND filter to cover the sky.
After sunset when the light darkens further (typically at least 10 to 15 minutes after sunset), till a point a longer than 30 second shutter speed is needed, I will have to use a remote shutter release and use Bulb mode on the camera. I normally install shutter release on the camera at the very beginning instead of waiting till now to do it, because color and light change very fast at this moment. You might miss some shots if you install equipment right now
Calculate shutter speed. In this case, I used 10-stop filter, so I need to calculate the right shutter speed
I use an iPhone app called ND Timer for shutter speed reference when I use 10-stop filter. But I calculate myself many times - my math is pretty good :-)
Manual focus after mounting the 10-stop filter. Click here for an article documenting the detailed process how to do manual focus with 10-stop filter
Try out other compositions at the same location and repeat the above steps until I get the ideal shot
Try different locations and repeat the above steps until I get the ideal shot
3. Post processing
I first used my Magic Light Landscape Workflow Lightroom presets and it took less than 5 seconds. However due to the camera sinking problem I mentioned above, the image was a bit blurry. I experimented Photoshop CC's new function in Filter -> Sharpen -> Shake Reduction. It was like magic and immediately reduced the blur.
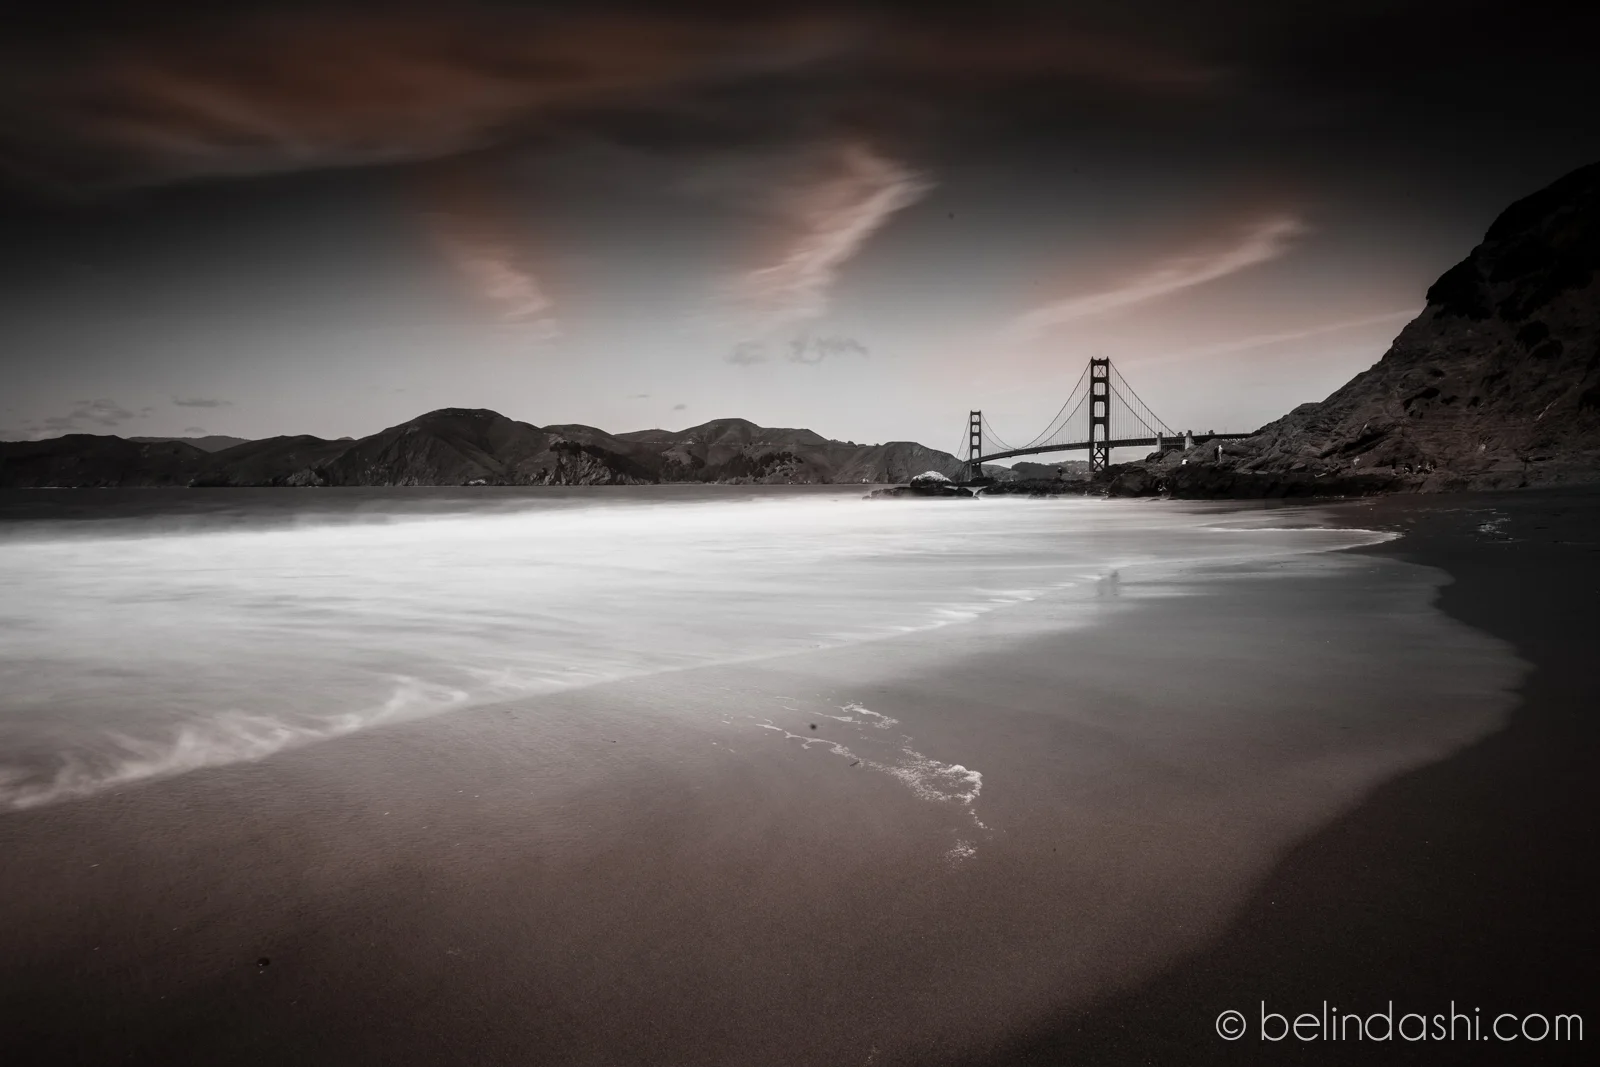
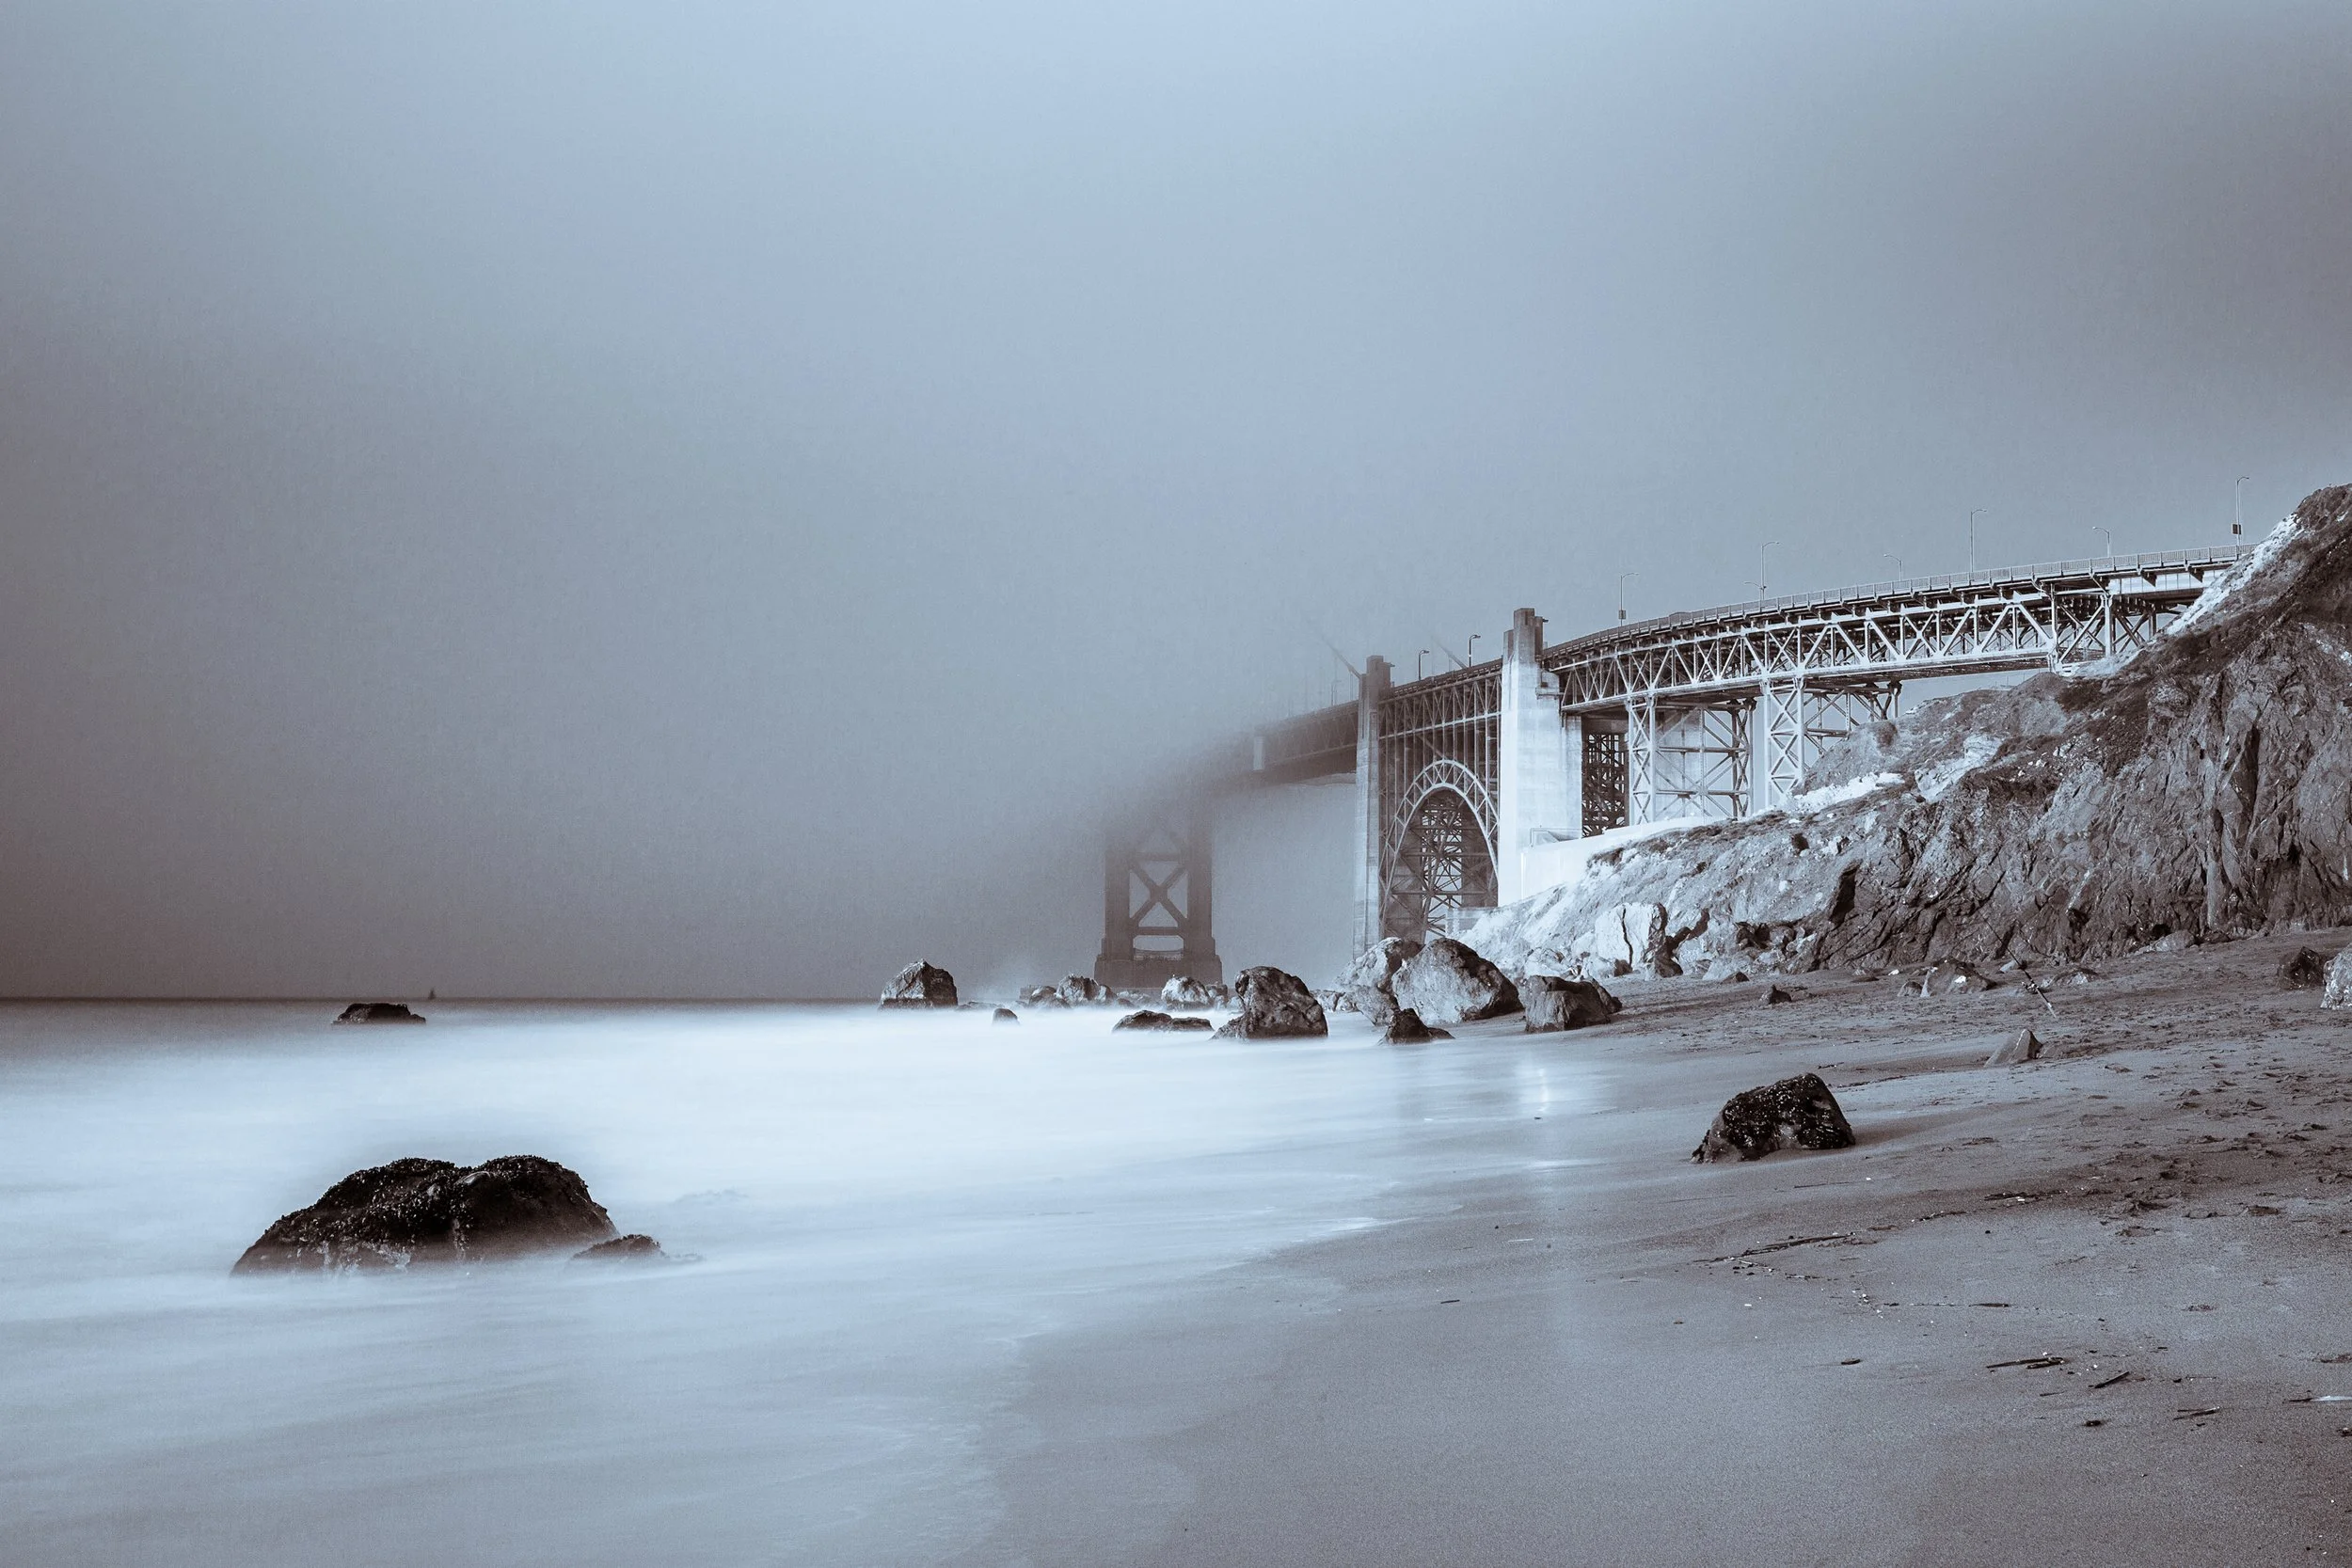
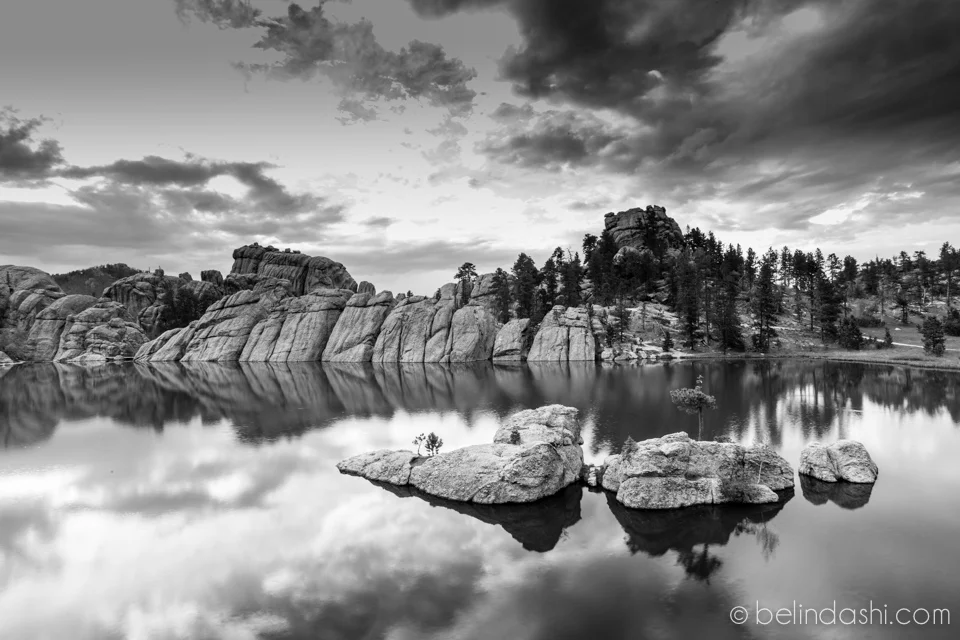
Because most of the image was covered by fog, I wanted to create a bit "mystic" feel by converting it to BW. I used my own BW creation presets (detail to be introduced in my future post - sign up on my site to get free update). See following 8 different versions. I still have not decided which version is my favorite, but I prefer the BW to the color version.
I've shared below the original picture imported from the camera (the first picture) and the retouched images. Let me know if you have a favorite one. Hope you enjoy!


you may also love…


Different from taking landscape photos, when I generally have heavy planning in advance, my travel photos have a much higher rate of “error” to begin with. Watch my video tutorial on how I edit my travel photos.