
Default Camera Setting For Landscape Photography
I mentioned my camera settings in several examples of my 3P photo creation process, such as 3P Creation for Palace of Fine Arts, 3P Creation for Golden Gate Bridge. Many of you might have paid extra attention to my ISO, aperture, shutter speed or even zoom range settings, but few might know that you can be much more efficient to make a one-time adjustment on default camera settings before you head out for landscape photography. Below are my camera LCD screen captures for these adjustments. Note I use Canon 5D Mark III so the menu could be different from yours, but most of these settings are available in other DSLR cameras.
1. Set your image quality to RAW
Jpeg format is compressed and contains much less information than RAW format files. Even you are not keen on post processing right now, shooting RAW format will give you flexibility to restore information for any important photos you take. In particular, those photos are about the places and moments you see only once in a life time.
On the flip side, RAW files are much larger. For example, a RAW file produced by my Canon 5D Mark III could be around 25MB, but its Jpeg equivalent could be only 5~6MB. Therefore if you don't have enough storage space in your hard drive, or you don't have enough space on your camera's memory card, shooting Jpeg is a wise solution. But if you care about photo quality and want to have the flexibility to post process your image, you want to shoot in RAW.

Canon 5D MarkIII Default Setting 3
This following screen is for cameras that have 2 memory card slots. Although mine has two, I never used two memory cards at the same time, not because I don't have two cards, but because I don't think it's necessary. I'm especially against saving RAW and Jpeg files at the same time, although it sounds like a great way to backup photos - you keep two copies on two cards, in case one is lost, you have another. The fact is: if you only care about RAW files (like I do), an extra copy of Jpeg files is useless. I keep a simple workflow of importing my RAW files into hard drives and back up my hard drive frequently, as my backup system.
Some people might think keeping a copy of Jpeg files can save time in case they need quick delivery. Well - if your post processing time on each image takes no more than a few seconds (like in my case, see this video tutorial for my post processing), and the retouched photos from RAW files look much better than their Jpeg equivalent, would you still bother to shoot Jpeg, even as a backup?
In a nutshell, I'm a strong advocate of shooting in RAW, and typically make this adjustment immediately after I get a new camera - it's only one time adjustment, and I don't have to worry about it, ever.
Canon 5D MarkIII Default Setting 4
2. Set exposure compensation to zero
By default the camera sets it to zero, but if you changed it in your last shoot, and forget to change it back, you might end up over-exposed or under-exposed images for the entire shoot without knowing why. So check this setting before each photo shoot.
You can also set auto bracketing in this same menu if you are not sure what exposure compensation you should use to get the right exposure. Or you would like to create HDR (high dynamic range) photos. See "7" below for more details.
Canon 5D MarkIII Default Setting 1
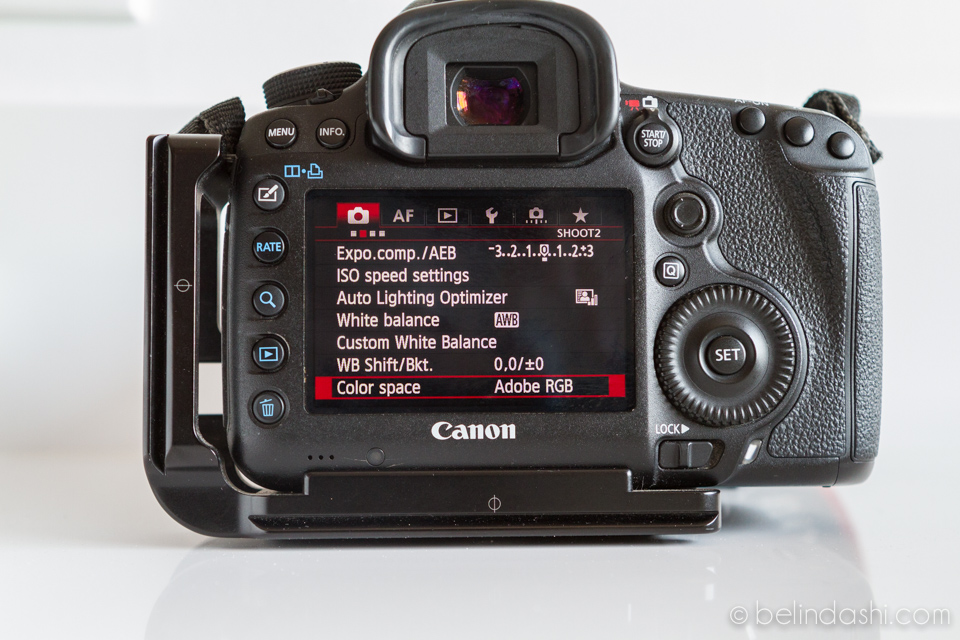
3. Change Color Space from sRGB to Adobe RGB
Adobe RGB is a bigger color space and allows you to produce more vibrant colors, on screen and in prints. As a landscape photographer, you are dealing with beautiful colors in the nature. If you have the choice to see on your computer screen more vibrant colors that you have captured with Adobe RGB, instead of the dull colors with sRGB, which one would you prefer?
Nevertheless, sRGB is a standard color space used for web display. When you upload photos online, your photos will only display in sRGB color space, no matter you embed sRGB or Adobe RGB color space in your photos.
Now when it comes to print, using Adobe RGB makes a big difference. It allows you to produce more striking and accurate colors on your prints.
One important note is that no matter what color space you choose to shoot with, you'll find different colors on different displays, from your camera LCD screen, to your computer screen, and prints. If you want to produce precise colors from the beginning to the end, you may want to learn color calibration across different systems, which is a more advanced topic that I can elaborate in future post.
Overall, Adobe RGB gives you much more color information to display across various media, that's why it's another adjustment I set immediately after I get a new camera.
Canon 5D MarkIII Default Setting 2
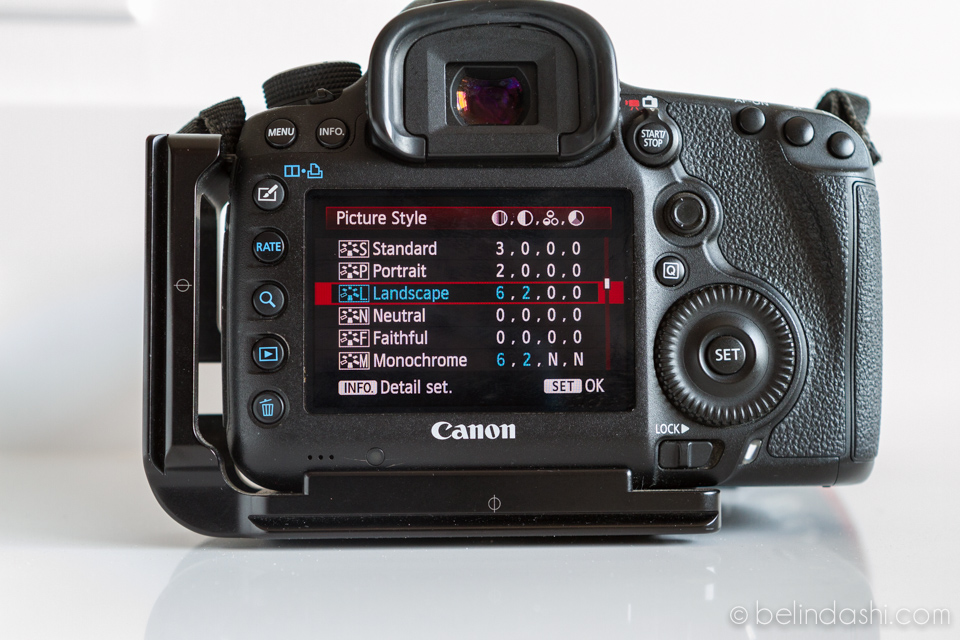
4. Adjust picture style
I often make a one time adjustment to set my default picture style to "Landscape" and change camera's default definition of "Landscape" - by boosting sharpness and contrast. This only will affect the Jpeg photos the camera takes. "Well, you shoot in RAW only, why bother to change this?" you might ask. I forgot to mention that the adjustment also will affect the photo display on the camera's LCD screen. Since I post process my RAW files in the computer, consistently with increased sharpness and contrast for landscape photos, I want the photos I see on the camera screen to look similar to what my post processed images.
Another reason is camera specific. Canon 5D MarkIII has a HDR function, which stacks together several photos with different exposure settings into one high dynamic range photo. Usually, for photos taken by other cameras, the HDR stacking has to be completed in photo software on the computer, not directly in the camera like Canon 5D Mark III does. I have several generations of Canons cameras before I used Canon 5D MarkIII. It's a unique and interesting function that I like. However the output of this in-camera stacking is only in Jpeg format.
In another word, I won't be able to convert this Jpeg into RAW after importing the HDR photos produced by my camera. Therefore the in camera picture style adjustment with increased sharpness and contrast is particularly helpful for me to "retouch" the photos directly in the camera. They typically stay as is after I import them into my hard drive because I seldom retouch Jpeg files.

Canon 5D MarkIII Default Setting 5
Canon 5D MarkIII Default Setting 6
5. Enable exposure simulation
This is a very useful tool for landscape photography, and is only effective in live view mode. When you turn on the live view mode - ie. look at your composition on the camera LCD screen instead of through the viewfinder - you'll see a photo with simulated exposure on your screen.
This is particularly helpful if you are using filters. For example when using a 10-stop filter to take picture, you won't see anything other than pitch darkness when looking through your viewfinder. But in the live view mode, you'll be able to see the approximation of your output image. Therefore it's much easier to take landscape photos in live mode when you are using filters.

Canon 5D MarkIII Default Setting 7
6. Turn off auto rotation on camera
In the camera default setting, the vertical images will automatically rotate 90 degrees for easy viewing, assuming you are viewing all your images in horizontal camera position.
However, this becomes inconvenient when you want to view your images vertically after taking each photo in vertical orientation on a tripod.
In the 3 choices below, the camera asks if you'd like to auto rotate your images
1) in both camera and computer, or
2) only in computer,
or 3) neither.
Make sure you choose the 2nd option to auto rotate in computer only, because you want your photos taken in vertical orientation to auto rotate when you import them into the computer. Otherwise, you'll end up having to manually rotate your vertical images one after another, which could be a painful process if you shoot in large volume.

Canon 5D MarkIII Default Setting 8

Canon 5D MarkIII Default Setting 9
7. Adjusting bracketing sequence & number of bracketing shots
This is related to item 2 above. You use auto bracketing when you test shoot in certain light condition, and would like to find out the best exposure settings for your landscape photos. By default, most Canon cameras set 3 bracketed shots with the sequence of 0-+, meaning the camera will take 3 photos in a roll - the first photo with normal exposure compensation, the 2nd photo with minus stop exposure compensation (darker than the 1st photo), and the 3rd photo with plus stop exposure compensation (brighter than the 1st photo).
For me, I'd like to see each photo with increased exposure compensation, therefore with the 1st photo with the darkest exposure, the 2nd with normal exposure, and the 3rd with the brightest exposure. This helps me to sort through my images much easily in the post processing stage, if I take similar shots repeatedly.
I usually find 3 bracketed photos enough for testing purpose. However, occasionally I take HDR photos, and would like to stack 5 photos instead of 3 together. Therefore I need to change the number of bracketing shots from the default 3 to 5.
The adjustment for this menu item is purely personal, and is of less importance than the previous ones.

Canon 5D MarkIII Default Setting 10

Canon 5D MarkIII Default Setting 11

Canon 5D MarkIII Default Setting 12

Canon 5D MarkIII Default Setting 13
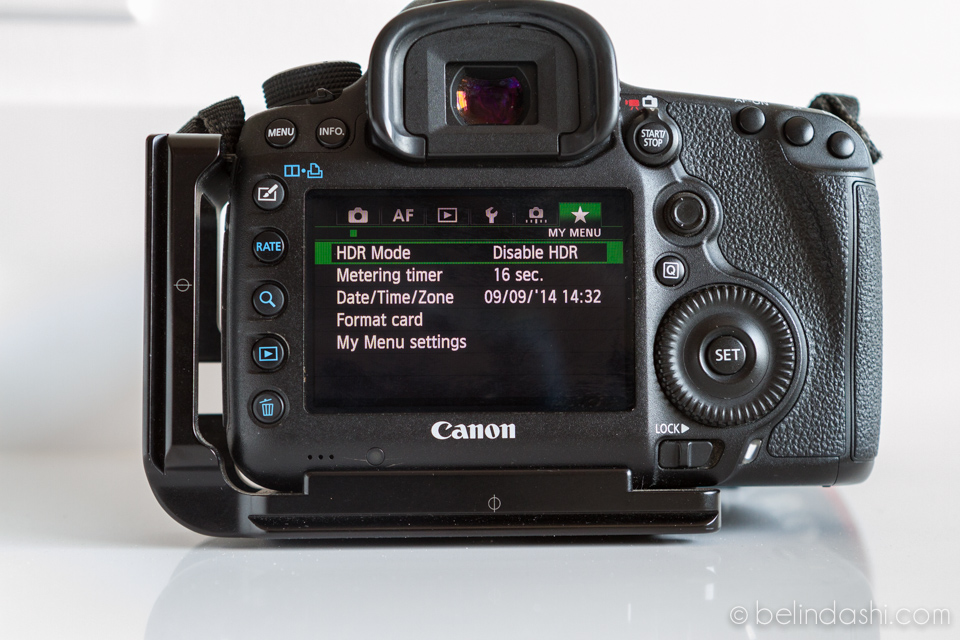
8. Build quick access "My Menu"
This is a quick and easy way for me to access certain menu items. It saves me time to go directly into this "My Menu" for frequently changed camera settings so I don't have to search through the long list of menu items. You can add any items you frequently use into your own customized menu list.
For me, I switch between HDR and normal mode (although more than 90% of my images are shot in normal mode). So I need to have quick access to enable or disable HDR, see the following screen.
I often adjust the local time according to the country and region I travel to. I'd like the camera to document the local time of each photo, not the time from my home country. More importantly, I also often shoot with 2 cameras at the same time, and it's useful to sync the two cameras' time so in the post processing stage, it's much easier for me to find photos taken at the same spots, regardless which camera I used. I have detailed tutorial on how I use Adobe Lightroom to efficiently organize, process and manage my photos. A streamlined workflow makes a huge difference in your overall productivity.
Format card is another frequent behavior. Instead of just "erasing images", I frequently format my memory cards.
You also see a metering timer in my menu. The camera's default setting is typically 16 seconds. When you half push the shutter button, the camera will evaluate the exposure according to the light meter. If you don't take the photo within 16 seconds, the camera will re-measure the light the next time you half push the shutter button. This is most useful in the hand held position, when you need to lock the light meter and then recompose the image. I find 4 seconds to be enough so oftentimes I change this setting. However, if you don't yet know what lock light meter means or how to lock light meter in hand held position, do not change this setting. I'd be happy to share tips in my future tutorials.
Canon 5D MarkIII Default Setting 14
You may also love…


The complete list of photography equipment and the statistics of usage for each piece of camera gear in our first trip to the Arctic Circle.