
5 Steps To Prepare My Portrait Camera For Landscape Photography
I’ve recently shared a post “Less Is More - How I Downsized To One Camera And One Lens”. I mainly addressed using the Sony A7III and the 55mm f1.8 Sony Zeiss prime lens for portrait.
I haven’t used the equipment for landscape photography yet, and am eager to try it out.
In fact, we are taking a road trip next week, along the southern portion, the North Caroline side, of the Blue Ridge Parkway. I’m excited that I’m also going to revisit the Great Smoky Mountain National Park. I did this road trip alone 7 years ago. It’ll be a different experience this time, as I’m traveling with my family.
(See below video our road trip along the northern part, the Virginia side, of the Blue Ridge Parkway)
If everything turns out as planned, I’ll have the chance to photograph July 4th fireworks, mountain ranges, waterfalls, perhaps animals, and definitely candid shots of my children.
There are various subjects, and I would like to minimize my luggage. In my past year’s “one-camera-one-lens” solution, I mostly used Sony A7III to photograph my children. In order to use it for landscape photography, I have to make some preparation.
So the following is my step by step set up.
Step 1 - Mount my camera on Tripod
I talked about the 40mm Universal Arca Swiss Quick Release Plate. (See picture in this post) It’s the small plate connecting the camera and the tripod ball head.
I like how small it is, and the fact it comes with a turning handle on the stainless steel screw makes things so convenient. I don’t have to bring a screw driver and can easily screw the plate tight on my camera. Since it’s so small, I just left it attached to the camera all the time.
If you don’t have one to start with, you’ll need to attach it to your camera before mounting your camera to the tripod.

step 2 - Mount Shutter Release Remote Control
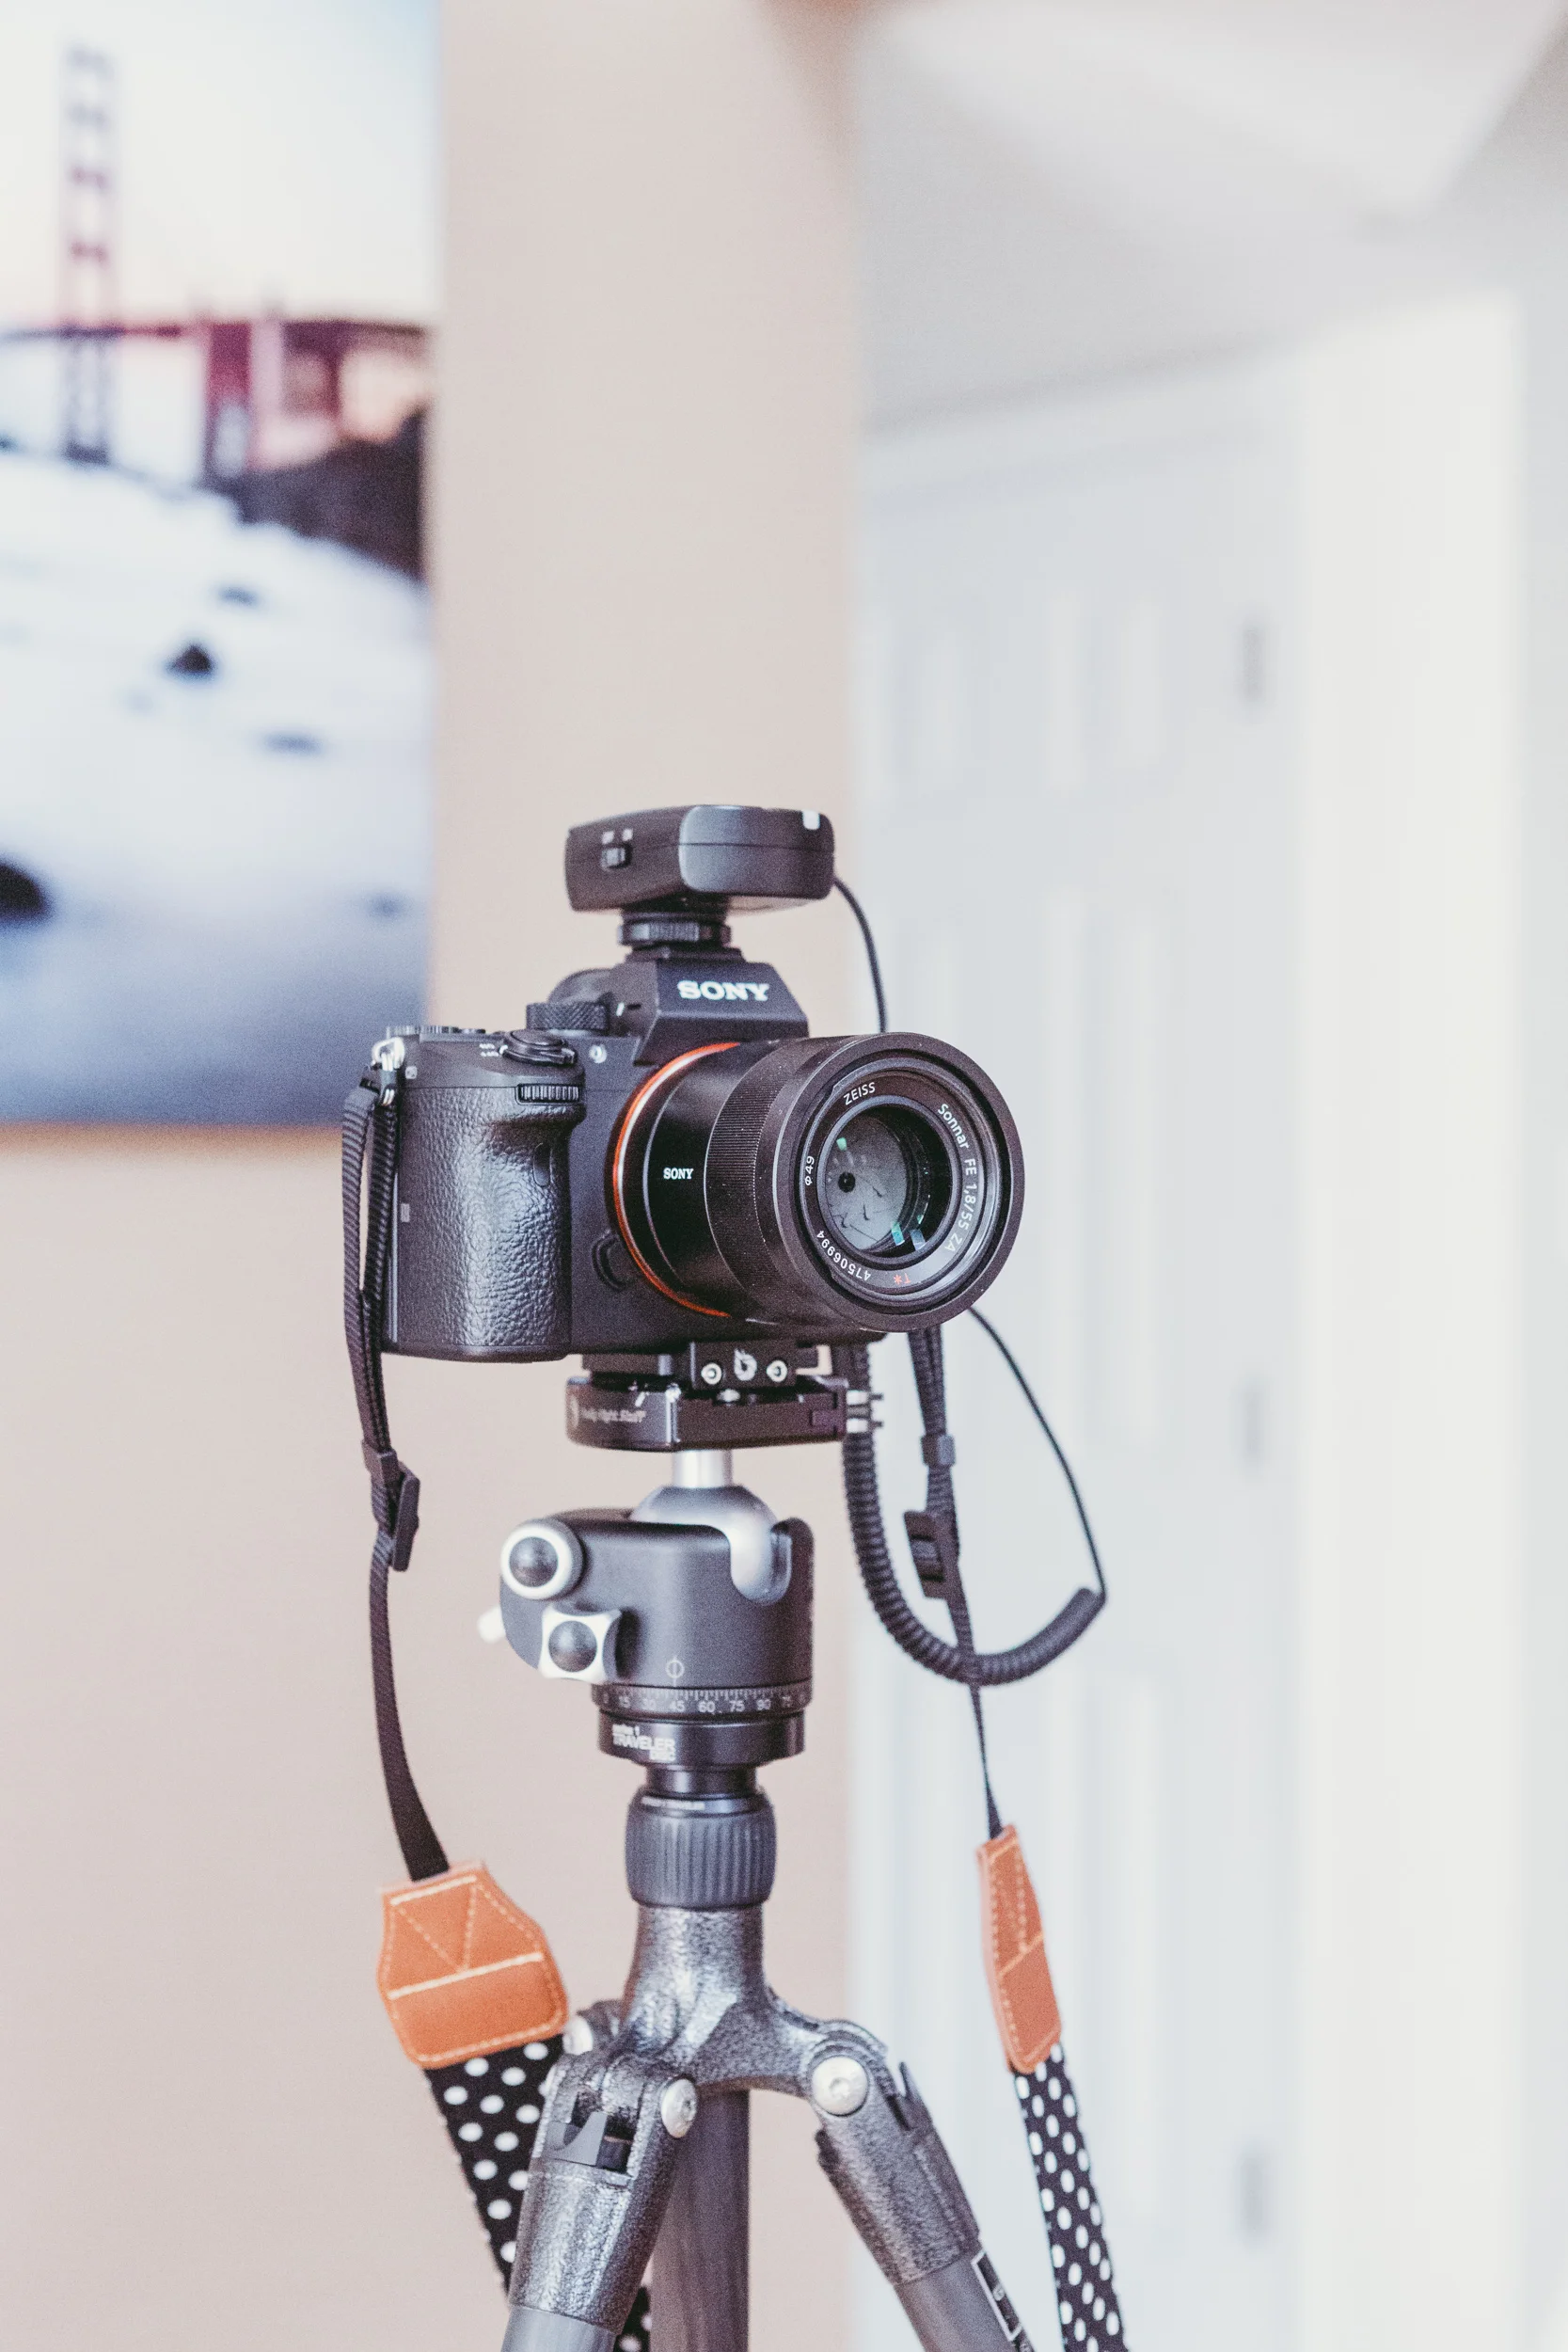
I have already owned two wireless timer shutter remote controls for years. (See my gear list for more details). But neither fits on my Sony A7III due to the difference of cable input on Canon and Sony. (See below shutter release cable input for Canon)

Instead of purchasing a new shutter remote control compatible with Sony A7III, I simply replaced the cable on my shutter release. Now everything works perfectly! (See below shutter release cable input for Sony)

Step 3 - Mount 49mm- 77mm Step Up Ring (Optional) - Only if Your Filter Or Filter Adapter has Different diameter from your lens

step 4 - Mount Filter adapter (77mm)

step 5 - Mount Filter slot adapter

Step 6 - Mount Graduated Neutral Density Filters

I have two filter slot adapters for Lee Graduated Neutral Density Filters. In the above picture, you see the adapter with two slots - so you can only use two filters at the same time.

The other filter slot adapter I own has three slots, so I can mount up to 3 filters at the same time. In reality, I mostly use one or two filters during sunrise or sunset - one to cover the sky, one to cover the ground. (See When And How You Should Use Filters)
Voila! My camera is ready for taking landscape photos during sunrise and sunset.
At first glance, this might seem to be too complicated. But since I used the same steps (without step 3) on my Canon 5D MarkIII for many years, and it almost became natural. The above probably takes me 2-3 minutes maximum.
Landscape photography is different from shooting sports - you don’t have to worry about missing action in a split of second - you do have reasonable amount of time to set things up in the field. I mean “reasonable” - in a matter of minutes - because in certain conditions, light and colors do change fast. (See How Colors Change Within 10 Minutes For Landscape Photography).
Even if you have all the financial power, I’d still suggest instead of getting new equipment, see what you already have. Try to maximize using the same equipment you are already familiar with. The worst thing is to fumble among new equipment in the field and miss your shot.
I have owned the above Lee filters, filter adapters and remote control shutter release for years. Before I purchased my Sony A7III last year, I went through all the lenses, filters and accessories I had, and made sure any additional accessories I purchase would not be redundant.
The only exception was, instead of using my existing Canon lenses on the Sony camera, I opted to purchase a new Sony lens. (I have explained this in much more detail here).
In summary, see below photo all the above mentioned accessories plus the extra batteries, battery charger, and the 6-stop filter I typically mount on my lens for videos.

Last but not least, I mentioned one problem in my post How I Downsized To One Camera And One Lens. I hadn’t found a good protection for my Sony camera until last week. I finally found a stylish camera case (see photo below), and a strap with matching design, both in black white polka dot. Aren’t they cute?

The case fits perfectly on my camera and lens like a glove. As eye candy, it is worth every penny. Well, it’s partly my vanity purchase, partly for safety. I will have a big trip coming up later this year (check out 40+ blogs I posted about our 2-month South America trip in Sept - Nov 2019), and I don’t want to wear the “Sony” or “Canon” strap to attract unnecessary attention.
I’ll also put it into more rigid test on my upcoming road trip. I just can’t wait to use it :-)
Now everything is ready for my road trip. I look forward to finally put my one-camera-one-lens minimalist equipment into test - for both landscape and portrait, photos and videos.
Let’s see how it goes. Stay tuned!
you may also love…


Owning a full-frame mirrorless doesn’t always mean you’ll document more life. In this article, I explain why I now carry Insta360 Ace Pro 2’s Xplorer Grip Pro Bundle, a compact camera system, alongside my main mirrorless setup — and how lightweight design, straight-out-of-camera video, and ease of use changed my creative workflow.