
6 Proven composition Tips For Unique Travel Photos
Let's talk about composition, particularly about your travel photos. I’m not going to talk about such text book jargons such as rule of third, leading lines that many other photographers might have already shared with you, but rather, some practical, and easy to implement solutions to elevate your travel photos.
Your photograph, or whatever you see through your lens, is essentially a reflection of who you are. It’s important to know the camera settings, but that's only the starting point. You need to hone your composition skills in order to capture the unique photos that are a reflection of the unique you.
The good news is that just like the basic camera skills, your photography eye or the composition skills can be trained.
Today let me share with you 6 composition tips that I use most often in my travel photos. Try them out and see how they can improve your own photos in your next trip.
Tip 1 - Move Camera Angles and Positions
If you don’t see the beauty, you won’t capture it, right? If you typically photograph in a standing position at eye level, try something different next time.
1 - When photographing people…
Try to lower yourself and angle up, or lift your camera up and angle down. You may be surprised how many new and interesting things that will present in front your lenses if you repeat this exercise.


Before you move on to practice the next few composition tips I’ll share with you, practice this first tip as much as you can. I guarantee you’ll see a whole new world when you get into the habit of observing things, people, moments, environments from different angles and positions. And the bottom line is, this technique is the easiest, yet most impactful solution to improve your composition.
2 - When photographing Landscape or Cityscape…
The concept is the same. Instead of standing at street level, try to find a high vantage point.
If you are in the nature, climb up on a hill.

If you are in the city, go to a rooftop.

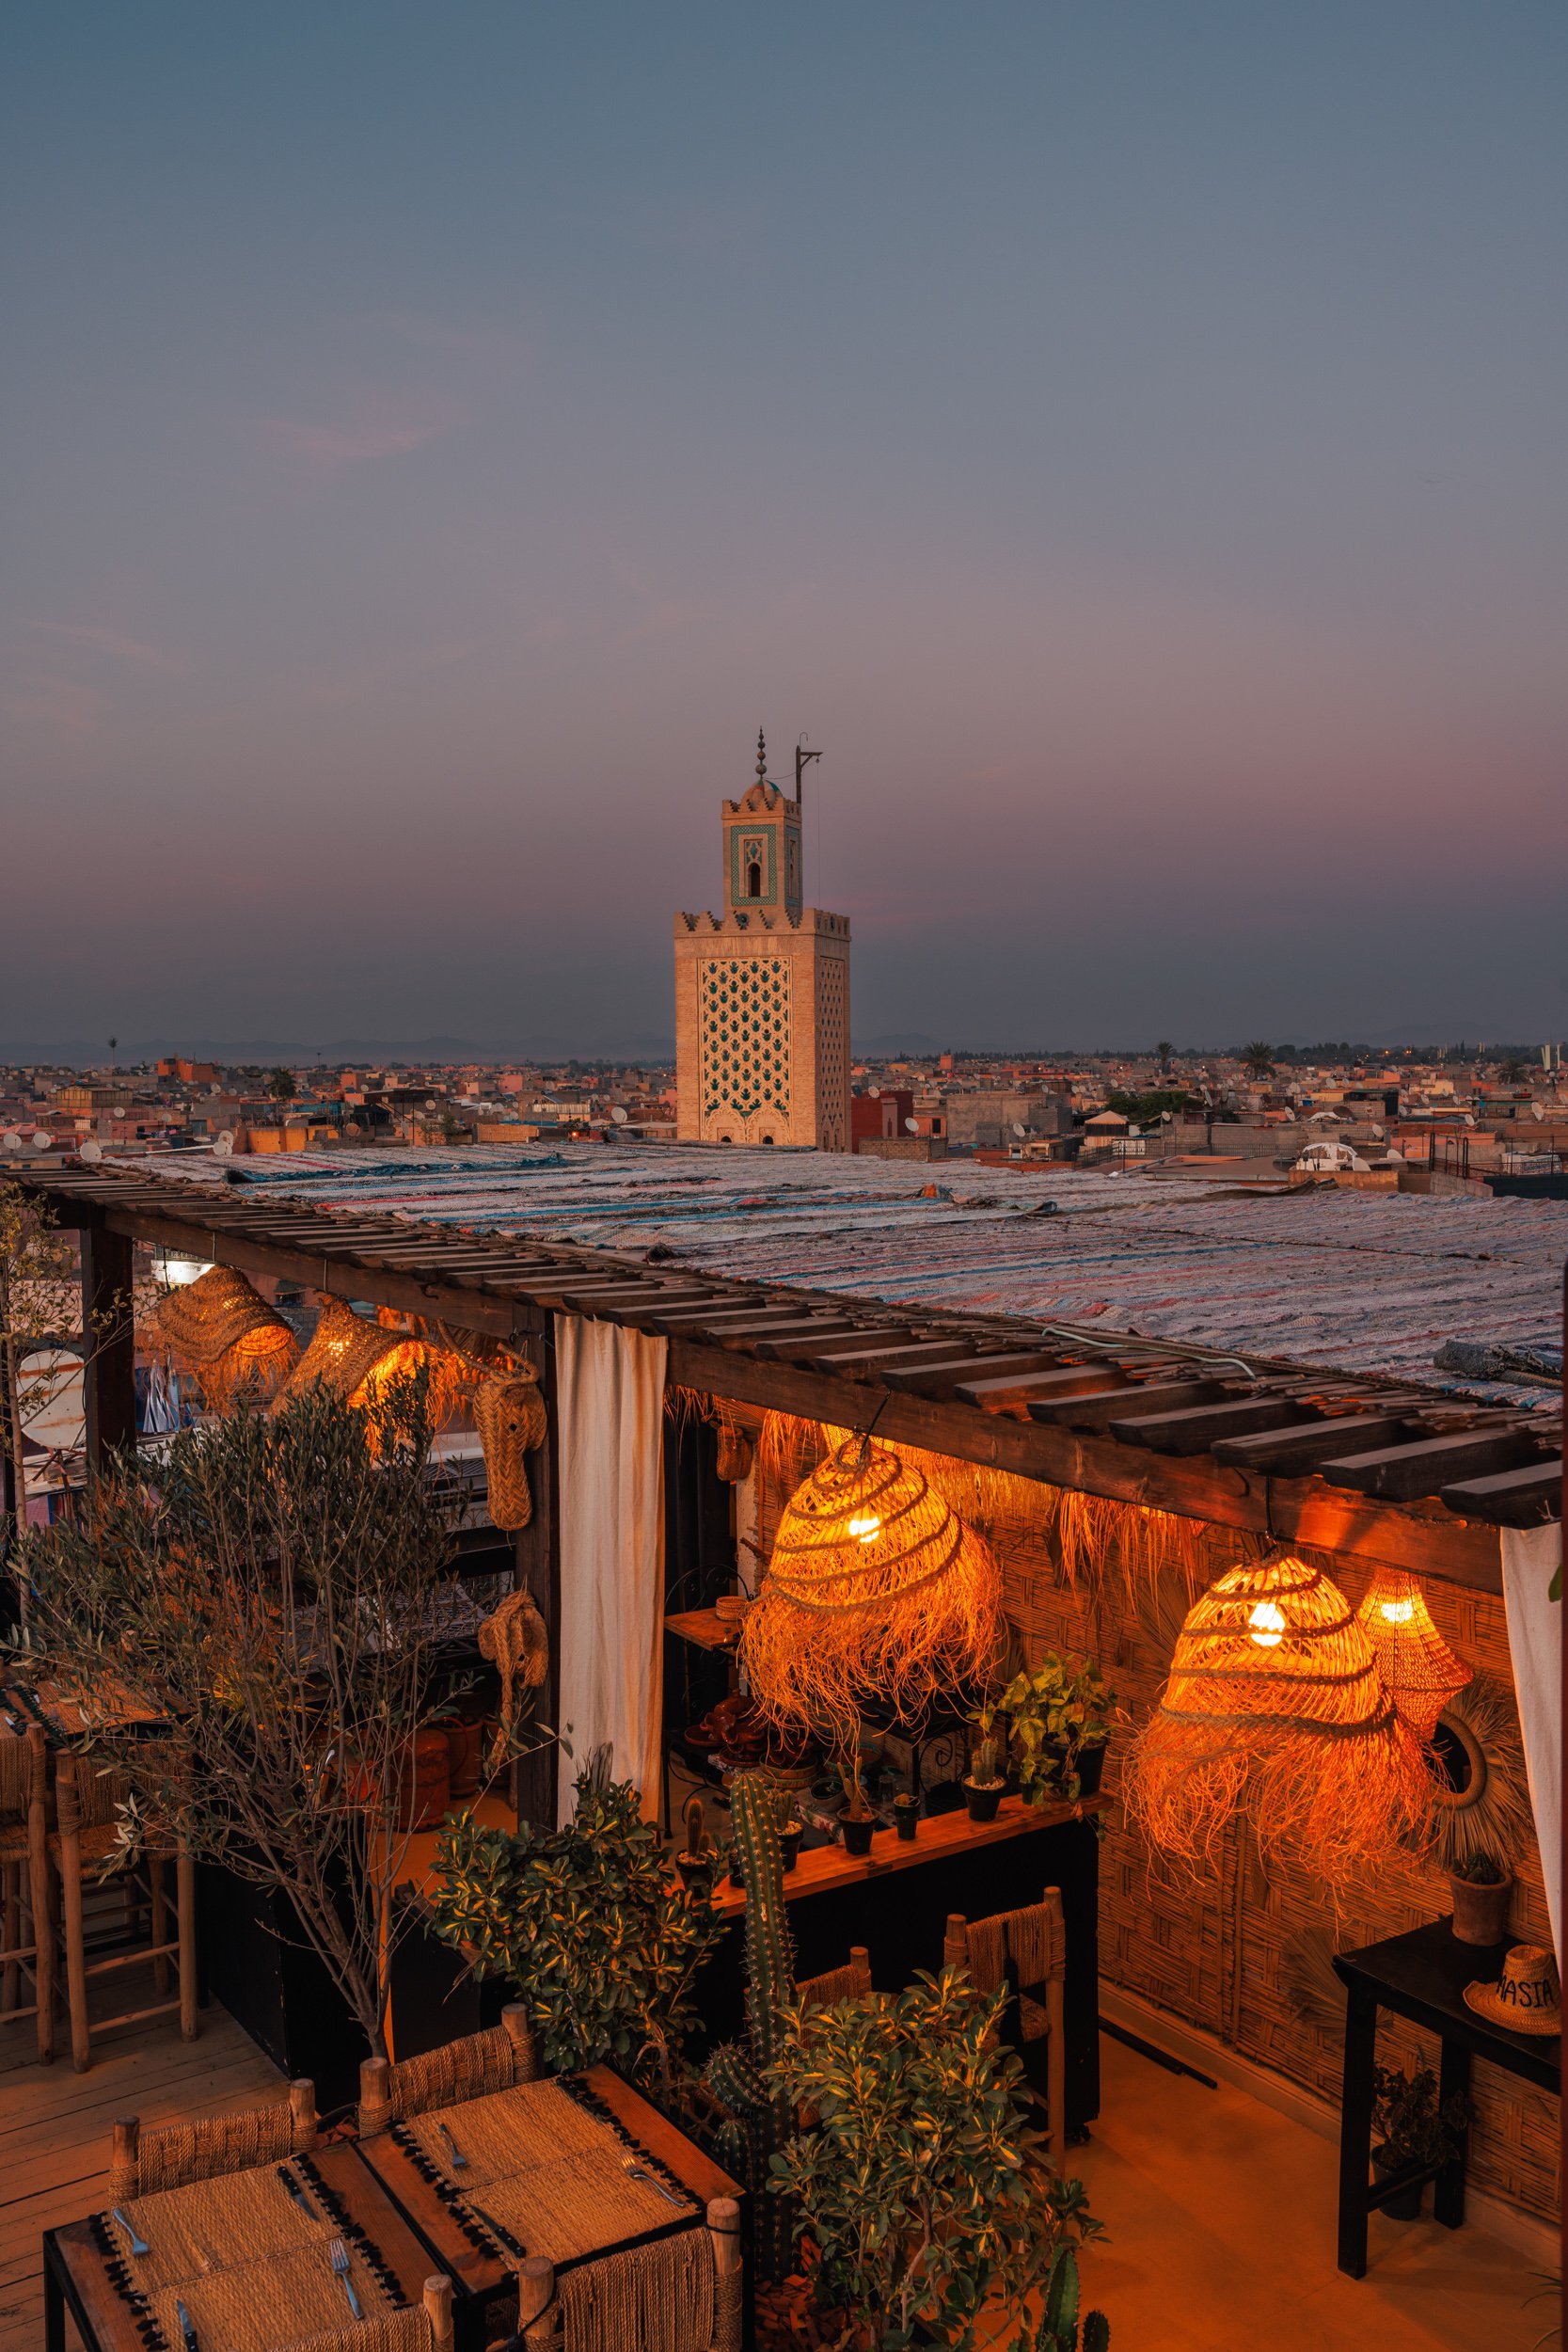
If you travel with kids, go on a ferris wheel. You don’t want to know how many times I took the ferris wheel with my kids last summer, just to photograph the cityscape from high above.


This technique is not only useful in finding something interesting in an ordinary place, but also effective in getting rid of unwanted crowd in a bustling touristic scene. Check out this post for more details.
Tip 2 - Add Foreground
Adding foreground elements to a photograph improve your composition in 3 ways.
1 - creates layers, adds depth and dimension
Why do we want to add depth? You may ask. We live in a 3D world, and photography is a 2D art. By establishing a sense of distance between foreground, midground, and background, you create more 3D dimension in your 2D art, and make your photo more visually captivating and dynamic.
You can add foreground by holding your camera close to something, whether it’s ground, the wall, the fence, the bush, the grass, the flowers, the railing, the food, or even a person. The option is endless. Whatever that within arm or inches distance from your lens could be the foreground.


You can adopt the same approach for both portrait and landscape, both indoors and outdoors.

Make sure the foreground do not take up too much a proportion and throw your photos out of balance.
2 - Structure composition And Achieve balance
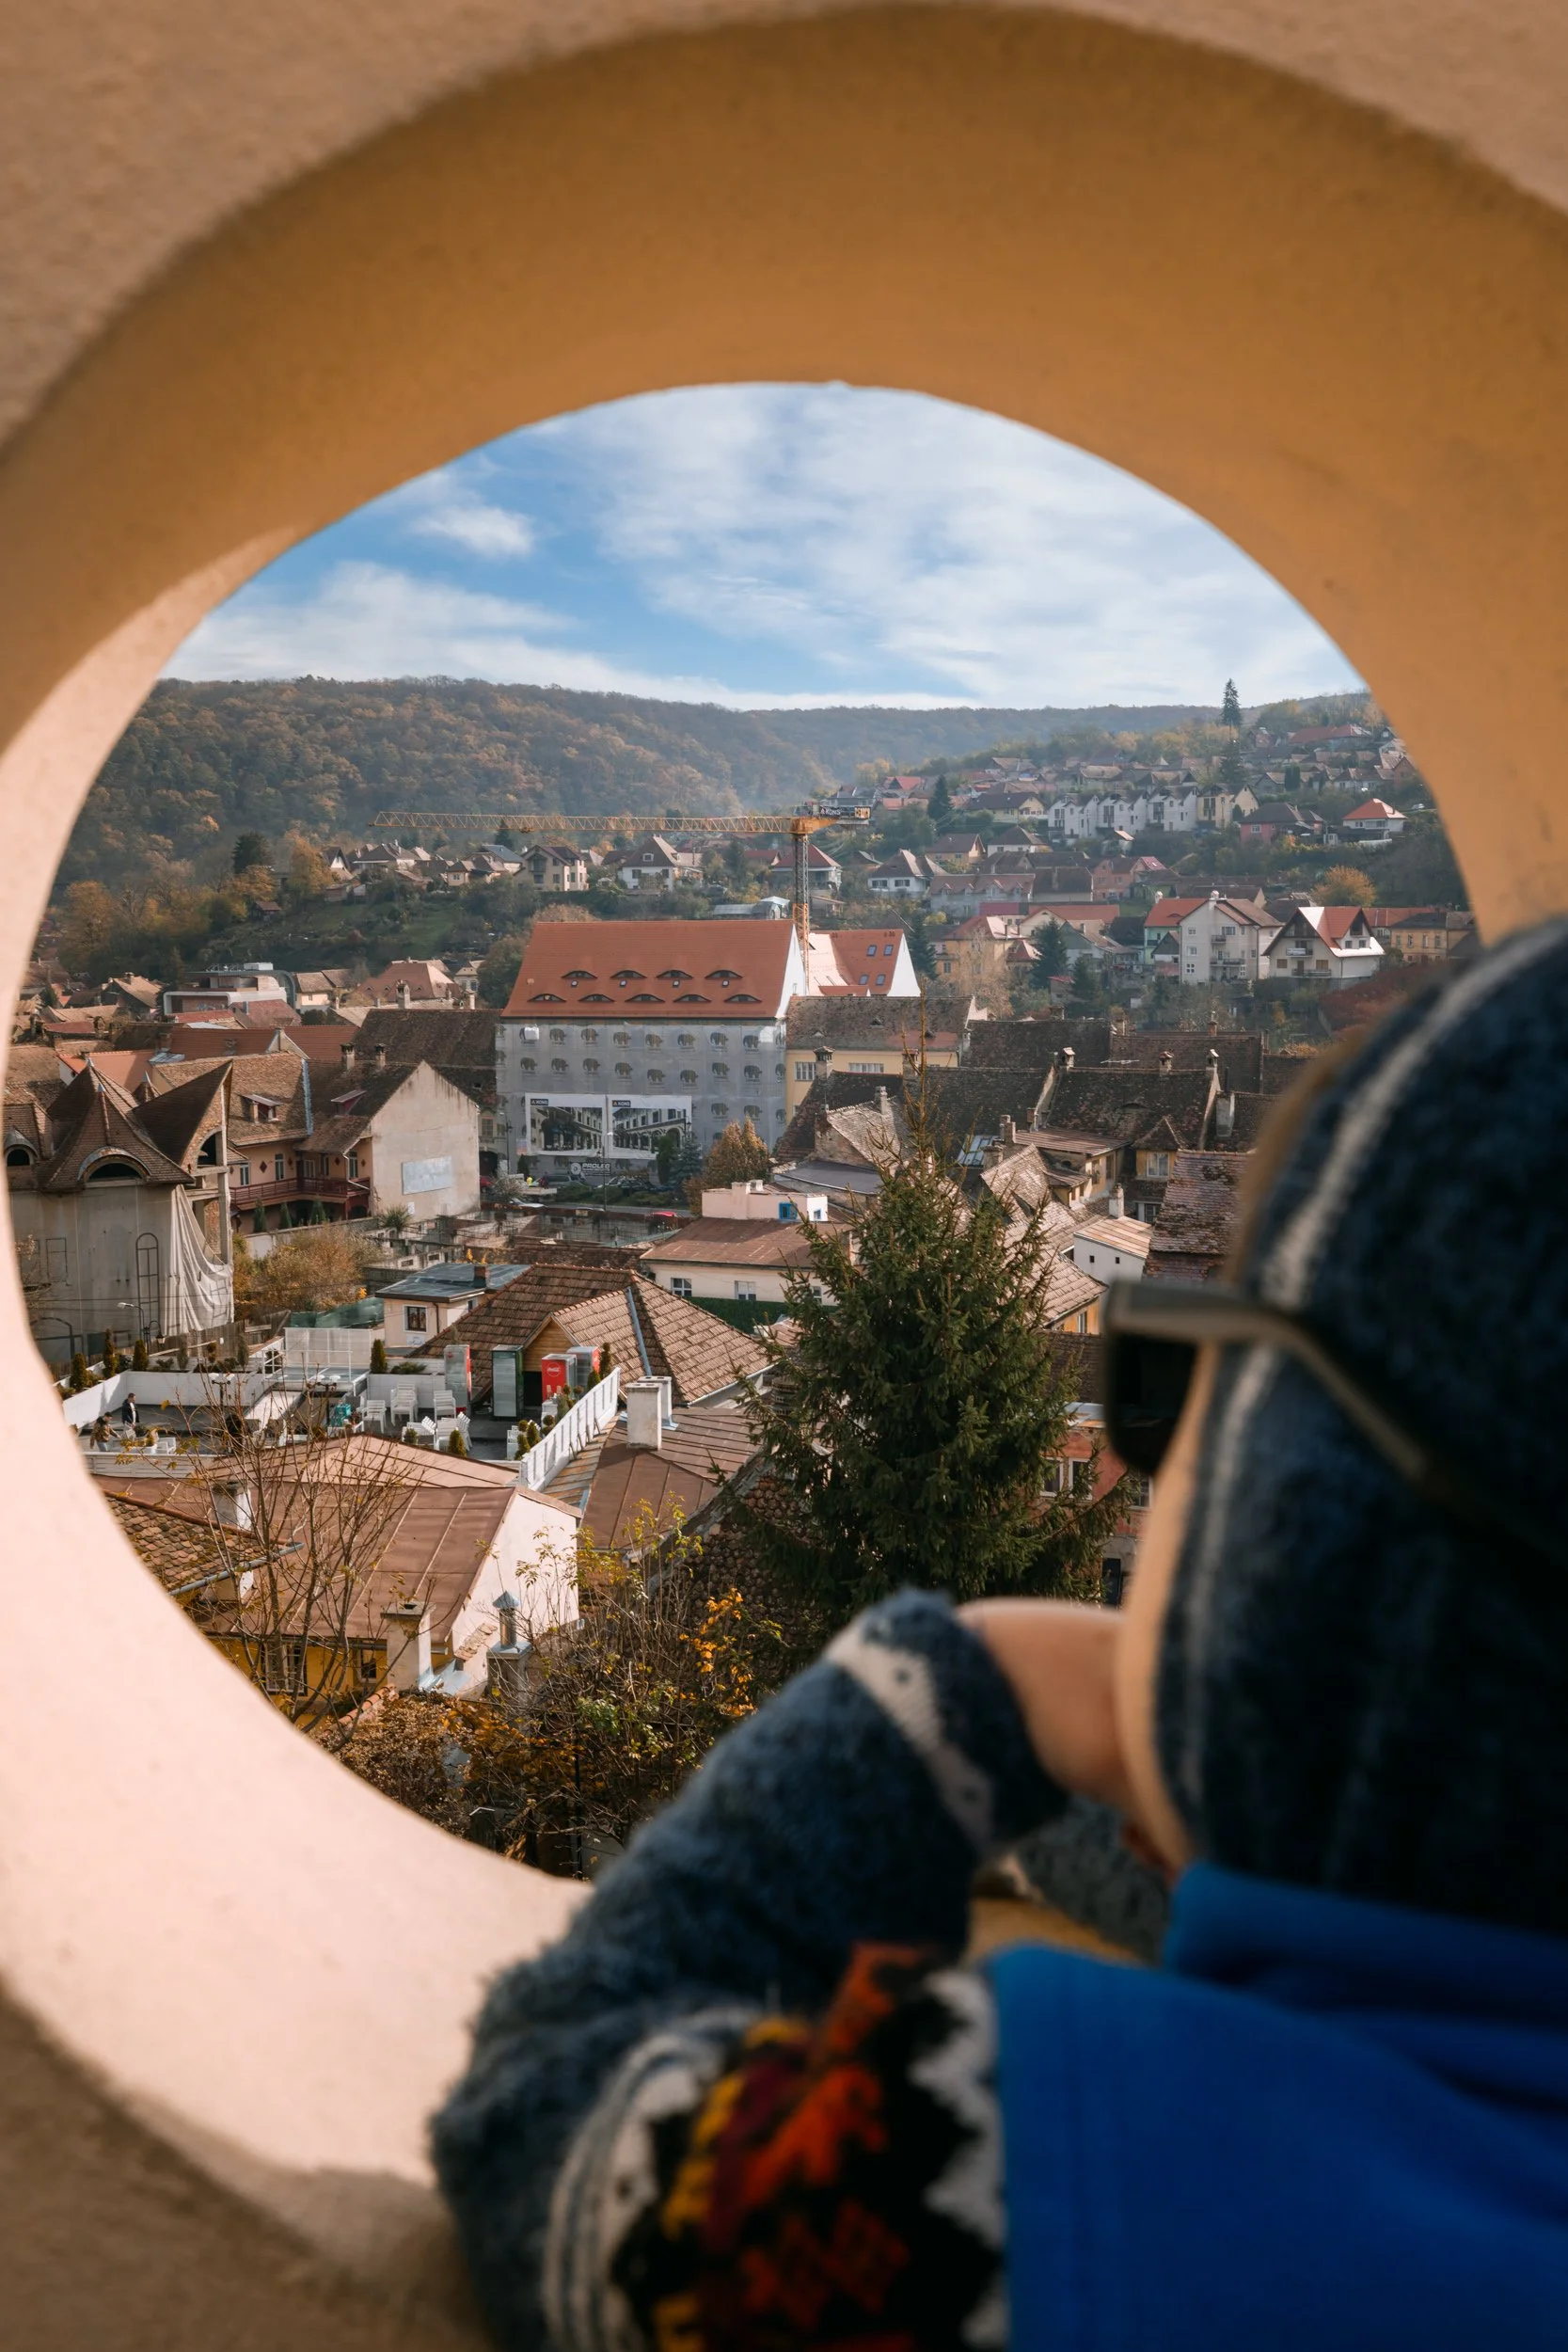
Instead of photographing an architectural landmark, I put my camera behind a fenced opening to frame the building, giving the photo a balanced border.


The frame doesn’t have to be square, rectangle, circle or oval covering all four sides of your photo. It could be side frames covering two opposite sides. They could be in tangible shapes, or in abstract forms. They all serve the same purpose to balance the photo.

3 - Add context and scale
Whether it's the color of bushes, a silhouette of a tree branch, or a textured surface, foreground elements anchor the scene and provide additional information regarding the timing and location of the photo, as well as the point of reference for your viewers.


Tip 3 - Balance Photo Content
A well balanced photo is typically more visually appealing. But what exactly is a balanced photo. It’s like talking about work life balance, some people may think a 10-hour work day plus 6 hour sleep is well balanced while others think this is totally not acceptable.
So here are some techniques to achieve balance.
1 - Symmetry
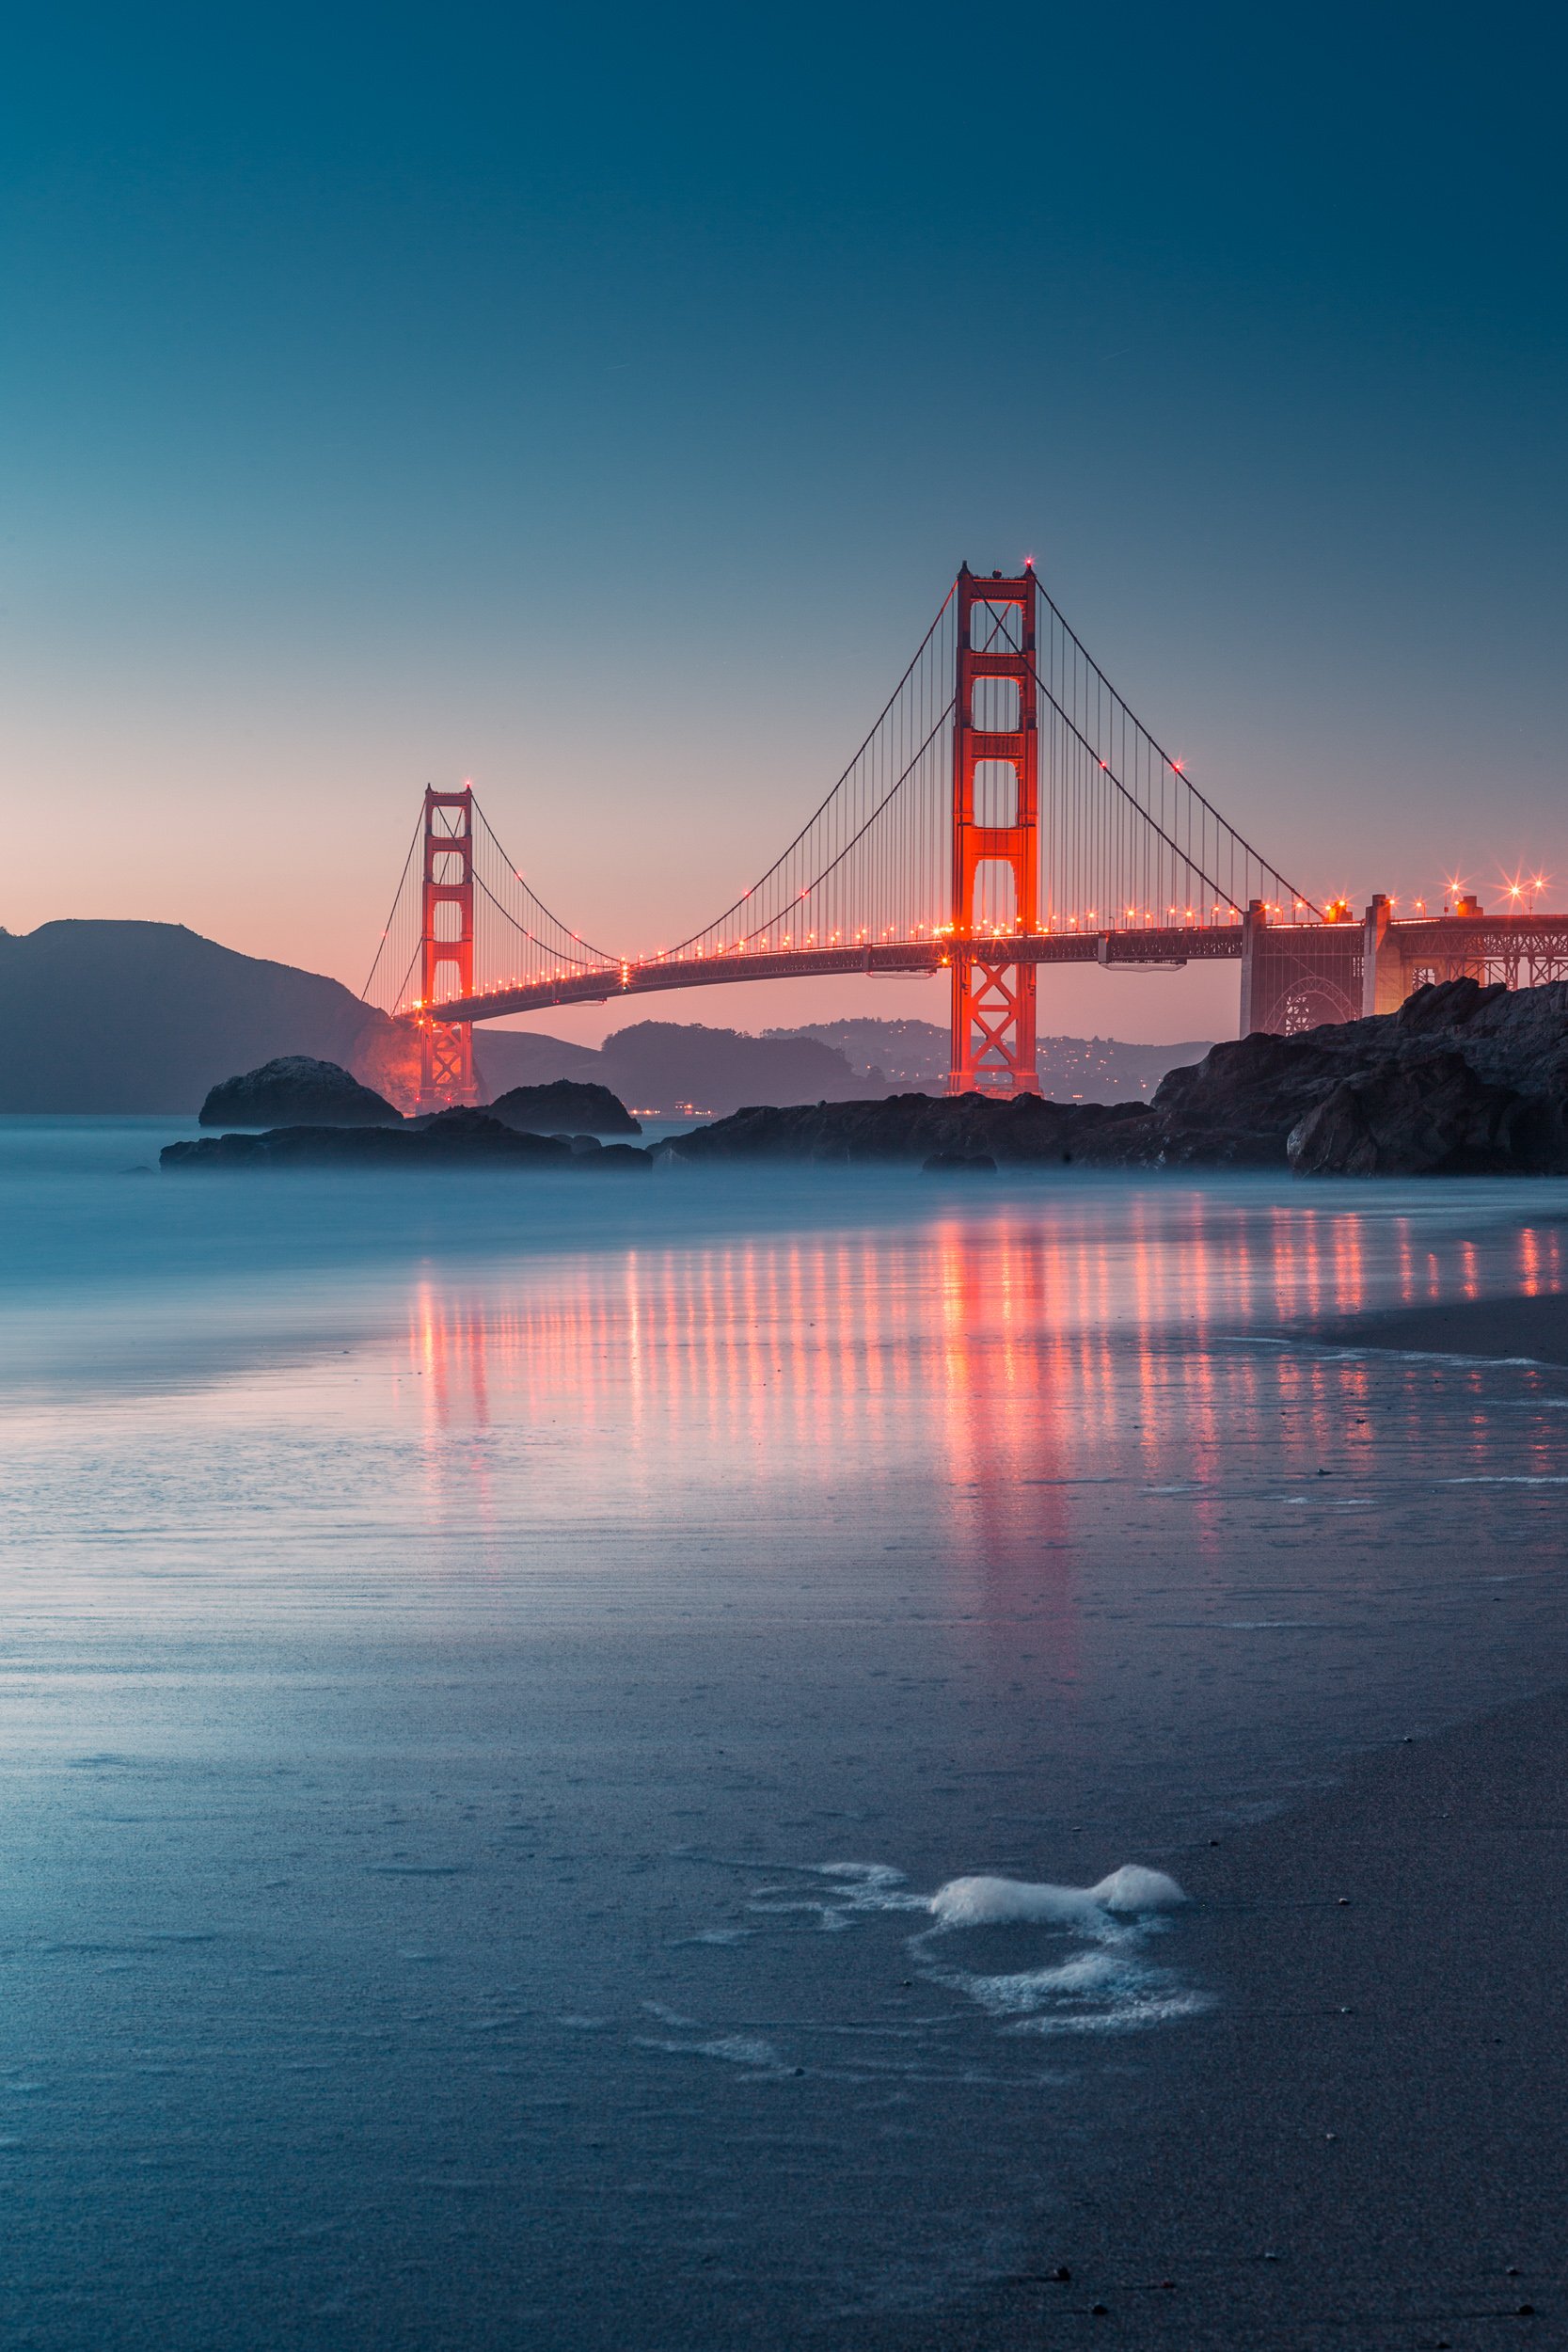
Symmetry in a photo is unarguably balanced. I have adopted symmetry a lot more in my landscape photos by incorporating reflection.

When you do travel or portrait photography, you can certainly adopt the same concept.

Symmetry can be top bottom symmetry, and left right symmetry.
For photos with subject or background of architecture, or things with lots of lines or repeat shapes and patterns, using symmetry in your composition is an easy way to create a balanced composition.
2 - Intentional Off Center
Rule of third is what people talk about all the time. In fact, I never intentionally adopt rule of third. But sometimes in certain situations, you just have to put your subject a little bit off the center to achieve balance.
My rule of thumb is to put the people subject in the opposite side of your photo where there’s heavy content. If the content is too heavy on the right, I put my subject on the left. If the content is too heavy on the left, I put my subject on the right. Same to top bottom balance.


Another quick tip is to see where the subject is facing. If the person is looking to the left, I leave more space on the left. If the person is looking to the right, I leave more space on the right. This way, you give your viewers the chance to follow your subject and explore the world that your subject is looking at.


Your goal is to achieve balance in a photo. I think it’s a bit misleading to blindly follow the text book composition tip of rule of third. If you have to adopt symmetry to achieve that balance, there’s no need to put your subject somewhere in the third.

If you have to put your subject in the corner of the photo to achieve that balance, whether it’s 1/4 or 1/5, do it. It’s all about experiment with perspectives.

Remember, you photos are a reflection of the unique you. You can learn the rules and break the rules.
Tip 4 - Simplify Content & Colors
I am a big fan of less is more, and have repeated this tip in past videos and blog posts many times.
Simplifying photos have many different approaches, whether to reduce elements, colors, unwanted subjects or clutter in the background, your goal is to achieve a simpler yet stronger composition. The simpler your photo, the easier it is for your viewers to understand or resonate with your story.
Here are some easy techniques.
1 - close up


2 - Repeat colors and patterns
Another example is to fill your frame with similar colors or patterns.


You might be surprised how easy it is to achieve simplicity. Sometimes all you need to do is to walk a few more steps if you use a prime lens, or zoom in if you use a zoom lens. Or do both.
3 - Minimize colors
Simplifying photos can also be achieved by harmonizing colors. If your main subject is your family and friends, be intentional about the colors of clothes. Try to have your subject wear solid or neutral colors, so you avoid adding more colors into an already complicated scene.

Of course you can also simplify colors in post processing. For years, I’ve tried to adopt muted color tones in my travel photos so I can further achieve simplicity. You can check out my Lifescape AI Lightroom presets for more details.
Tip 5 - Experiment Size and Distance
1 - Do the Classic Full Body right
Most amateur photographers photograph family and friends with full body in a travel photo. Nothing’s wrong with that. You want to show your people subject as well as the location in your photo frame.
However, a common problem I often see in the full body captures is that a foot, or the shoes, or a hand, some fingers are cut out of the photo frame. Sometimes just a small detail can make or break a photo. If you want to capture your people subject with full body, try to include all the fingers, feet, hands and shoes.


Of course this is just the guideline. If it’s your intention to cut out certain part of your subject to tell your story, by all means do it.
Now let’s do two exercises and try different composition.
2 - Tiny People, Big Scenes
First, photograph big scene with tiny people by distancing yourself from your people subject. This is particularly useful if you take pictures in the nature, and want to showcase the grand size and the magnificence of a scene. You want to use your subject as a reference point to show the size difference.


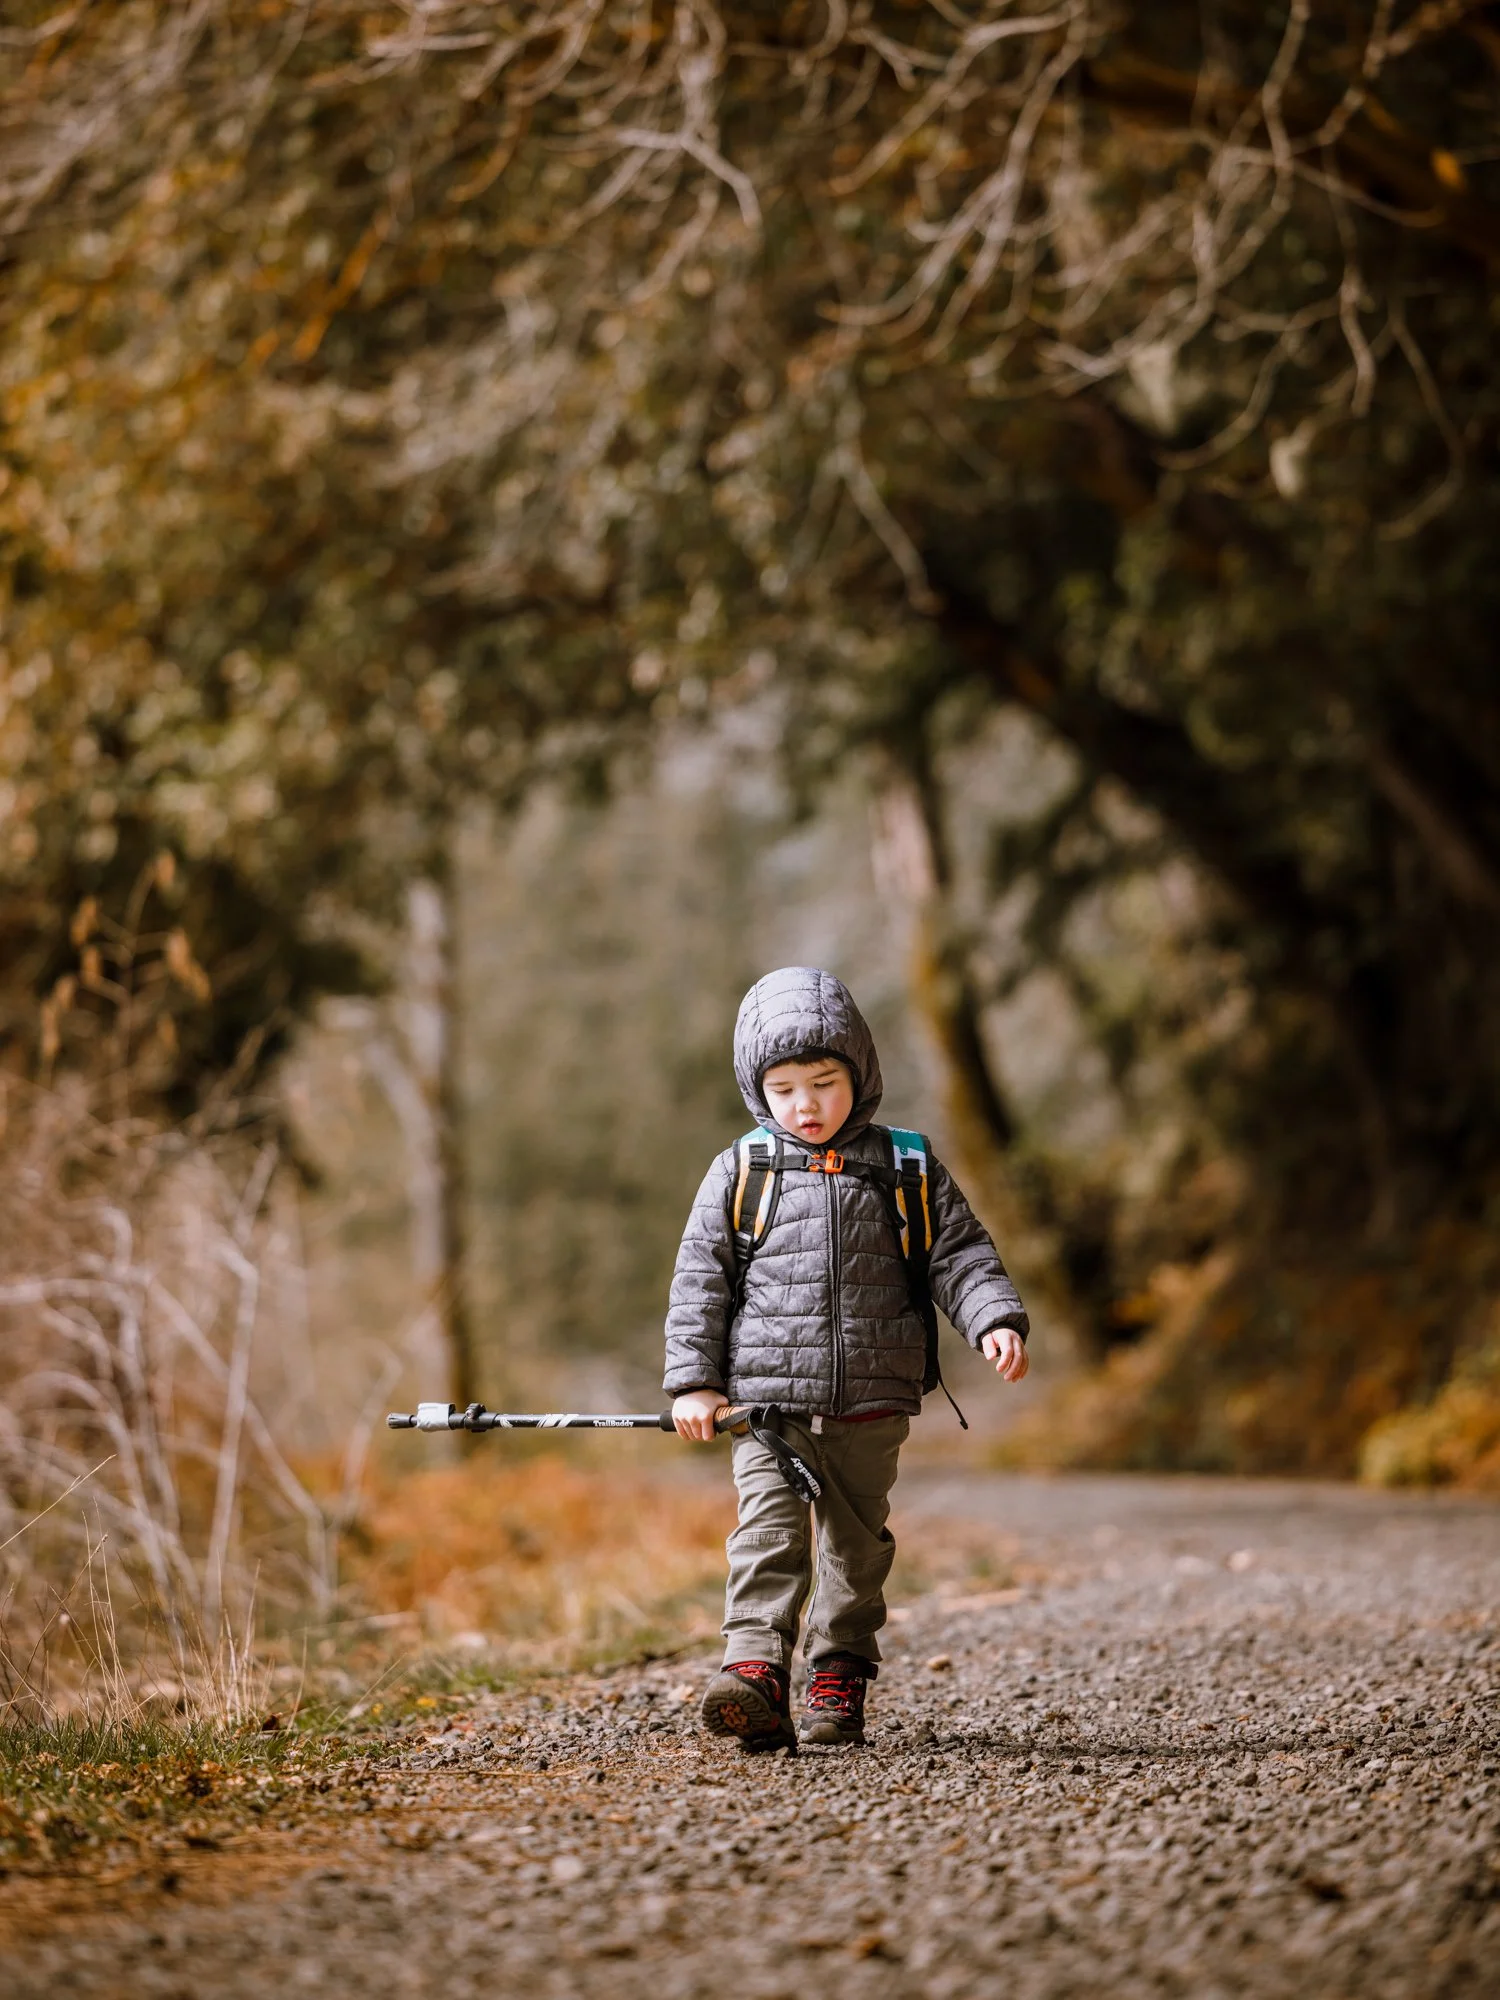
3 - Close Up
Now, here’s the opposite exercise. Do close up, which we just talked about. We know doing close up with shallow depth of field can give you cleaner background and composition. This is especially useful when you are in an urban scene with busy crowded background.
Zoom in or walk up closer can effectively declutter your background and instantly elevate your photo quality. Check out this post where I’ve shared more tips how to take better travel photos in crowded scenes.
In a nutshell, you don’t have to always do the classic full body travel photo. Experiment with different sizes and distances to achieve a strong composition.
Tip 6 - Focus On Moment and Story
Most of the composition tips I mentioned above have something to do with the visual attractiveness of the photo.
However, if you are into candid style, and want to document your real travel experience or the reality of your life, you probably don't always have the luxury of clicking your shutter in a perfect location where there’s natural frame, symmetrical shapes, lines and patterns, or simple colors.
Instead, you pay more attention to the behaviors of your subject, the interaction between different subjects or between the subjects and their surroundings.


A composition I use very often in my travel photos is to photograph my people subject looking into a beautiful scene. More often than not, I will focus on the scene and blur out the people subject in the foreground.


Your goal is to invite your audience to enjoy the travel scene. You want your audience to have an immersive experience with you.
Summary
There you go. Six easy to implement composition tips that can elevate your travel photos.
If you’d like to learn more composition tips and how to take better travel photos in general, check out my Document Happiness photography course, where I’ve shared topics from light, camera settings, exposure, focus, composition as well as post processing techniques to help you photograph family and friends, anytime and anywhere, on your photo journey.
Pin it 👇

You may also love…


If you’ve been photographing for years but your photos still look average, the problem may not be your camera — but how you learned photography. I break down four common mistakes many amateur photographers make and share a practical approach to evaluating your photos, and making tangible improvements.