
How I Photographed Northern Lights and Star Trail

Star trail + Northern Light in north Washington. Oct 30, 2021
I’ve practiced various subjects and types of night photography over the years (see how to start night photography I wrote 8 years ago), northern light is among my most anticipated but least photographed one. When I heard there was a chance to see northern light last weekend near Seattle, can you imagine my excitement?

Northern Light in Washington, Dec 9, 2020
As a matter of fact, this is not the first time we encounter high northern light activity in the area (or the northern part of the US). The first show since we moved to Washington (see our 2020 - A Year In Review) took place last December. Unfortunately, it fell on a cloudy and rainy weekend (see above image). It wasn’t perfect.
I barely saw anything with my own eyes. I simply pointed my camera to the north (It is fundamental direction in northern hemisphere unless you are north to the aurora belt in the Arctic Circle). I wasn’t sure what I’d photograph but blindly clicked my camera. Fortunately, my camera did detect the light between the clouds, but it didn’t last long. The clouds moved in quickly and completely blanketed the sky. No stars were visible afterwards, not to say the light.
I still remember that day when I went out around midnight by myself. There were two loose cougars in the forest, as reported by my next door neighbor. So I had a combination of fear and excitement when I stood in complete darkness.
I had only about 15 minutes opportunity and wrapped up quickly. I felt somewhat relieved. At least, I didn’t leave the site because of fear, but the weather.

Clear sky, Oct 31, 2021
Fast forward, I got a second opportunity last Saturday. This time the weather was perfect!
After two weeks of non-stop rain, Seattle and its nearby area in Washington welcomed its first sunny day. The sky was completely clear for the whole weekend. (See above)

Shooting star, Oct 30, 2021
Coincidentally, there was a forecast of strong northern light activities for the same weekend.
The only problem was that my husband was traveling, and I didn’t have babysitters. I have solo-parented our kids on and off for several months this year, and was very familiar with our kids’ routine, so I felt relatively confident to take the chances. However, I still had to do some homework to be better prepared.
homework before the night
1 - location recon
During the day time, I took our boys to several beaches near our home. I wanted to select the best location, and even know exactly where I would set up my tripod at night. I had to be very efficient at night so I could capture the Northern Lights within the least possible time.

The above was one of the pictures I took during our recon. It was near my final pick but not exactly the same location near the US-Canada water border. There was no light pollution (except a minor one which I’ll mention later), something basic in order to see and photograph northern light, or any starry sky.
2 - Tide Research
It was during high tide when we visited, and the beach was underwater. I realized I had to pick a time during low tide at night, so I could set up my tripod on the beach rather than the logs. The latter would have been much more challenging in the darkness.
According to “Tides Near Me”, an app I often use to find out tide info, there would be low tide around midnight.
3 - composition Research
I also checked my favorite photography app Photopills and found out more about the visibility of the Galactic Center of the Milky Way.
It was such a rare opportunity to get a clear sky, so why didn’t I maximize my chance to photograph one more of my favorite night subjects?
Unfortunately, Galactic Center was nearly invisible during this time of the year. I could still see other parts (narrower parts) of the Milky Way in the sky, but around midnight, the Galactic Center wouldn’t be above the horizon.
4 - equipment preparation
I packed my gear well in advance. I packed up my Sony A7III and a Sony 24mm f1.4 lens in my camera bag, and left my Canon EOS R5 and all the Canon lenses at home. All my Canon lenses are zoom lenses at f/2.8, which meant if all else equal, they would take longer shutter speed. My goal was to be quick, so I had to choose the fastest lens.
Other than a camera, a lens, and a tripod, I also packed a headlight, some velcro (to secure the camera strap in high wind, if necessary), which were my default accessories for any landscape shooting. (see my video tutorial of “what’s in my camera bag”).
In addition, I packed my scarf and gloves, as it would be cold.
5 - camera settings
I even pre-dialed all the camera settings so I’d be ready to shoot anytime.
Manual mode. ISO2500, 24mm, f1.4, 15sec
Every situation was different. I would have to refine the ISO and shutter speed when I started to shoot.
Since I brought a prime lens, the zoom of 24mm was fixed so that would not change. I would use the widest aperture of f/1.4, so that wouldn’t change either.
Quick photo tip
There’s an underlying “best practice” on the shutter speed you should use for astrophotography.
Your maximum shutter speed = 500/ your zoom. For example, I’m using a 24mm lens this time. So my shutter speed shouldn’t exceed 500/24 = 20.8sec. If I use a 16mm wider angle lens (typically what I did in the past when I used my Canon 16-35mm lens), my maximum shutter speed should be 500/16 = 31.25 sec.
If you use a shutter speed slower than the above, the stars would show visible trails due to their move/rotation around the Polaris, aka North Star. Your image might look blurry even you have the perfect focus.
The night
Now the night came, everything was in order,
Little would I have guessed that the small unknown beach was packed when I arrived. Apparently, everyone saw the news and wanted to see the Northern Lights.
Luckily, there was a parking spot very close to my selected tripod spot. The beach was covered by kelp and seaweed this time, but safe enough for me to set up the tripod.
technical settings
Although I already pre-dialed my settings at home. There were two more steps I had to adjust on site.
1 - focus
I pointed my camera to a lighthouse in the distance, the only light pollution in the area, and used auto-focus to achieve the focus. Then I switched to manual focus on my lens, so the focus was locked in.
quick photo tip
If you do not have a light source nearby, you could select one of the brightest stars (eg. the North Star) in the sky and use manual focus to lock the focus.

Bad example. Northern lights in Iceland, Mar 2014. ISO2500, 16mm, f/2.8, 15sec. Photographed with Canon 5D MarkIII + Canon EF16-35mm, f/2.8L
If you have never used manual focus, I’d highly suggest you practice at home. Nailing the focus is key to success for a sharp starry sky image. I learned some hard lessons in Iceland, when I had several occasions to see Northern Lights, but my images didn’t come back sharp due to the focus issue (see above image).
I wasn’t able to auto focus on a bright star in the field so I used plan B by dialing to “infinity” on my lens in the darkness, but that wasn’t entirely accurate.
Here’s my other tip. No matter how many photography books or articles you read before a trip, no matter how well you think you are theoretically prepared, you can’t be a good photographer. You need practice, practice, practice! This has been my top tip to aspiring photographers over the years, and it still is! (See the final chapter of my photography ebook “30 Day Photo Tips”).
2 - ISO adjustment
In my first few test shots, I found the images to be pretty bright at my pre-dialed settings. So I dialed down the ISO to ISO2000, and even used a shorter shutter speed. I eventually settled at ISO2000, 24mm, f/1.4, 13sec for the rest of my images.
quick photo tip
For any astrophotography, you want to use the lowest ISO possible to minimize digital noise. What is the lowest ISO? It depends on your camera.
The top line mirrorless full-frame cameras in the market these days can make an image at ISO12800, ISO25600 or even beyond
A regular full frame DSLR can possibly use ISO6400 before visible digital noises would destroy the image quality
A cropped sensor DSLR might not be able to even photograph in such dark environment, and thus is not recommended for astrophotography.
In my past experience with Canon 5D MarkIII, a regular full frame DSLR, I would not go beyond ISO3200 to photograph starry sky.
For my current Sony A7III and Canon EOS R5, both mirrorless full frame cameras, I would be comfortable to use ISO6400 or ISO12800 sometimes (for non-star related subjects). But in night photography exercises like this, I didn’t need to, if I pair them with fast lenses, such as my Sony 24mm, f/1.4 in this case.
OK back to the night.
Although there was a small degree light pollution from a lighthouse, the stars were clearly visible, so was the Milky Way, which was hanging across my head parallel to the beach. It was impossible to photograph Milky Way and northern light in the same shot, as I had to face north for the latter but Milky Way was non-existent there. I already knew this during my homework, so I wasn’t disappointed.

Milky Way, ISO1600, 24mm, f1.4, 13sec
I had a few quick snapshots of the Milky Way by pointing my camera with a complete up angle. There wasn’t any chance to include any foreground, but that was a known fact before my trip. After this, I was laser focused on the Northern Light photography.
Similar to last December, when I photographed Northern Light for the first time in Washington (see several images above and the one below), I only saw a very faint glow of green color above the horizon. I certainly would like to see something more spectacular, like a dancing one, or perhaps with not only green, but also red or purple colors, something like what I saw in Iceland years ago.
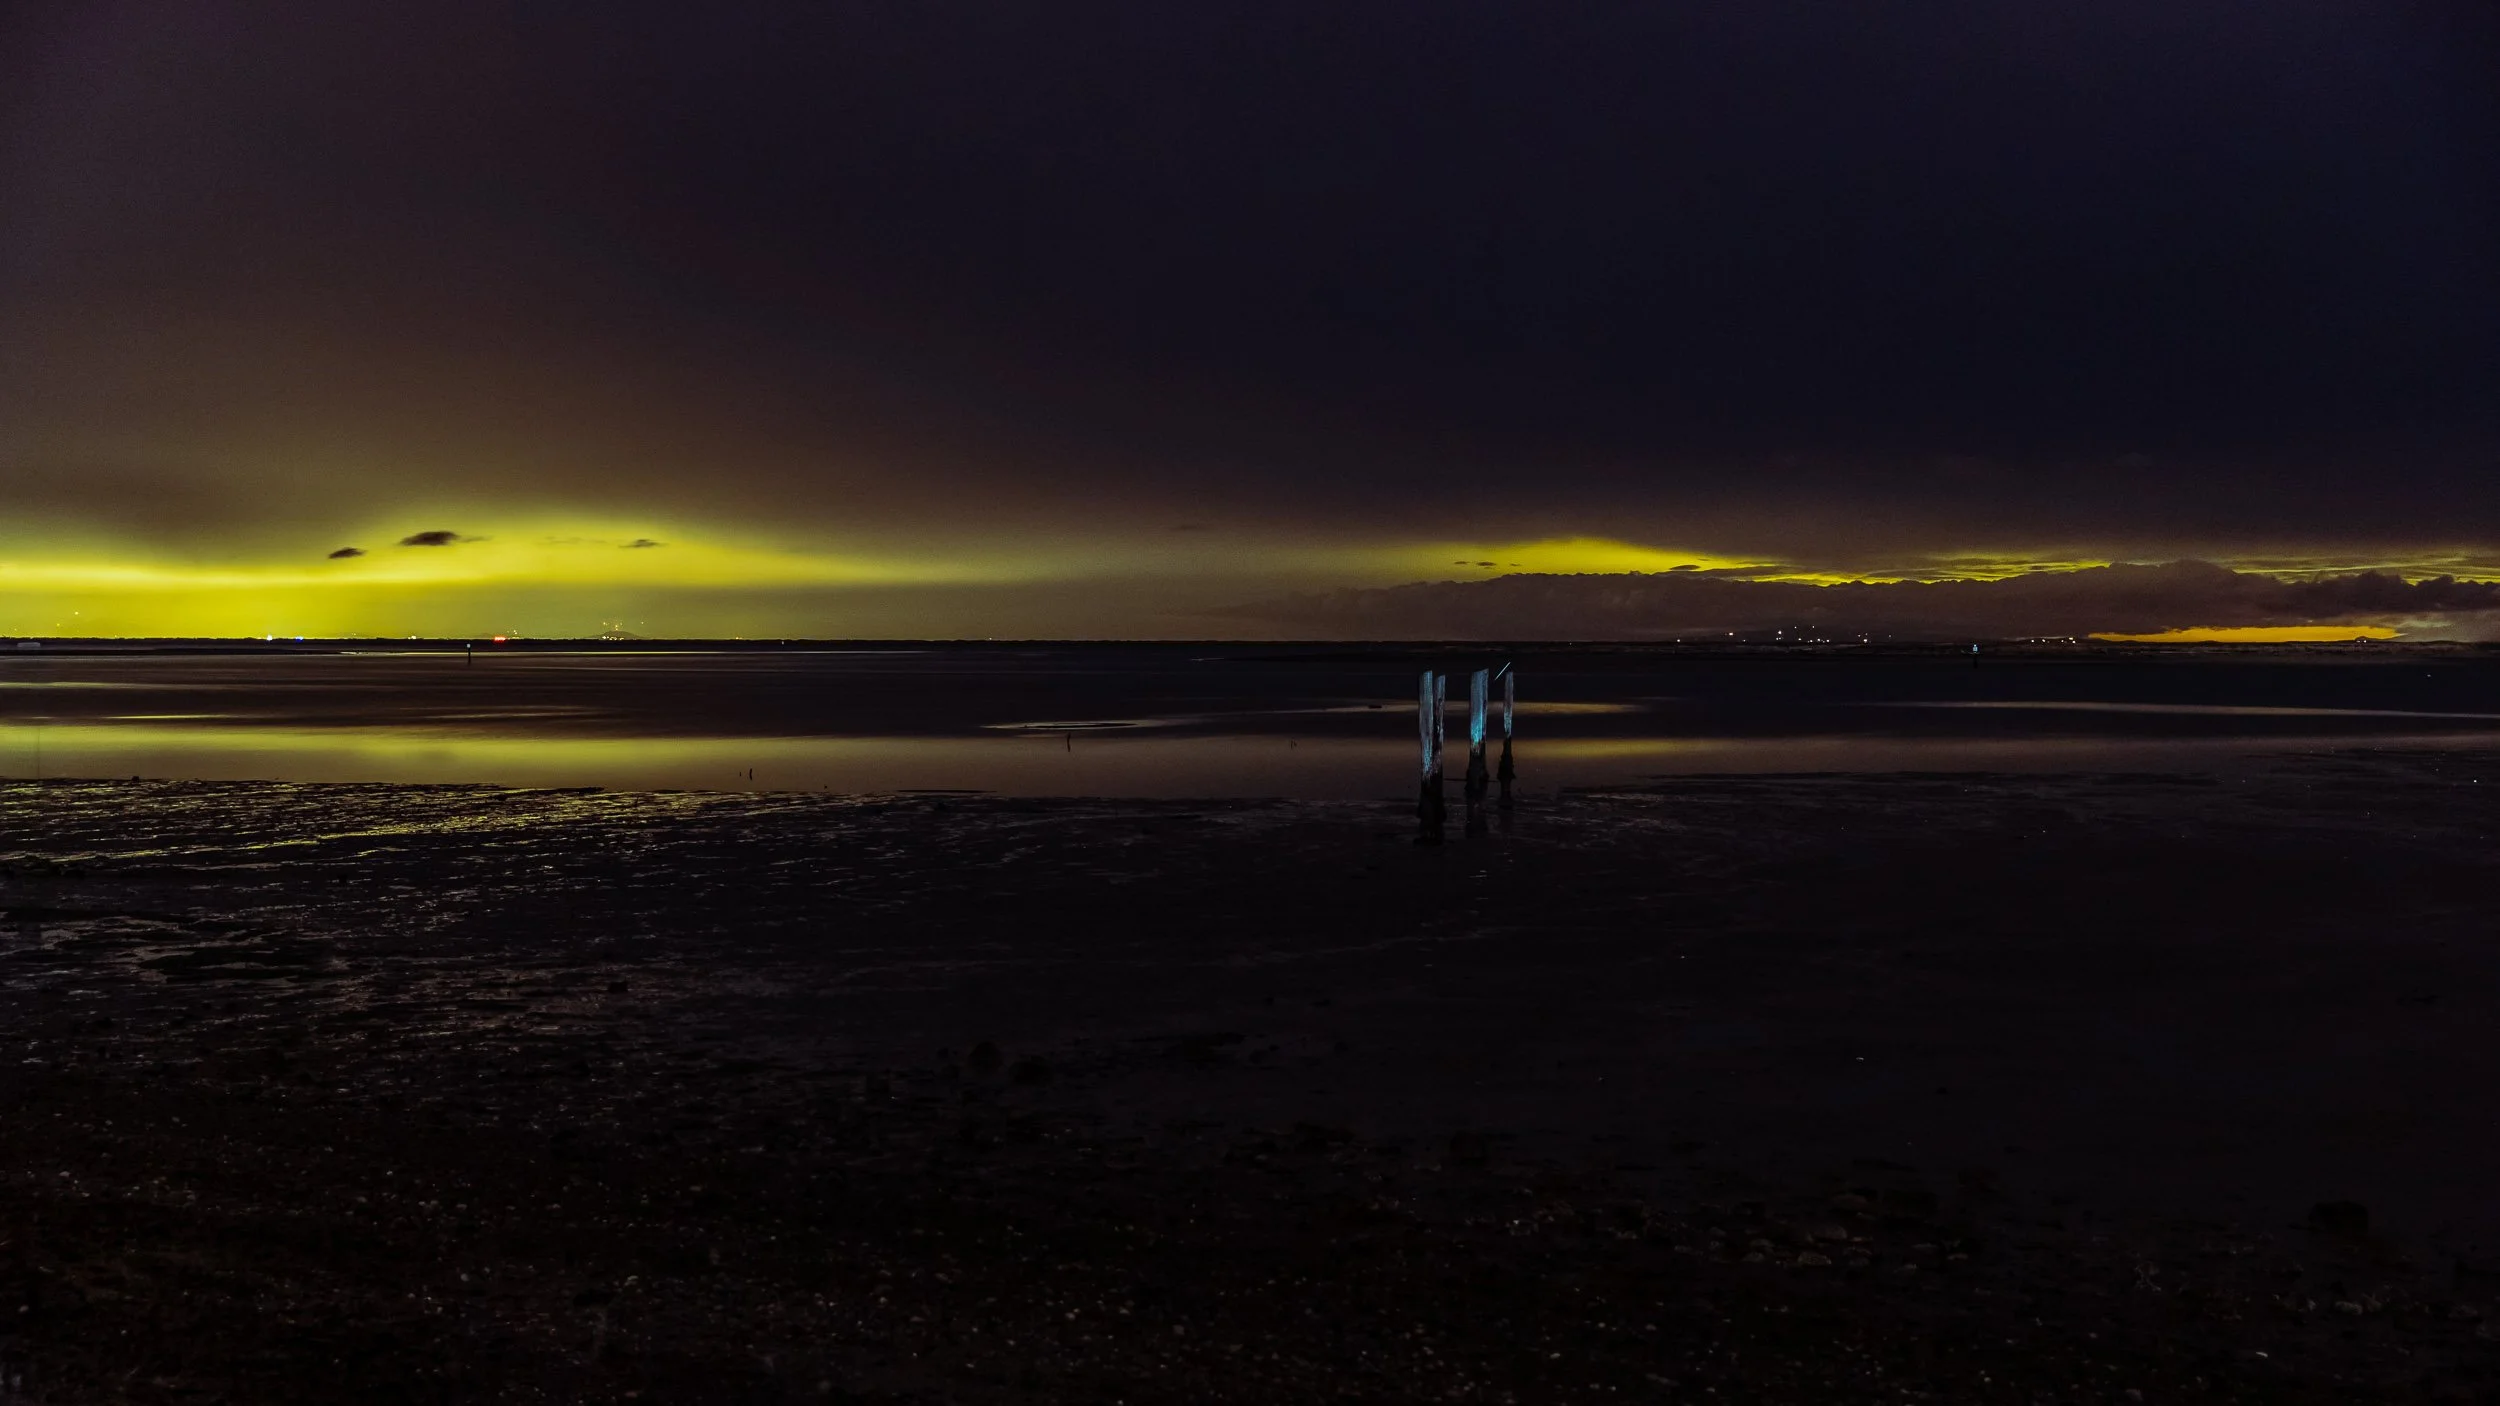
Northern Light hanging low in north Washington. Dec 2020. ISO2500, 42mm, f/2.8, 15sec
Unfortunately it wasn’t the case this time.
Oh well, I had to remind myself again, we were not anywhere near the Arctic Circle, or within the typical aurora belt around 70°N latitude (we were only at 48°N). Any aurora viewing at this location was already pure luck.
In the meantime, the Big Dipper was so bright and visible. So I decided to at least not “waste” the night, and create a star trail image, which I was 100% certain doable. My only challenge was time.
My past star trail image typically consists of at least 200 images shot over several hours, with at or more than 30 seconds interval between the images.
This time, I had a much “compact” time window. I shot 80 with only 17-second interval (see below)

Star trail of 80 stacked photos, each at ISO2000, 24mm, f1.4, 13sec
It was 36°F (2°C) outside, I used my Sony A7III’s built in intervalometer feature and left my camera on the tripod to photograph these 80 photos. I retrieved back to the car to keep myself warm.
During this whole time, there were cars coming and going. I also saw people walking around in the darkness trying to photograph the sky with their smart phones. Apparently, not everyone knew what it took to photograph Northern Lights.
By the time I wrapped up everything, I still hadn’t seen any dancing aurora as seen in Iceland. At least, I captured some shooting stars, the Milky Way, and a faint aurora hanging over the horizon.
Of course I had to do some post processing and create the 80-image stacking of star trails in Adobe Photoshop after coming back home.
I didn’t know if 80 photos would be enough for a star trail image and was surprisingly happy with the result.
Pin it

You May Also Love…


From the windswept coast of the Catlins to the Southern Lights near Twizel, this part of our New Zealand road trip brought some of the most memorable moments of the journey—including waterfalls, Nugget Point at sunrise, the Milky Way, Aoraki/Mount Cook, Peter’s Lookout and Lake Tekapo.