
Waterfall Photography Tips - Seljalandsfoss In Iceland
Seljalandsfoss Iceland Photography Workshop
Photographing waterfall typically was fun, but not in Iceland, not in the wind.
If you know you'll take a two week trip with snow or rain storm every day, when you see colors in the sky like this, I bet you'll feel excited. I didn't know about this until the end of my landscape photography tour to Iceland. Fortunately, I was diligent enough to capture every single color I could see every morning and evening, provided it was not snowing or raining. That of course was at the expense of sleep hours - for the first week, on average I slept 3-4 hours every day, but every single minute of my waking hours was well worth it.
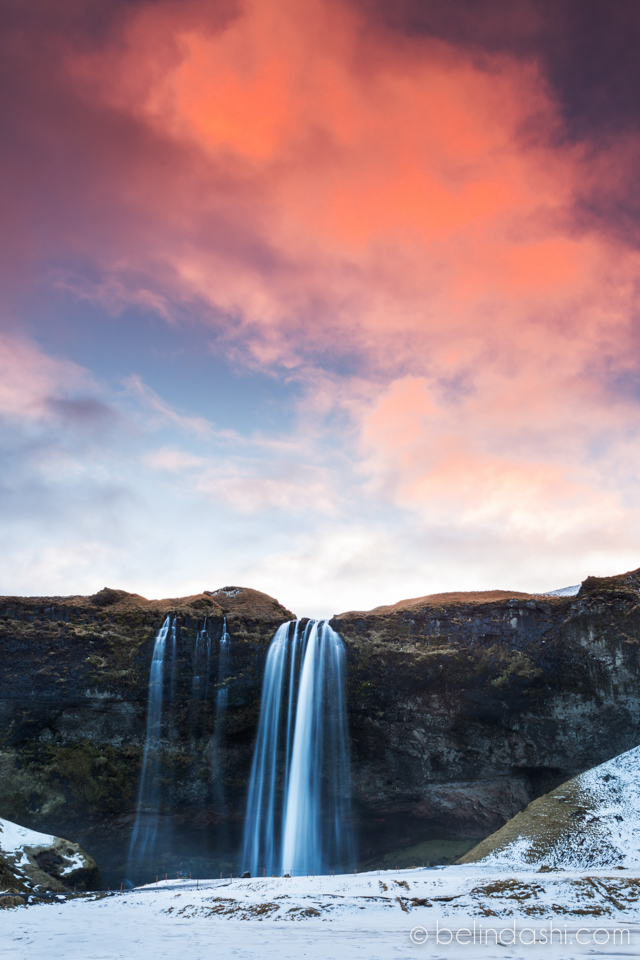
The above waterfall photo (ISO100, 25mm, f/13, 0.8sec) was taken on Day 3 of my trip in front of Seljalandsfoss. I have driven past this waterfall located in South Iceland at least four times during my trip, and every time was a brand new experience.
The following was taken on Day 8 of the same waterfall (ISO100, 27mm, f/20, 10sec) while I was teaching my photography workshop participants. It was in the evening. Not all of my workshop guests have filters (eg. 10-stop filter that can slow down the waterfall anytime during the day), so I took them to this waterfall in dark light condition. Everyone could simply do long exposure without filters. I did apply a Lee 2 stop graduated ND filter to darken the sky a bit.

Something interesting to note is that Seljalandsfoss is a unique waterfall, and probably the most well known one, in Iceland. You can walk behind it to experience the up close and personal water spray (although this was not my first time to walk behind a waterfall). Of course photographing the waterfall behind it was quite challenging, given the strong wind in Iceland. I particularly bought a "rain jacket" (cost only $15 on Amazon) for my camera before the trip, and the only time I used it was behind this waterfall. I have to admit I wasn't very successful maneuvering the camera in its rain jacket when the water was fiercely spraying on me and the lens.
The following image (ISO2000, 16mm, f/8, 3.2sec) was a shot barely acceptable, just to give you an idea what the waterfall looked like from a completely different angle. Notice I used a very high ISO - since it was about 40 minutes before sunrise and pretty dark, and the only way to get a proper exposure was to use long exposure. But due to the water spray problem mentioned, I wanted to force a much faster shutter speed so I wouldn't risk the lens from being blurred by water spray. In order to achieve that, you need to either use a larger aperture (therefore f/8 as compared to the normal small aperture I used), or increase ISO. In this case, I did both. Nevertheless, I wanted to capture the silky effect of a waterfall which typically required slow shutter speed. You see there was quite a conflict here - I wanted faster shutter speed, and slower shutter speed. Given the strong wind and water spray, I didn't have too much time for trial and error. I had to be satisfied with whatever I got, ie. the following image.

Seljalandsfoss Iceland
Here's a final image from a slightly different angle in black and white (ISO100, 16mm, f/16, 1.6sec) taken in the workshop evening. The road was icy and slippery after several snow storms this time, and I decided to simply set my equipment at the base of the waterfall, far enough not to get the water spray but close enough to show the size of the waterfall. As the entire image was pretty grey with the snow and rocks, therefore I made this black and white to simplify the image.

Seljalandsfoss Iceland
Check out my waterfall photo gallery, and see more of my Waterfall Photography Tips
you may also love…


Looking for less crowded photo spots on Oahu, Hawaii? After spending months exploring the island, this travel photography guide highlights eight quieter locations—from coastal hikes to secluded beaches—where Oahu reveals its natural beauty away from the crowds.