
4 tips to Take beautiful backlight photos
Backlighting photography is a common technique used by many professional portrait photographers. A backlit photo gives your subject a golden glow. It almost instantly enhances your photo quality, if you know to do it right.
Many professional portrait or wedding photographers these days often get their best results from backlit photos.

As travel photographers, can we achieve the same result? And how?
Let me share with you four essential tips today. They are the fundamentals to take backlit photos. (Check out my ebook 30 Day Photo Tips for more lighting scenarios and tips)
1 - Best timing
The most magical hour to do backlit or backlight photography, assuming you shoot with natural light outdoors, is during golden hours. The sun is low and the light is soft during this time, often casting a beautiful layer of warm color over your subject.
What is golden hour? “Generally” speaking, 30-60 minutes after sunrise or before sunset. You can easily find sunrise and sunset times in the weather app if you use a smart phone. If you need more precise info on the go, try PhotoPills, a great app for landscape photographers.

The specific time and duration of the golden hour might change depending on where you are in the world, and what time of the year you are in.
For example, in the Seattle area, you could expect golden hour before 4pm in the winter but after 8pm in the summer. For the same summer month in June, you could still be in the golden hour even around midnight in Fairbanks, Alaska.
In short, your best timing, aka golden hour, is not a fixed hour. So prepare your shoot smartly!
2 - Shooting Direction
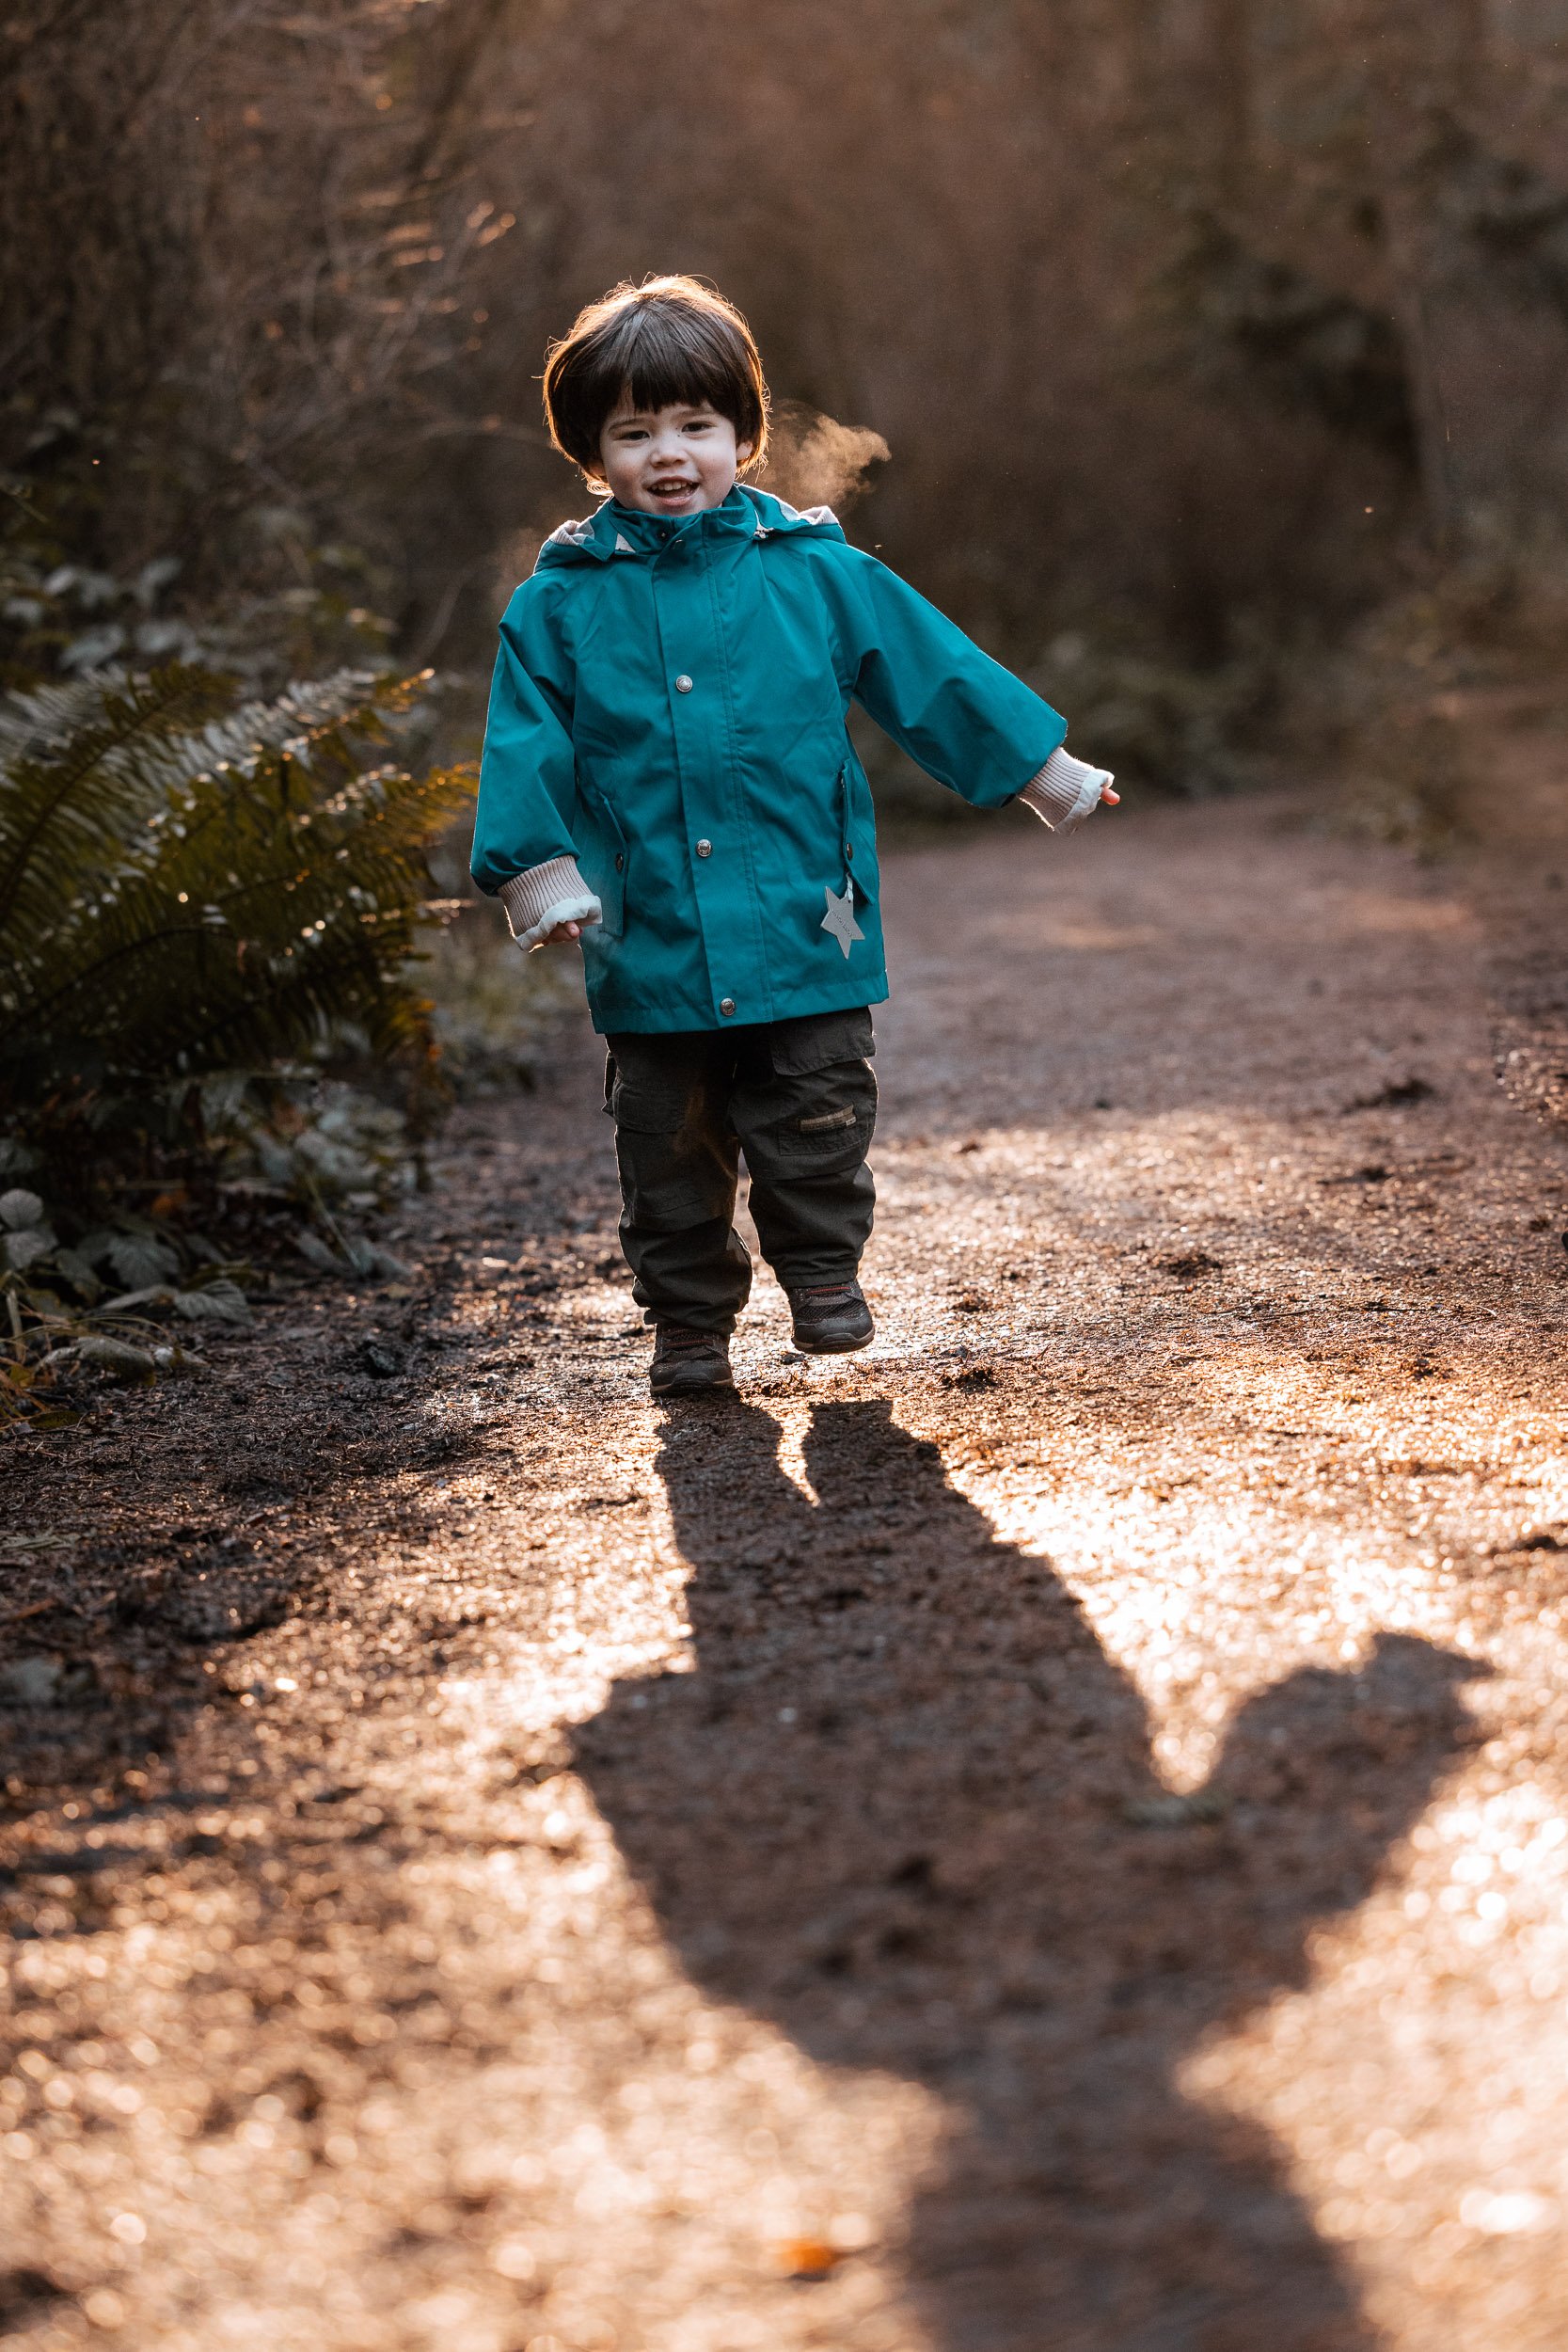
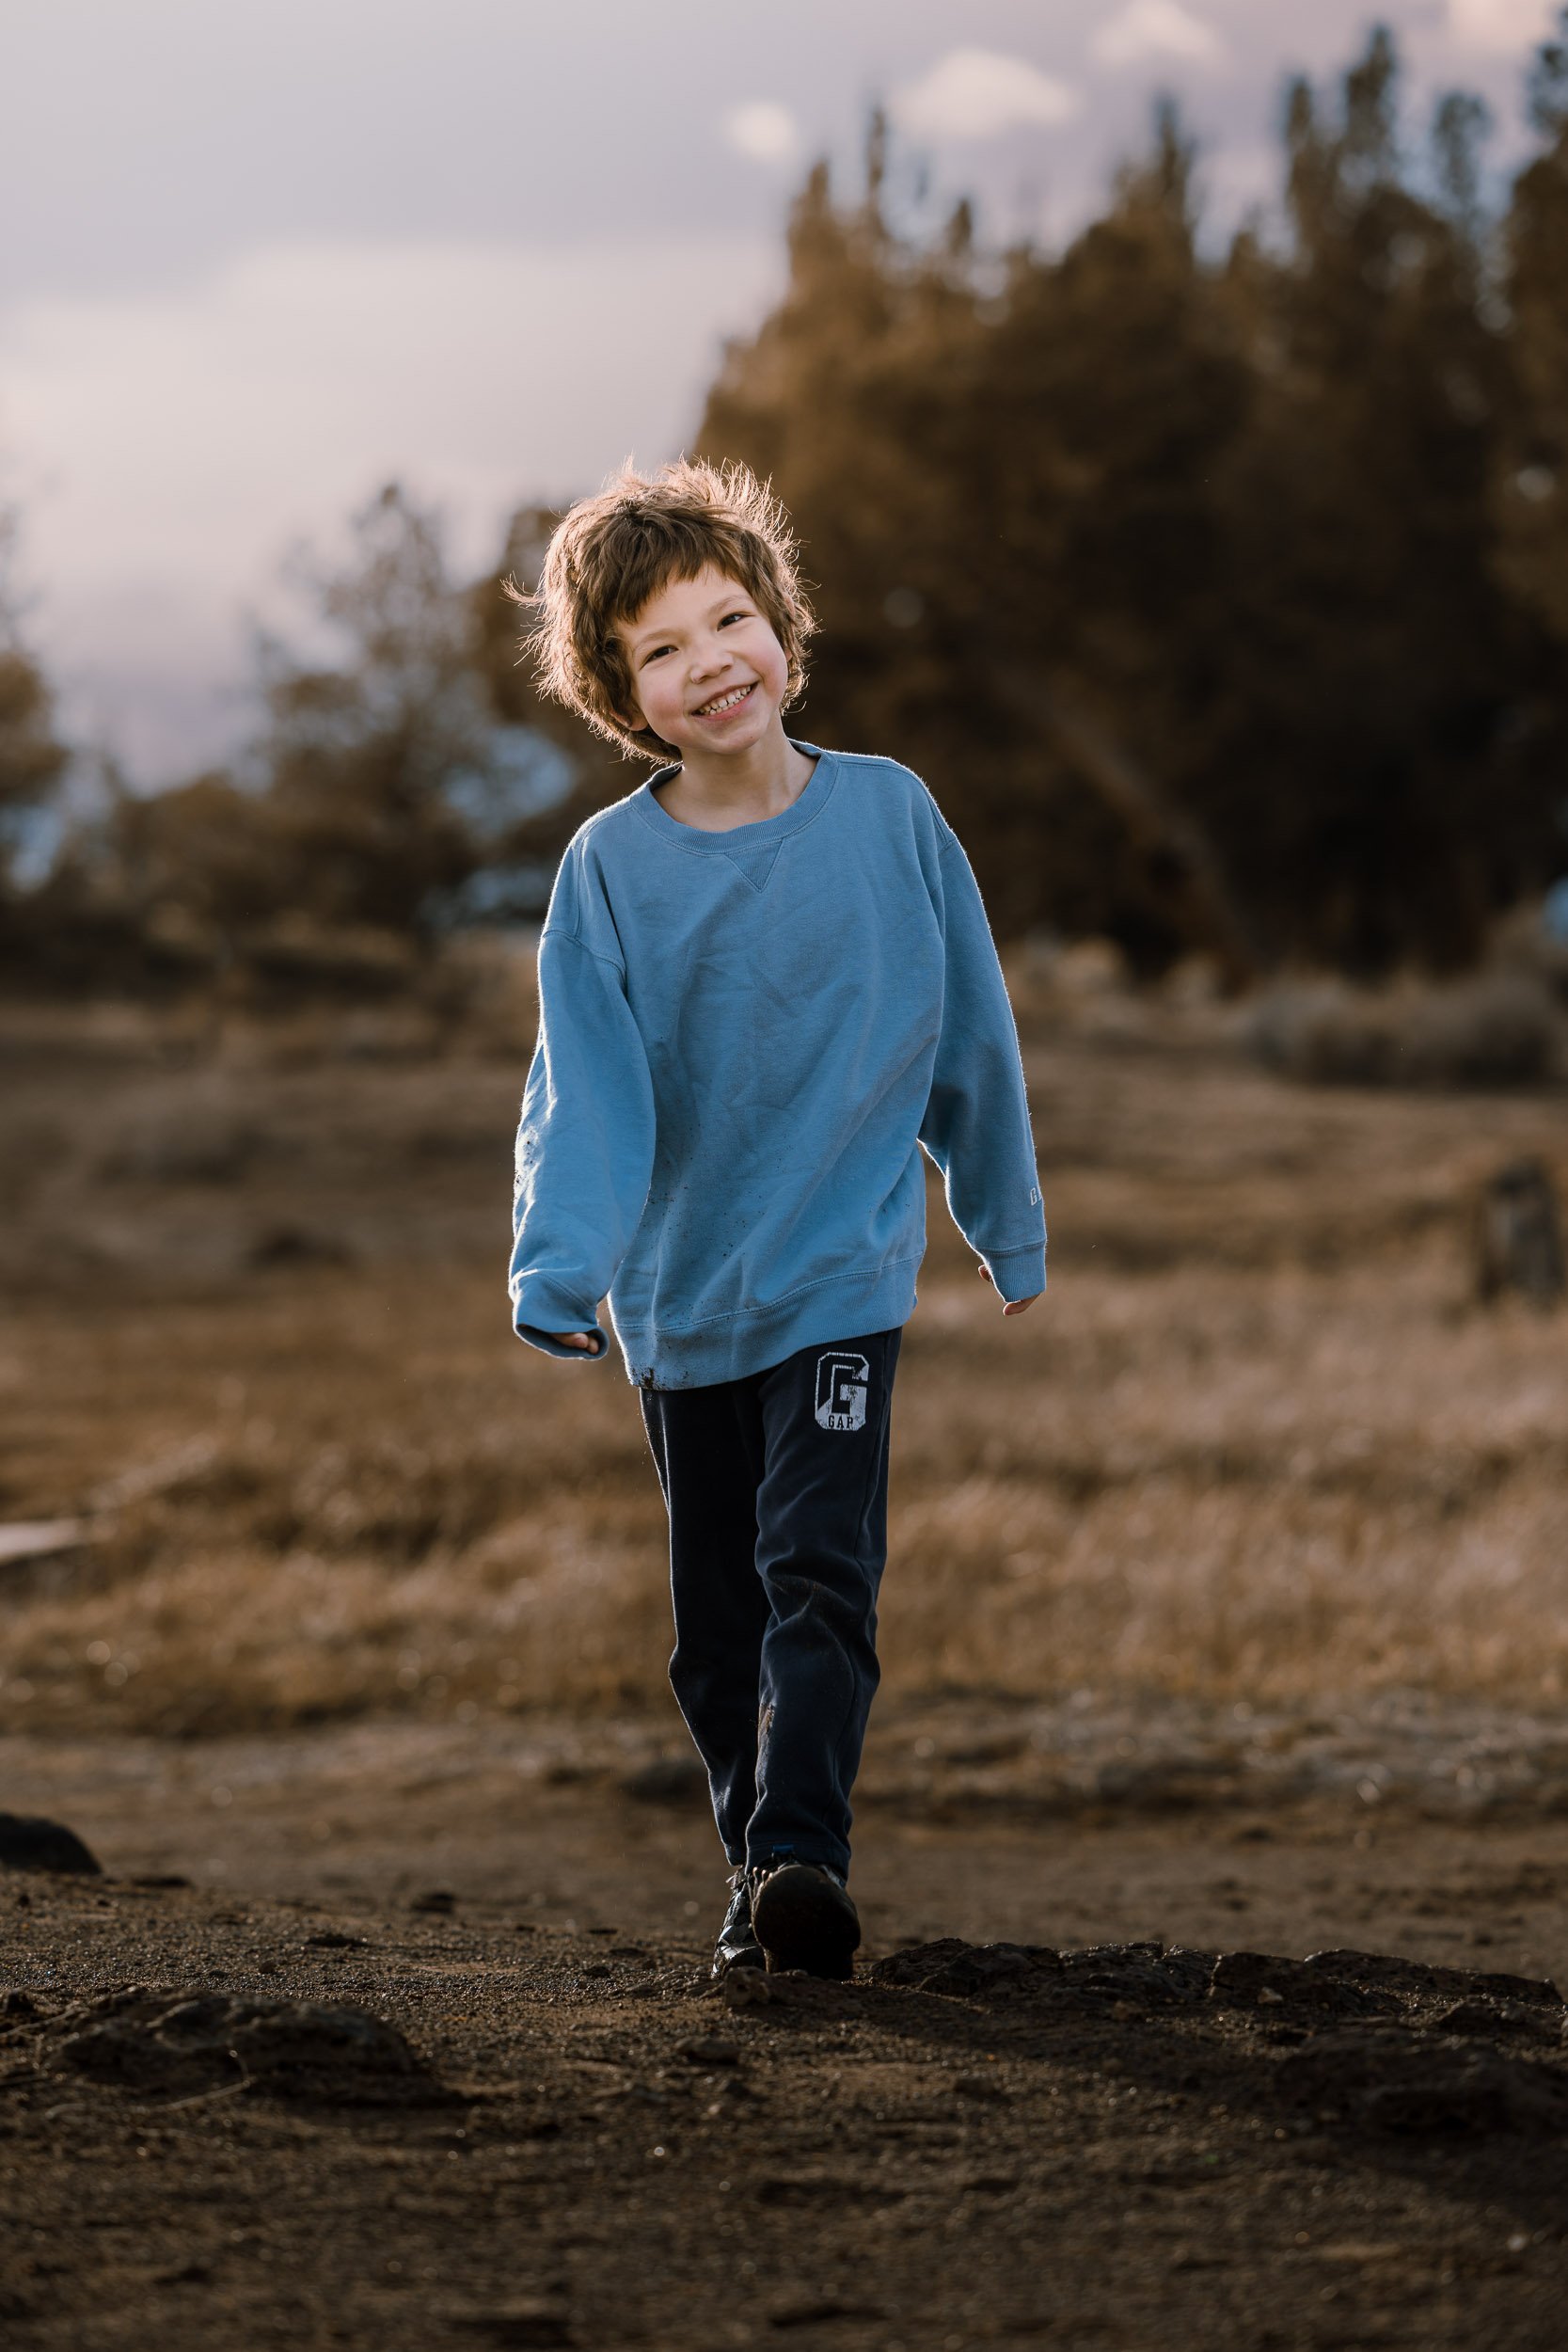
Put your subject between your camera and the sun, so your subject is facing the camera and against the sun. That’s why it’s called backlit.
However, this doesn’t mean you have to be in the straight line with your subject and the sun. As a matter of fact, this is the biggest mistake people make when shooting backlit photos. When you are in the straight line, you either get a super dark face for the subject, or a completely washed out sky, or a greyed out photo with little contrast (see following bad examples), or a combination of all these problems.


A better and easier approach is to walk slightly away from the straight line of the sun-subject-camera, so that the sun-subject-camera form an obtuse angle. See following photos - from the shadows, you can tell the direction of the sun and the obtuse angle I’m talking about.

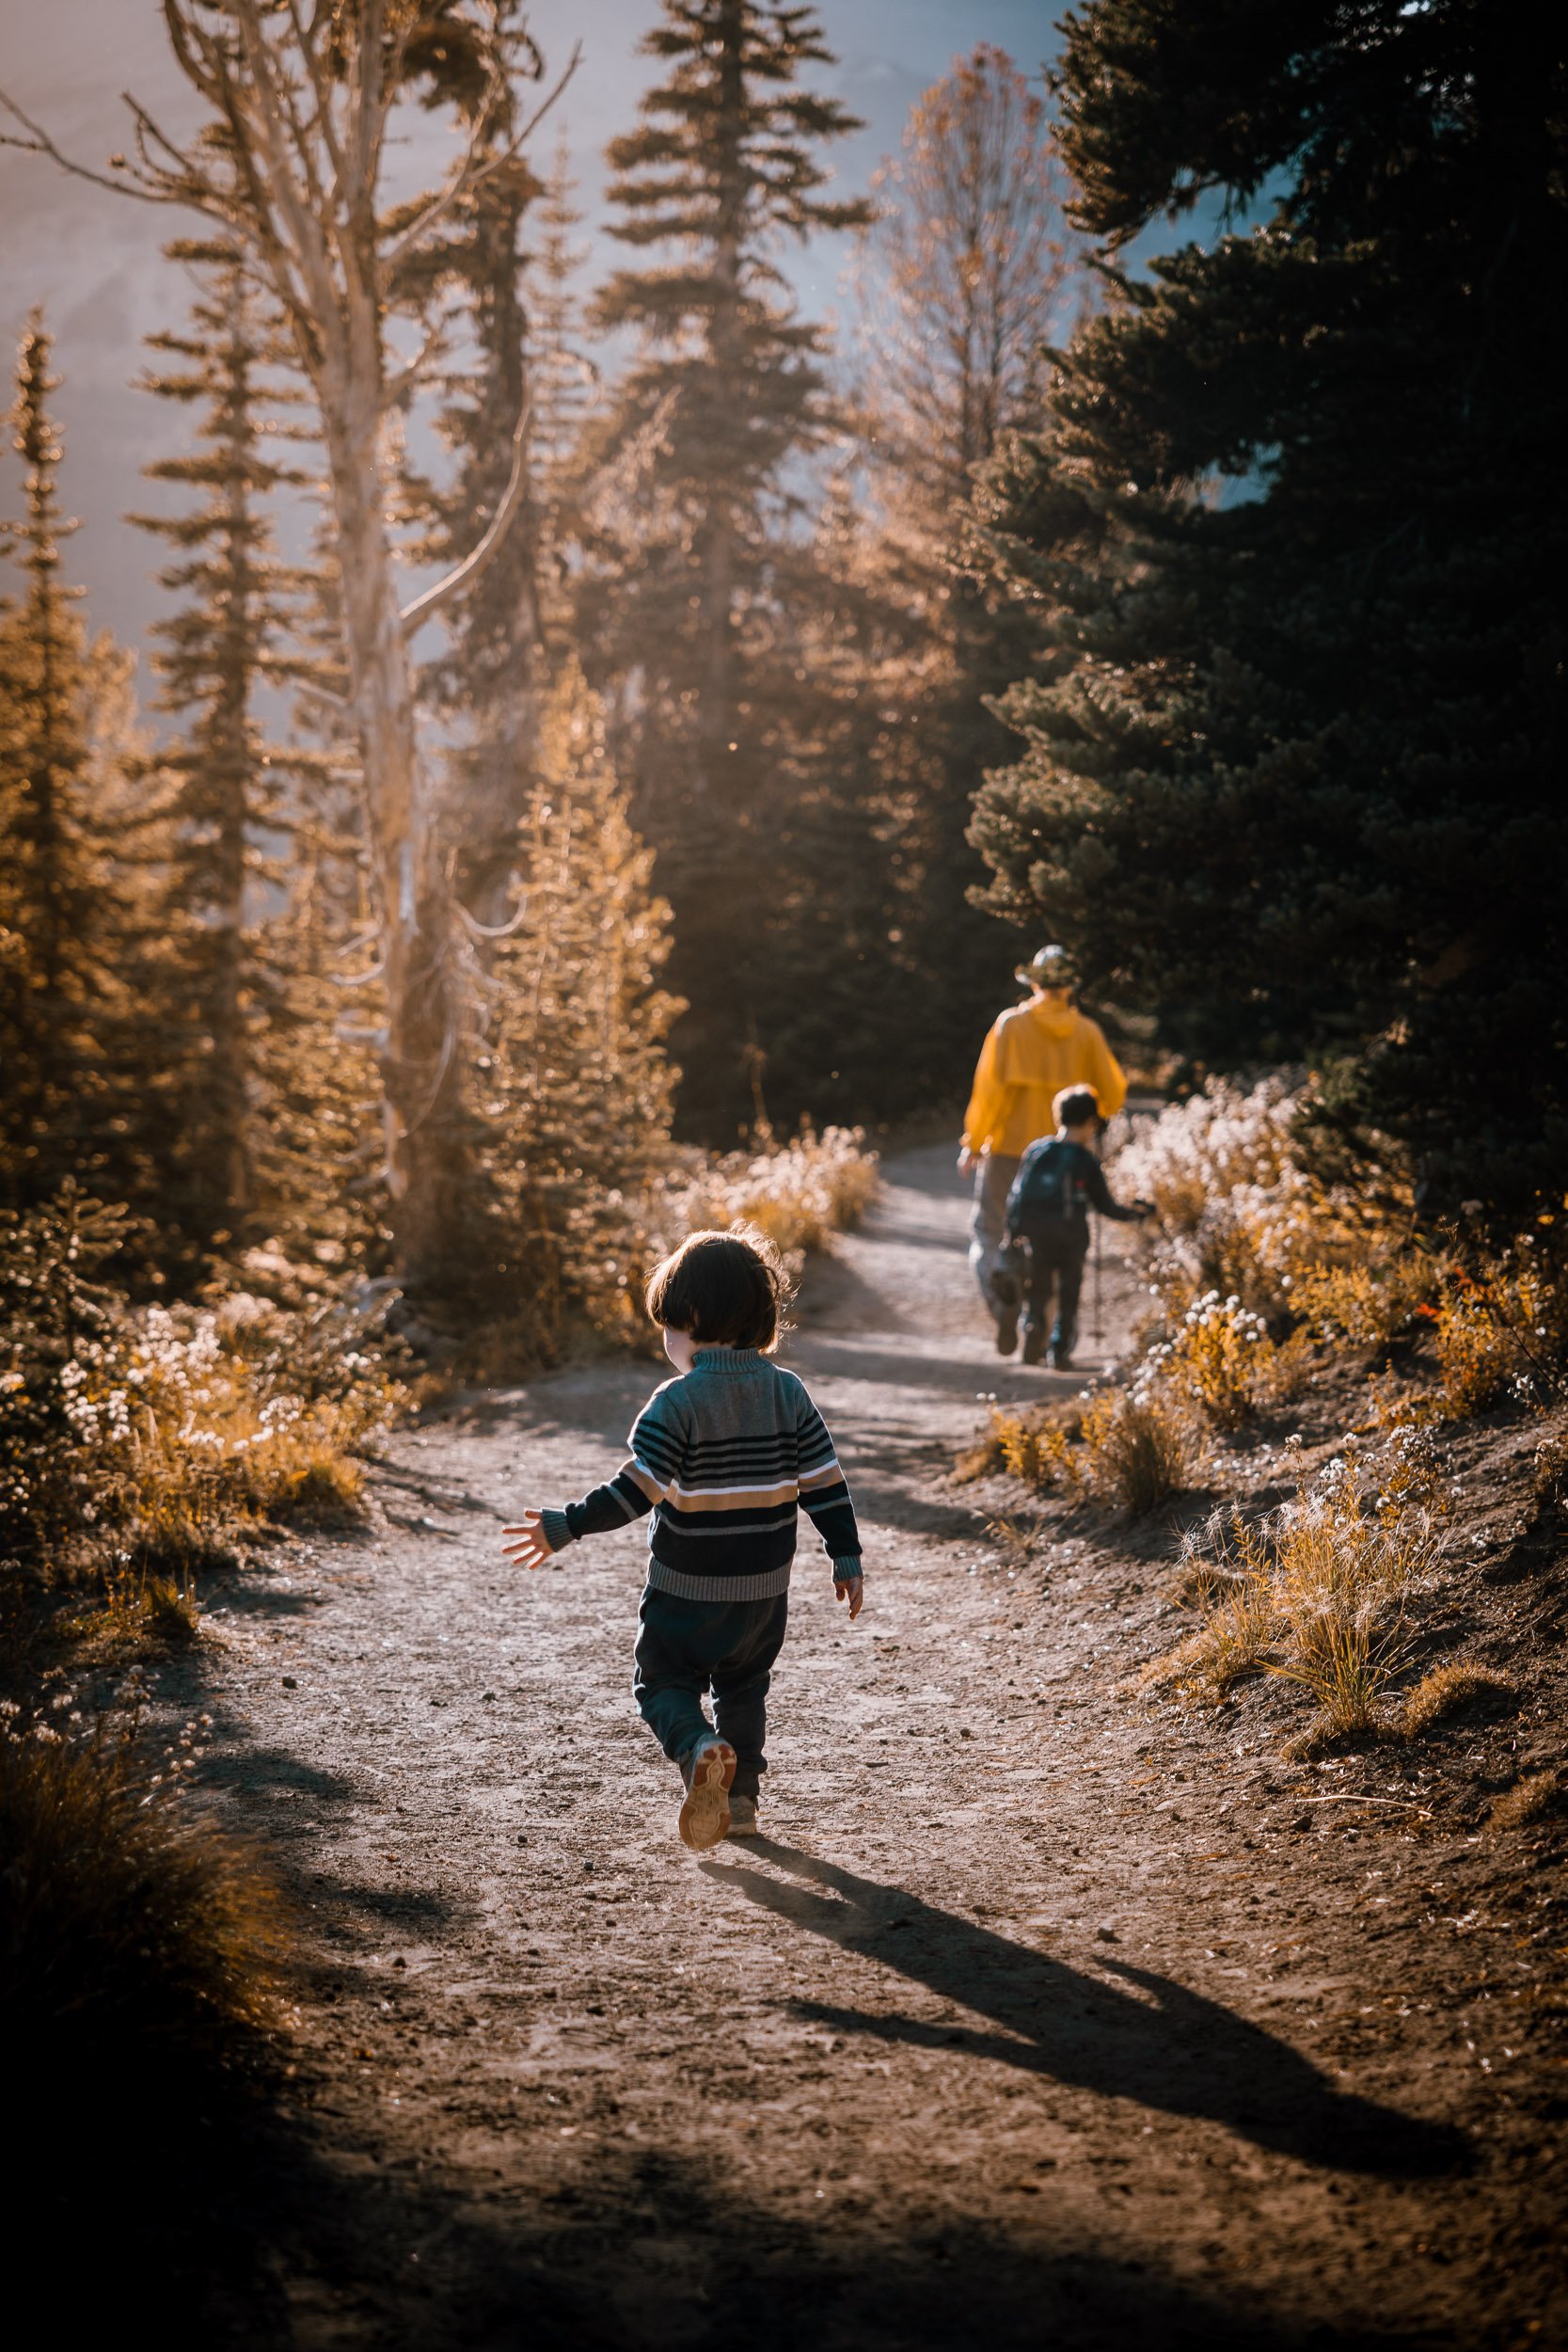
Even better, move the sun out of your composition (see the same examples above).
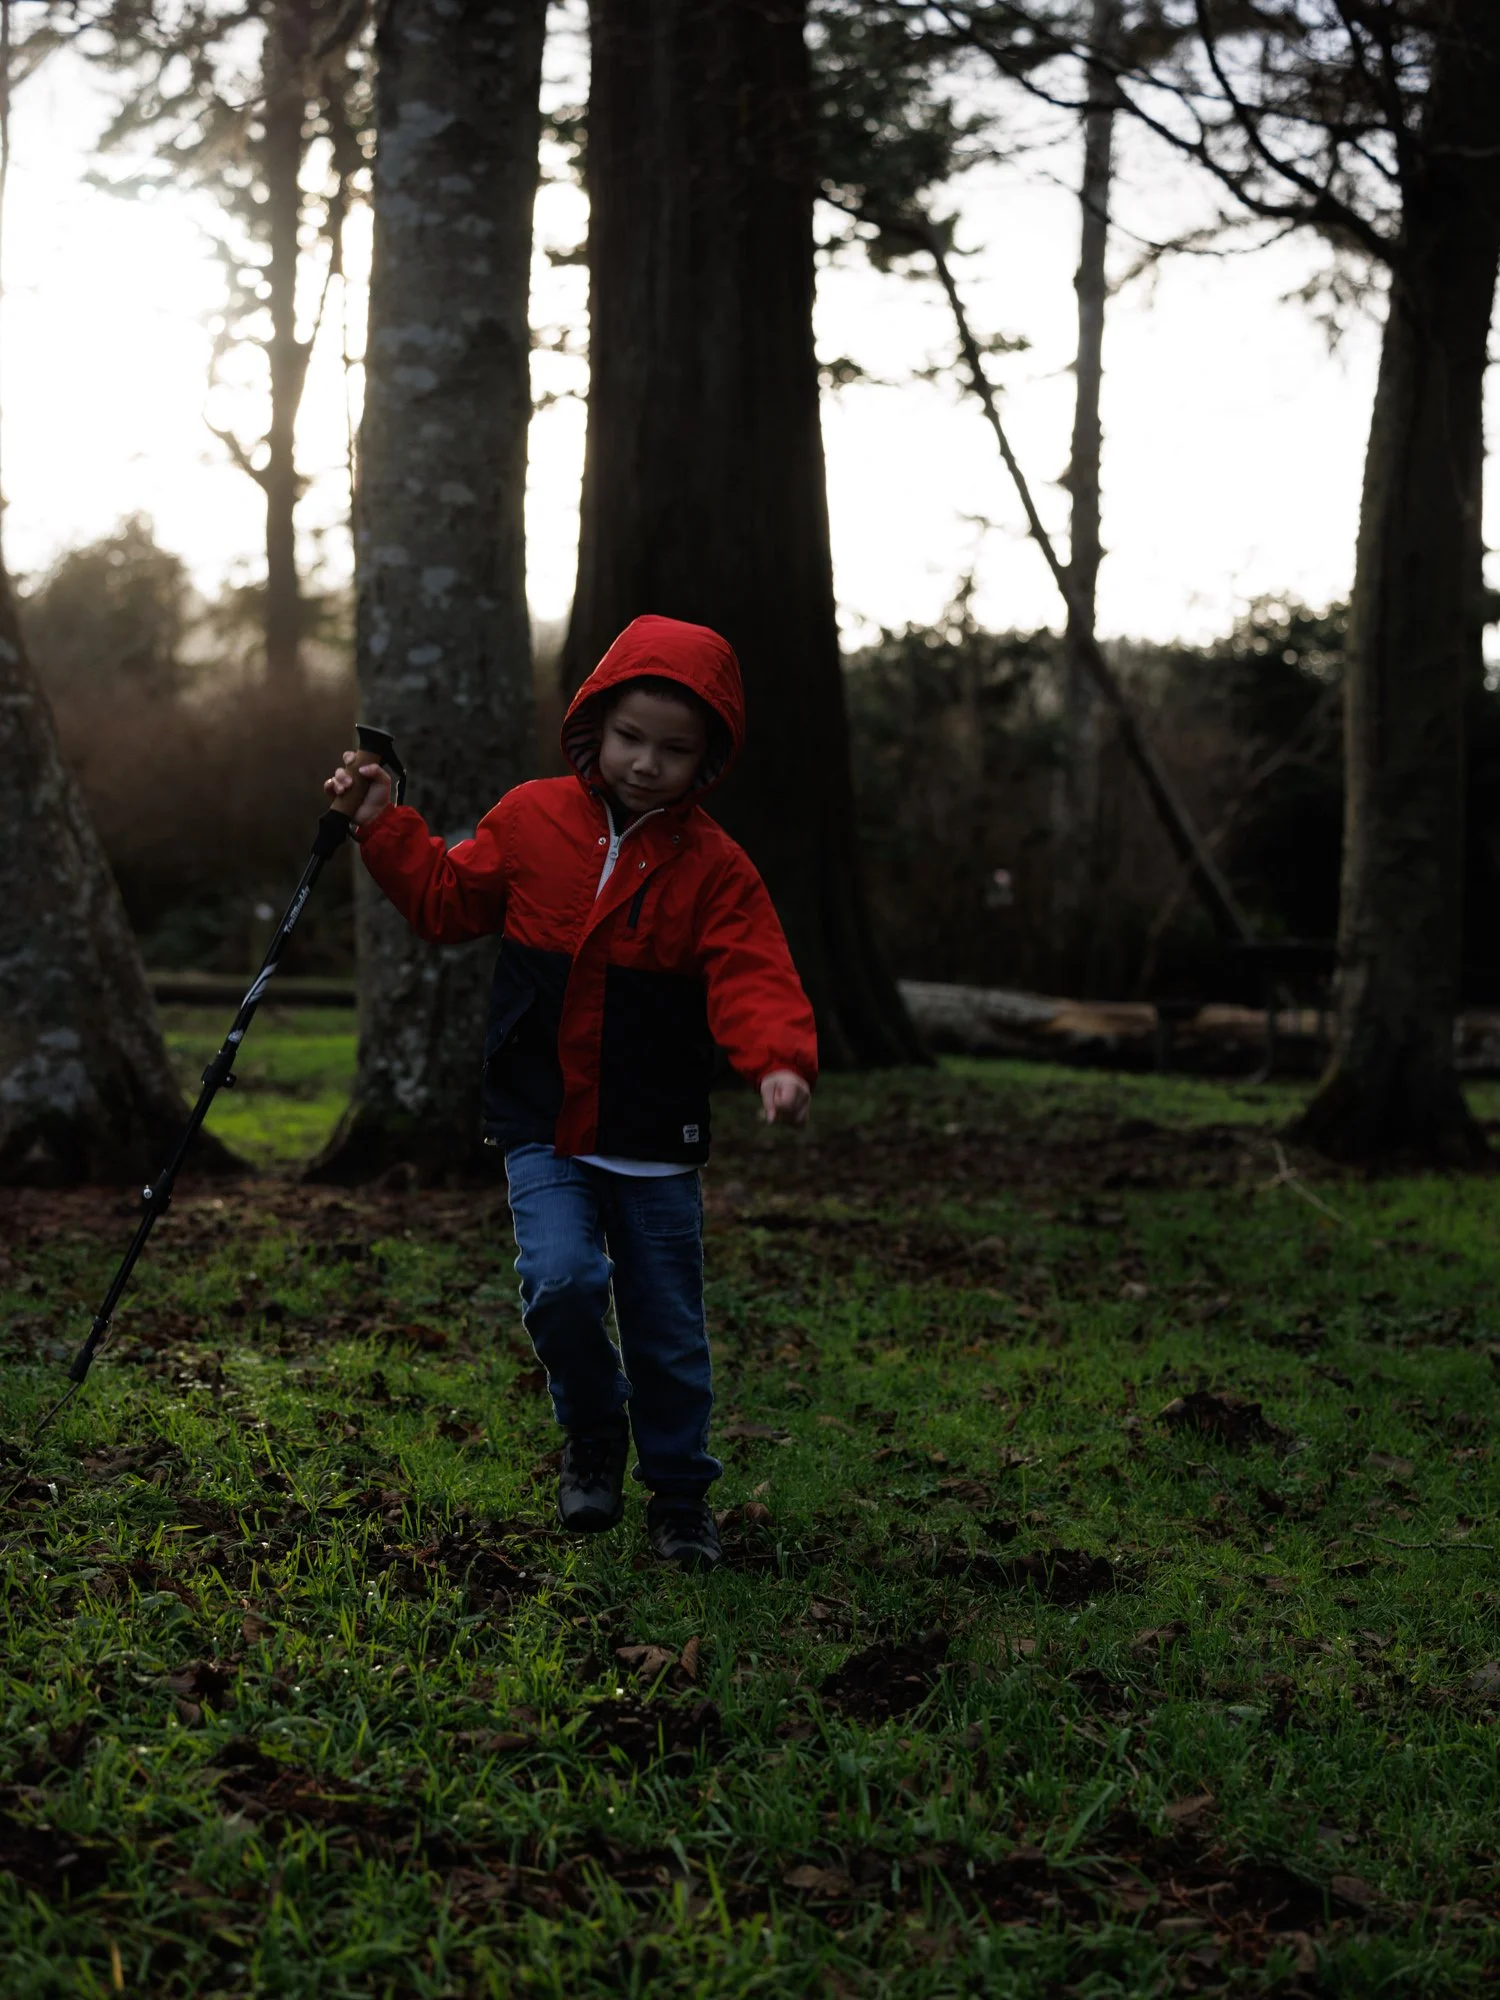
If for some reason, you have to shoot into the sun, try to find something (eg. tree branches) to cover the sun or minimize the proportion of the sky in your photo. You want to minimize the over-exposure in your photo. See following examples.


3 - Under Exposure
No matter what direction you choose, try to under-expose your image (see following 2 examples). You can retrieve details from the shadow in post processing, particularly if you shoot in RAW.


The above before/after example was edited in Lightroom. Check out my Adobe Lightroom Workflow video tutorial.
You can achieve this by one of the following, or mix several following approaches in full manual mode:
dial down aperture
increase shutter speed
dial down exposure compensation. Check out my post on Histogram and Exposure Compensation written 8 years ago. They are two most important tools in your DSLR camera to help you get the right exposure.
last but not least, reduce ISO if your ISO is not at its lowest level

The above before/after example was edited in both Lightroom and Photoshop,
4 - Composition
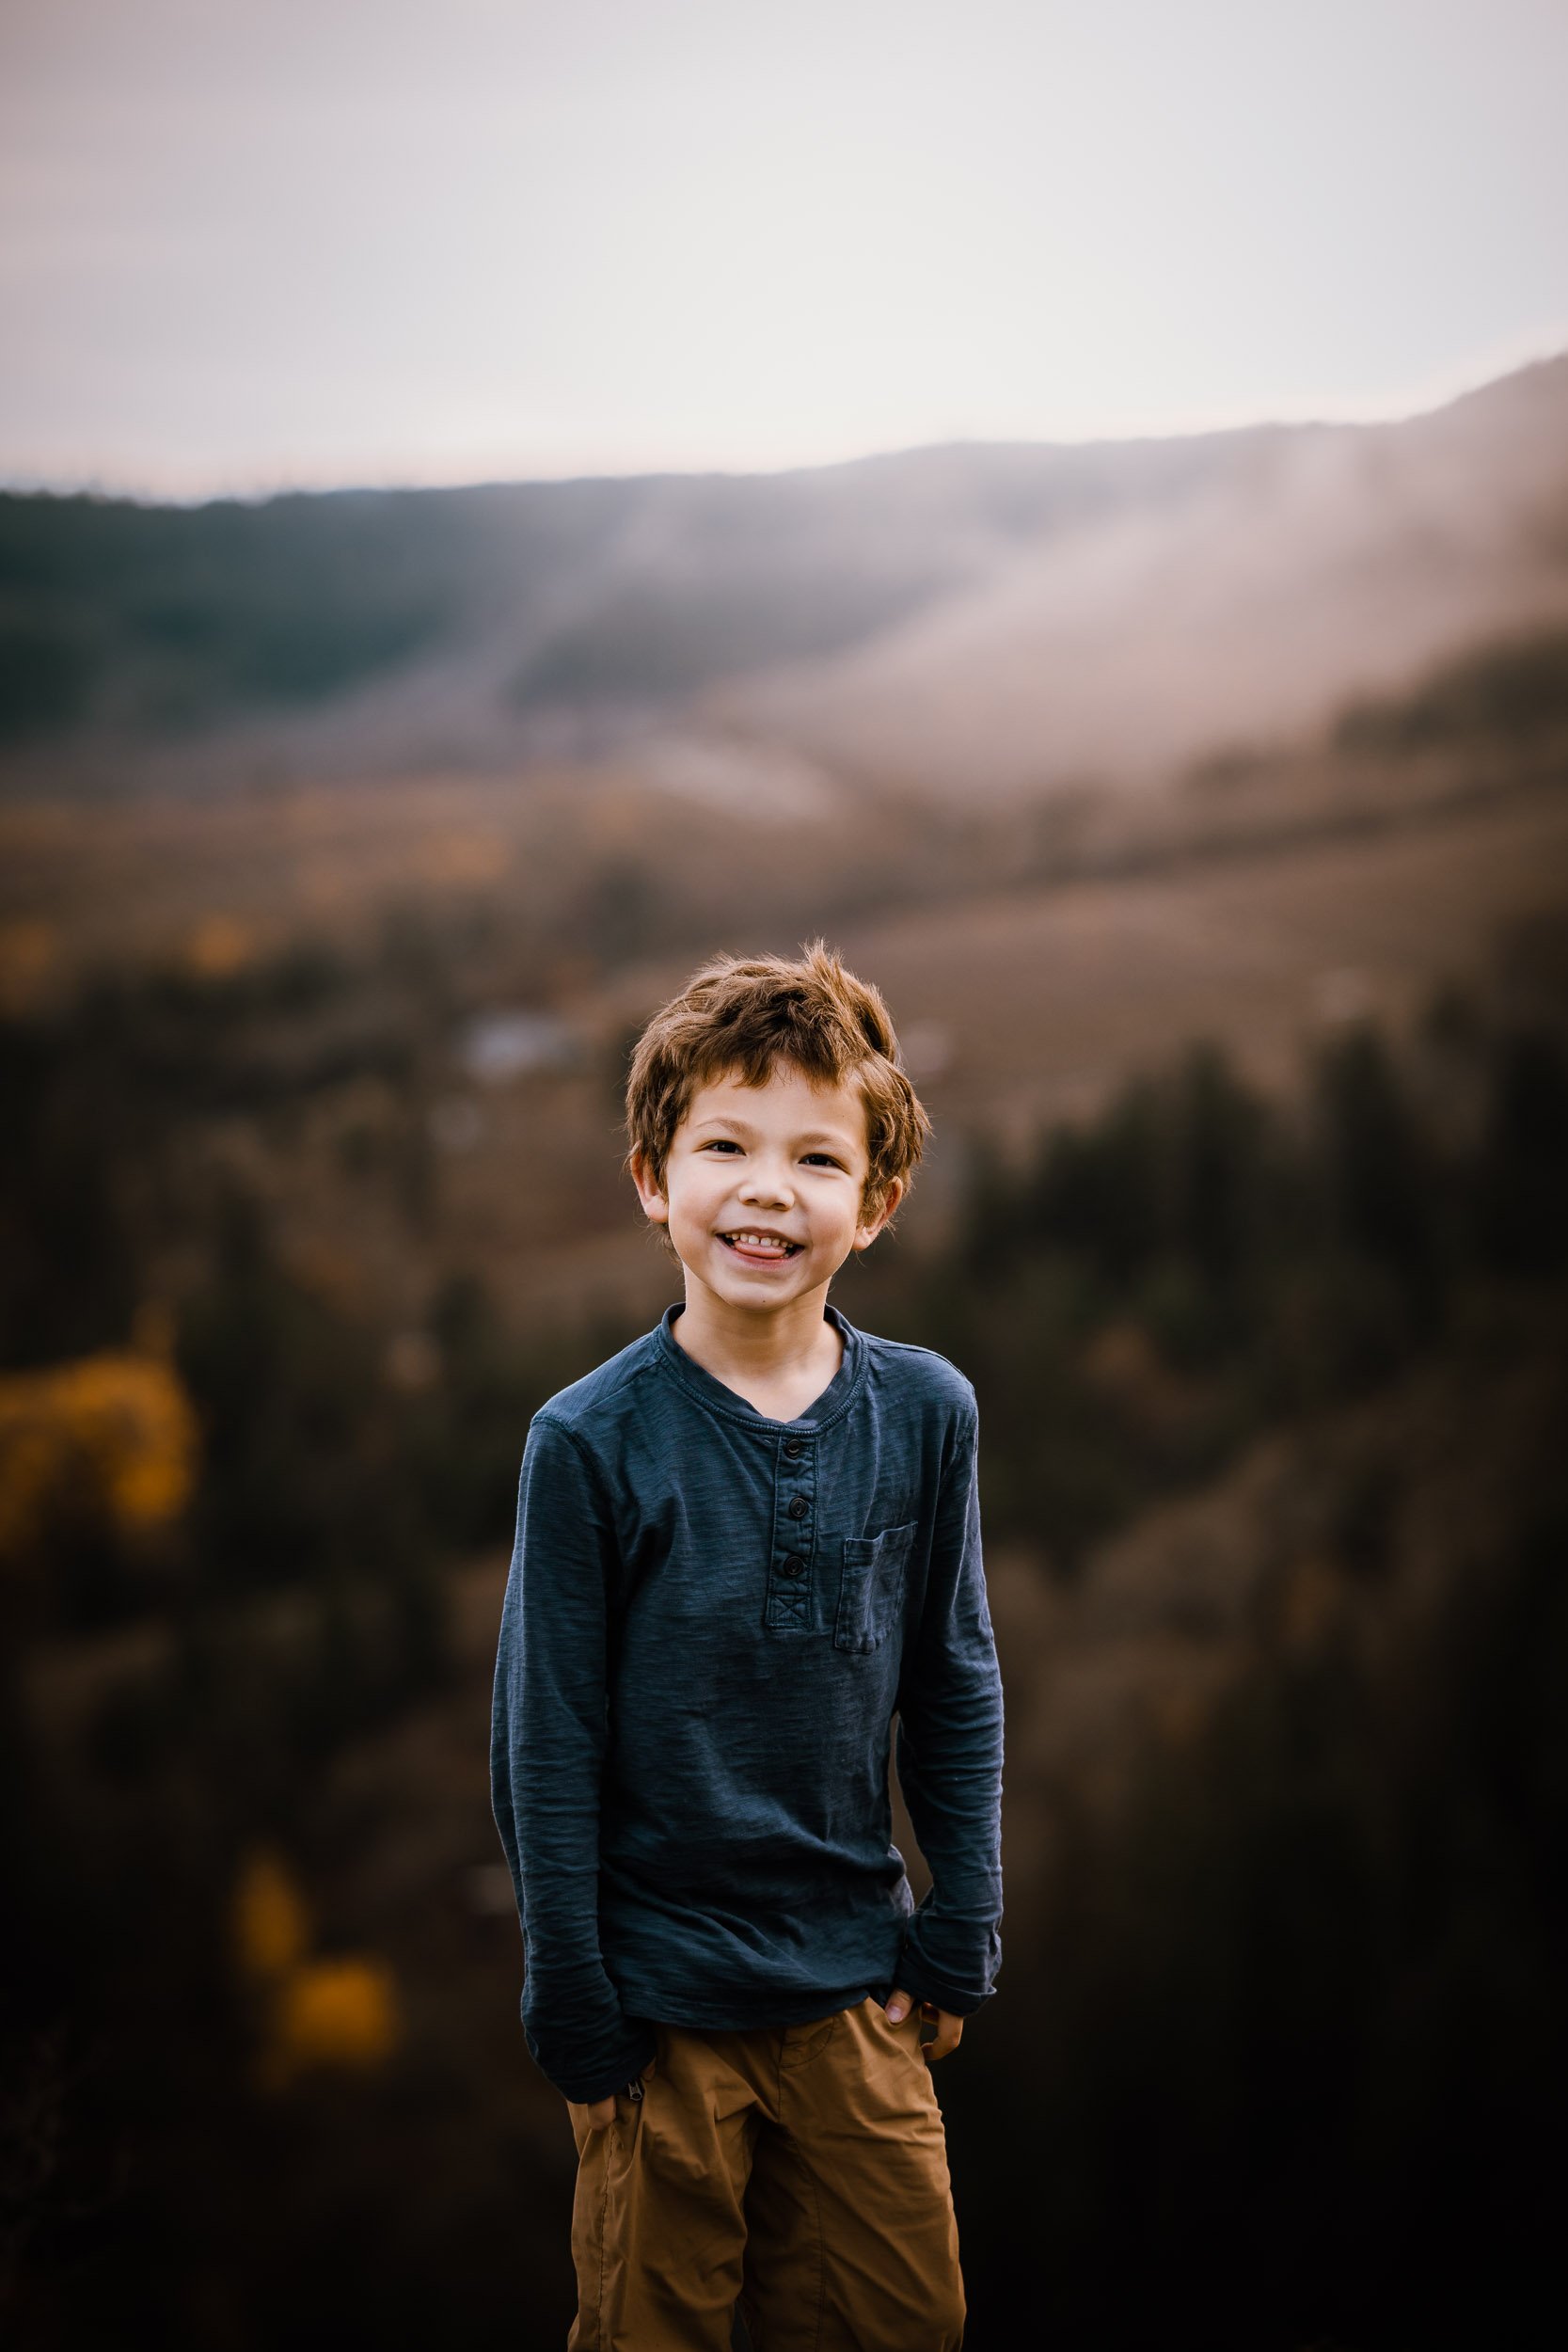
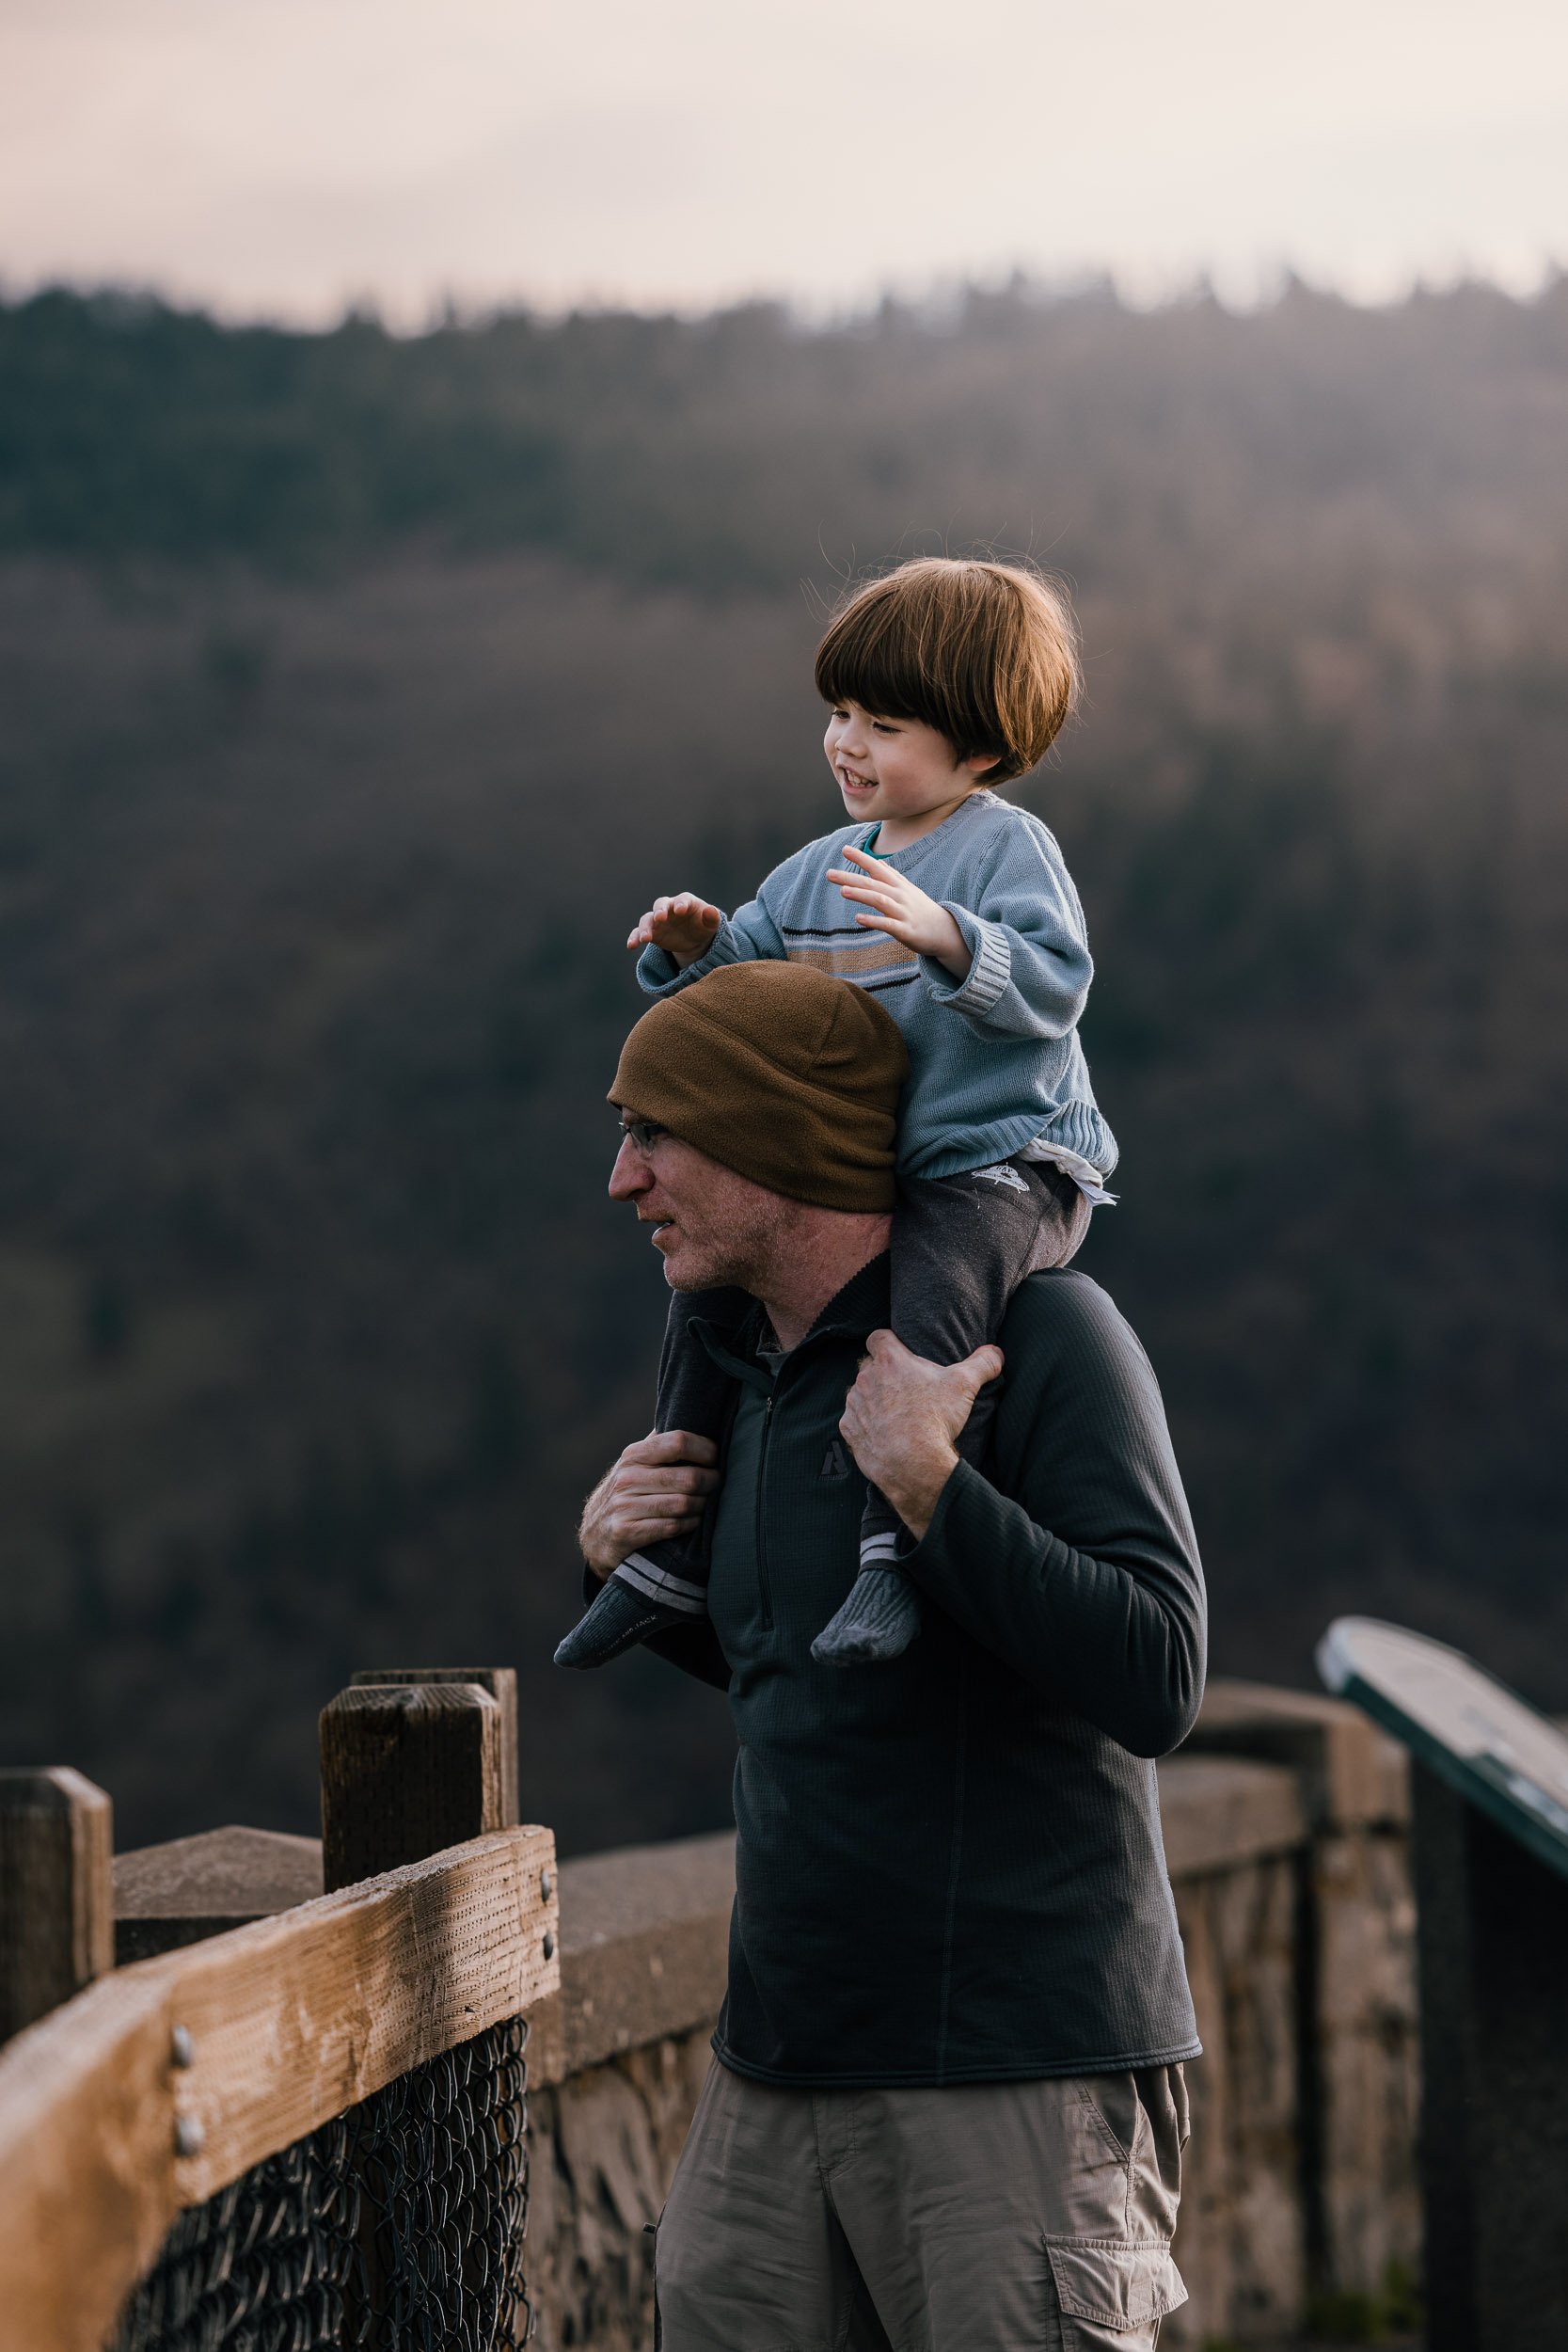
The most charming part of a backlit photo is the golden halo around the hair or the entire body.
This requires a contrasting background. Put your subject, or at least the head, in front of a dark background. This is a critical step to achieve “the golden glow”.

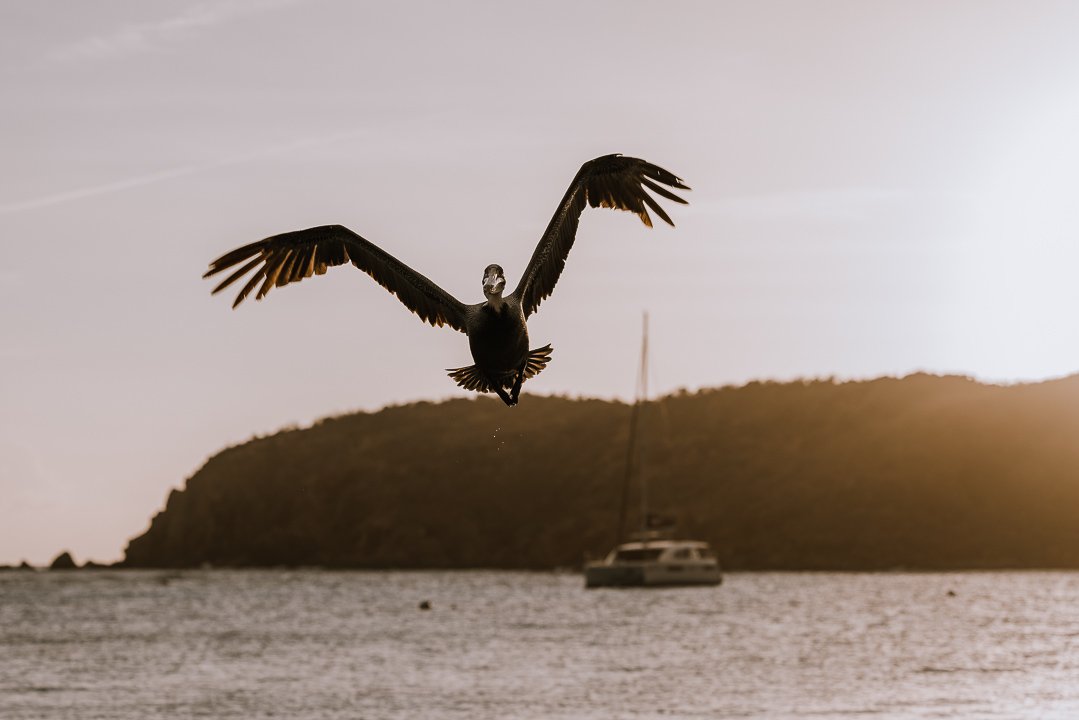
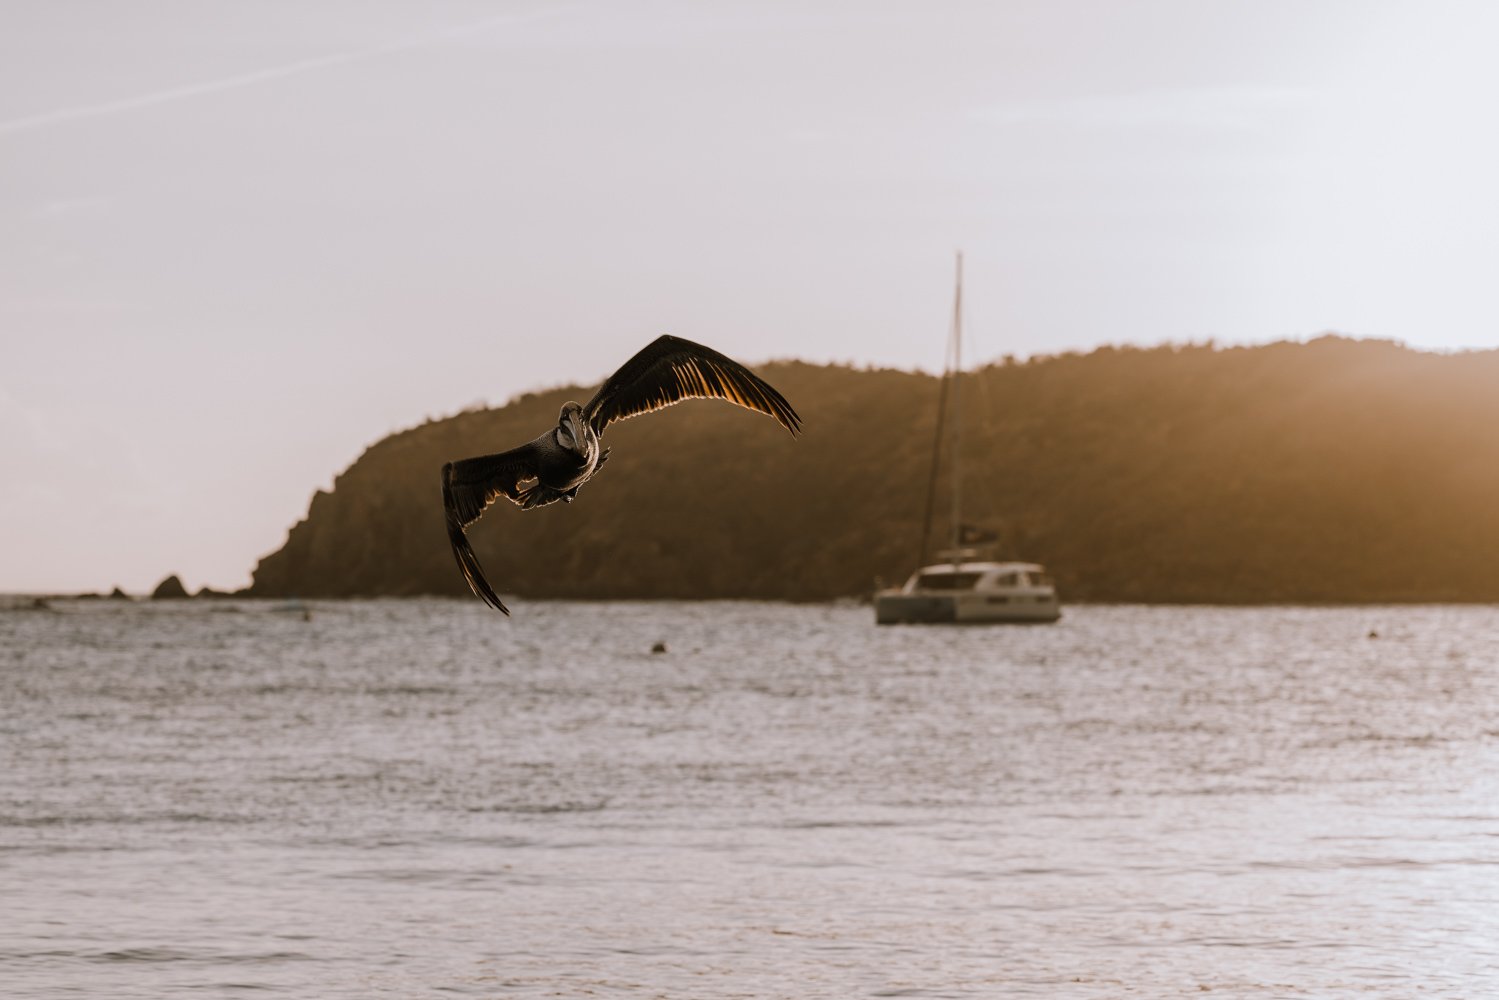
Last but not least, backlit photography can be applied to many other subjects. See the bird examples below. Notice the golden glow around the wings in the right image? It’s because the wings were in front of a dark background. You couldn’t see the golden glow on the left image, because the bird on the left was in front of a bright background.
If you asked me many years ago if I’d photograph landscape in the back light, I would have probably answered no. But I’ve learned over the years the more open minded we are, the more new things we try, the more we can improve ourselves.

I took the above backlit landscape photo in North Cascades National Park last year. It was one of my favorite photos I took there.
In fact due to the rain, I never had the chance to even take out my tripod for a typical landscape shoot. If I hadn’t tried this, I wouldn’t have discovered a new approach to photograph landscape.
Of course, backlit photos can be shot indoors, and beyond golden hours, or even with artificial light. Pay attention to your light source, follow similar guiding principles above and you may achieve amazing results. (See following examples)


If you are a beginner DSLR photographer, check out my 30 Day Photo Tips for more tips on equipment, light, settings and techniques, composition and so on.
Pin it

You May Also Love…


Struggling to know what to photograph - both during travel and in everyday life? I share the 5 storytelling elements you can find in almost every scene, helping you not only find subjects intentionally, but also creating photos that feel more immersive and alive, using our recent hike at Koko Crater Railway Trail in Hawaii as an example.